Filter
Filter Flexim collection records with one or more field conditions, combine rules, and clear or adjust active filters.
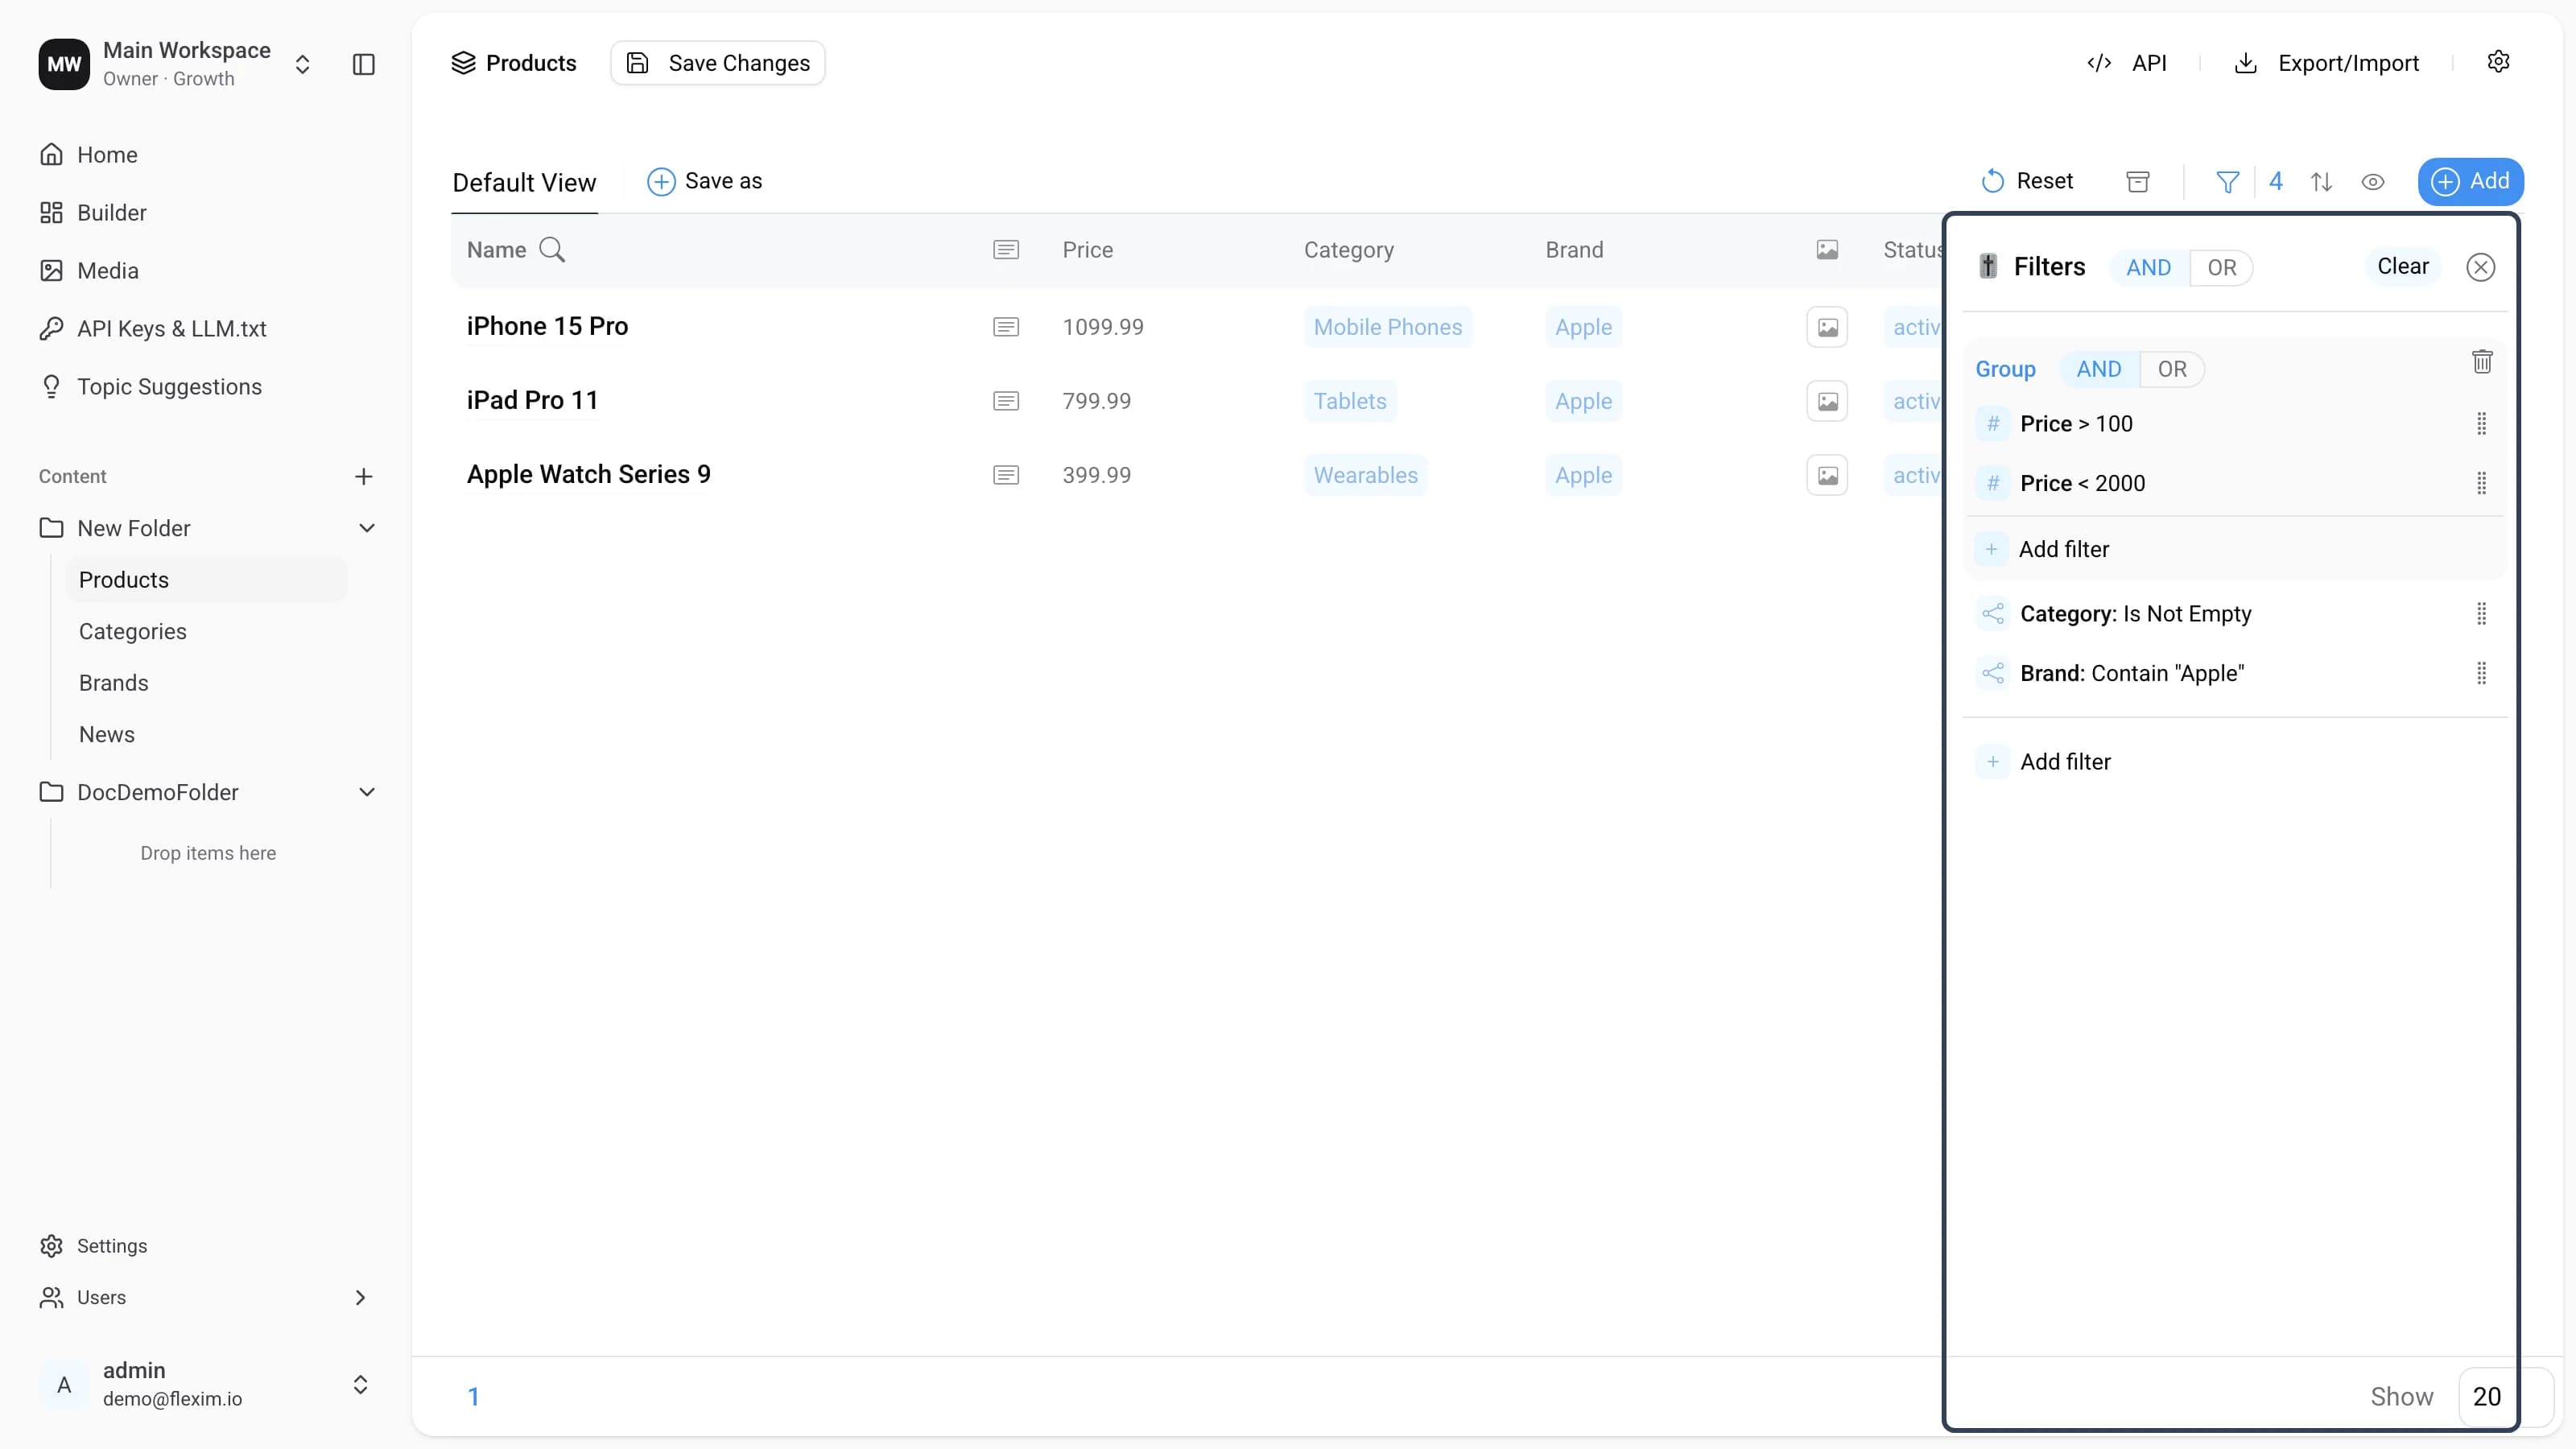
Filters let you find the records you need inside a collection. You set one or more conditions, and the table shows only the records that match them.
Main Elements
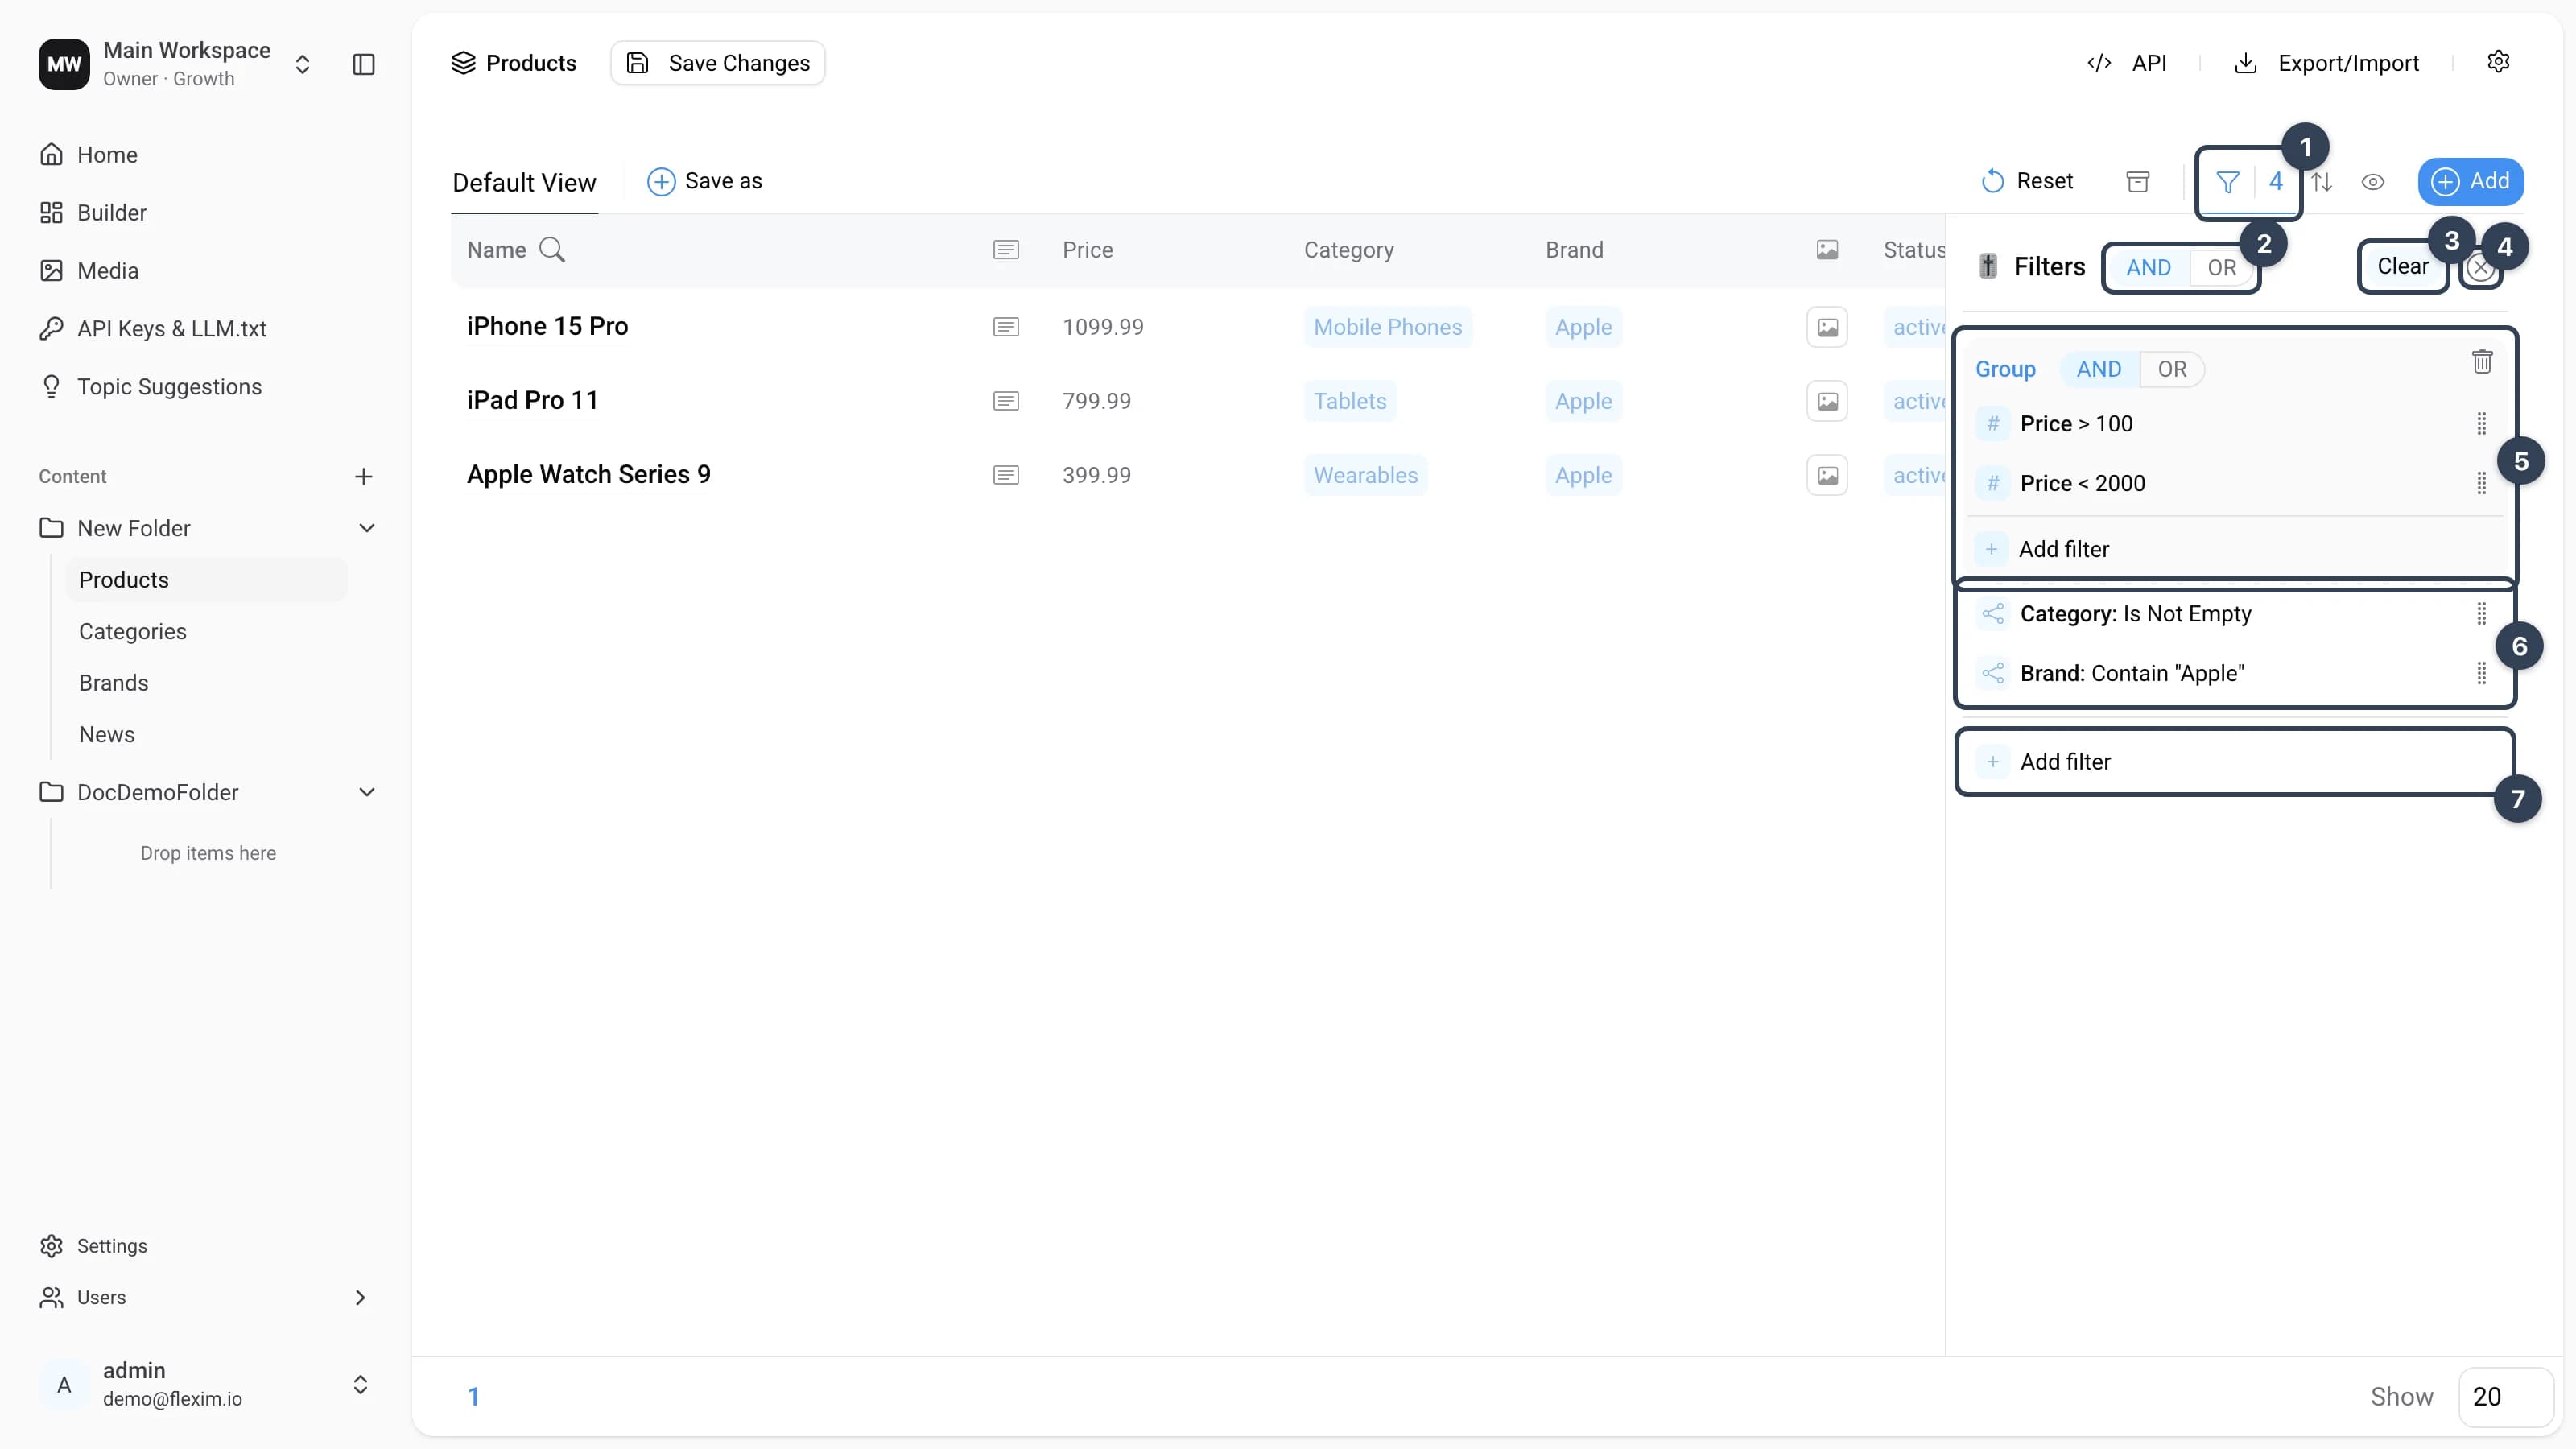
Let's take a closer look at the Filters panel:
- Filter icon The panel opens when you click the filter icon. When at least one filter is active, a counter next to the icon shows how many conditions are applied (including those inside groups).
- Match condition
AND— every condition must be met;OR— any one of the conditions is enough.ANDis selected by default. Switch it and you'll see the result change straight away. - Clear
Clicking
Clearremoves all filters at once. - Close button
Clicking
✕closes the panel. - Filter group
You can bundle several conditions into a group that uses its own
AND/ORmatch, different from the panel header. You can have many groups, but a group can't be nested inside another group. - Filter list All the added filters that are not inside a group.
- Add filter
The
Add filterbutton adds a new condition row.
Filter state
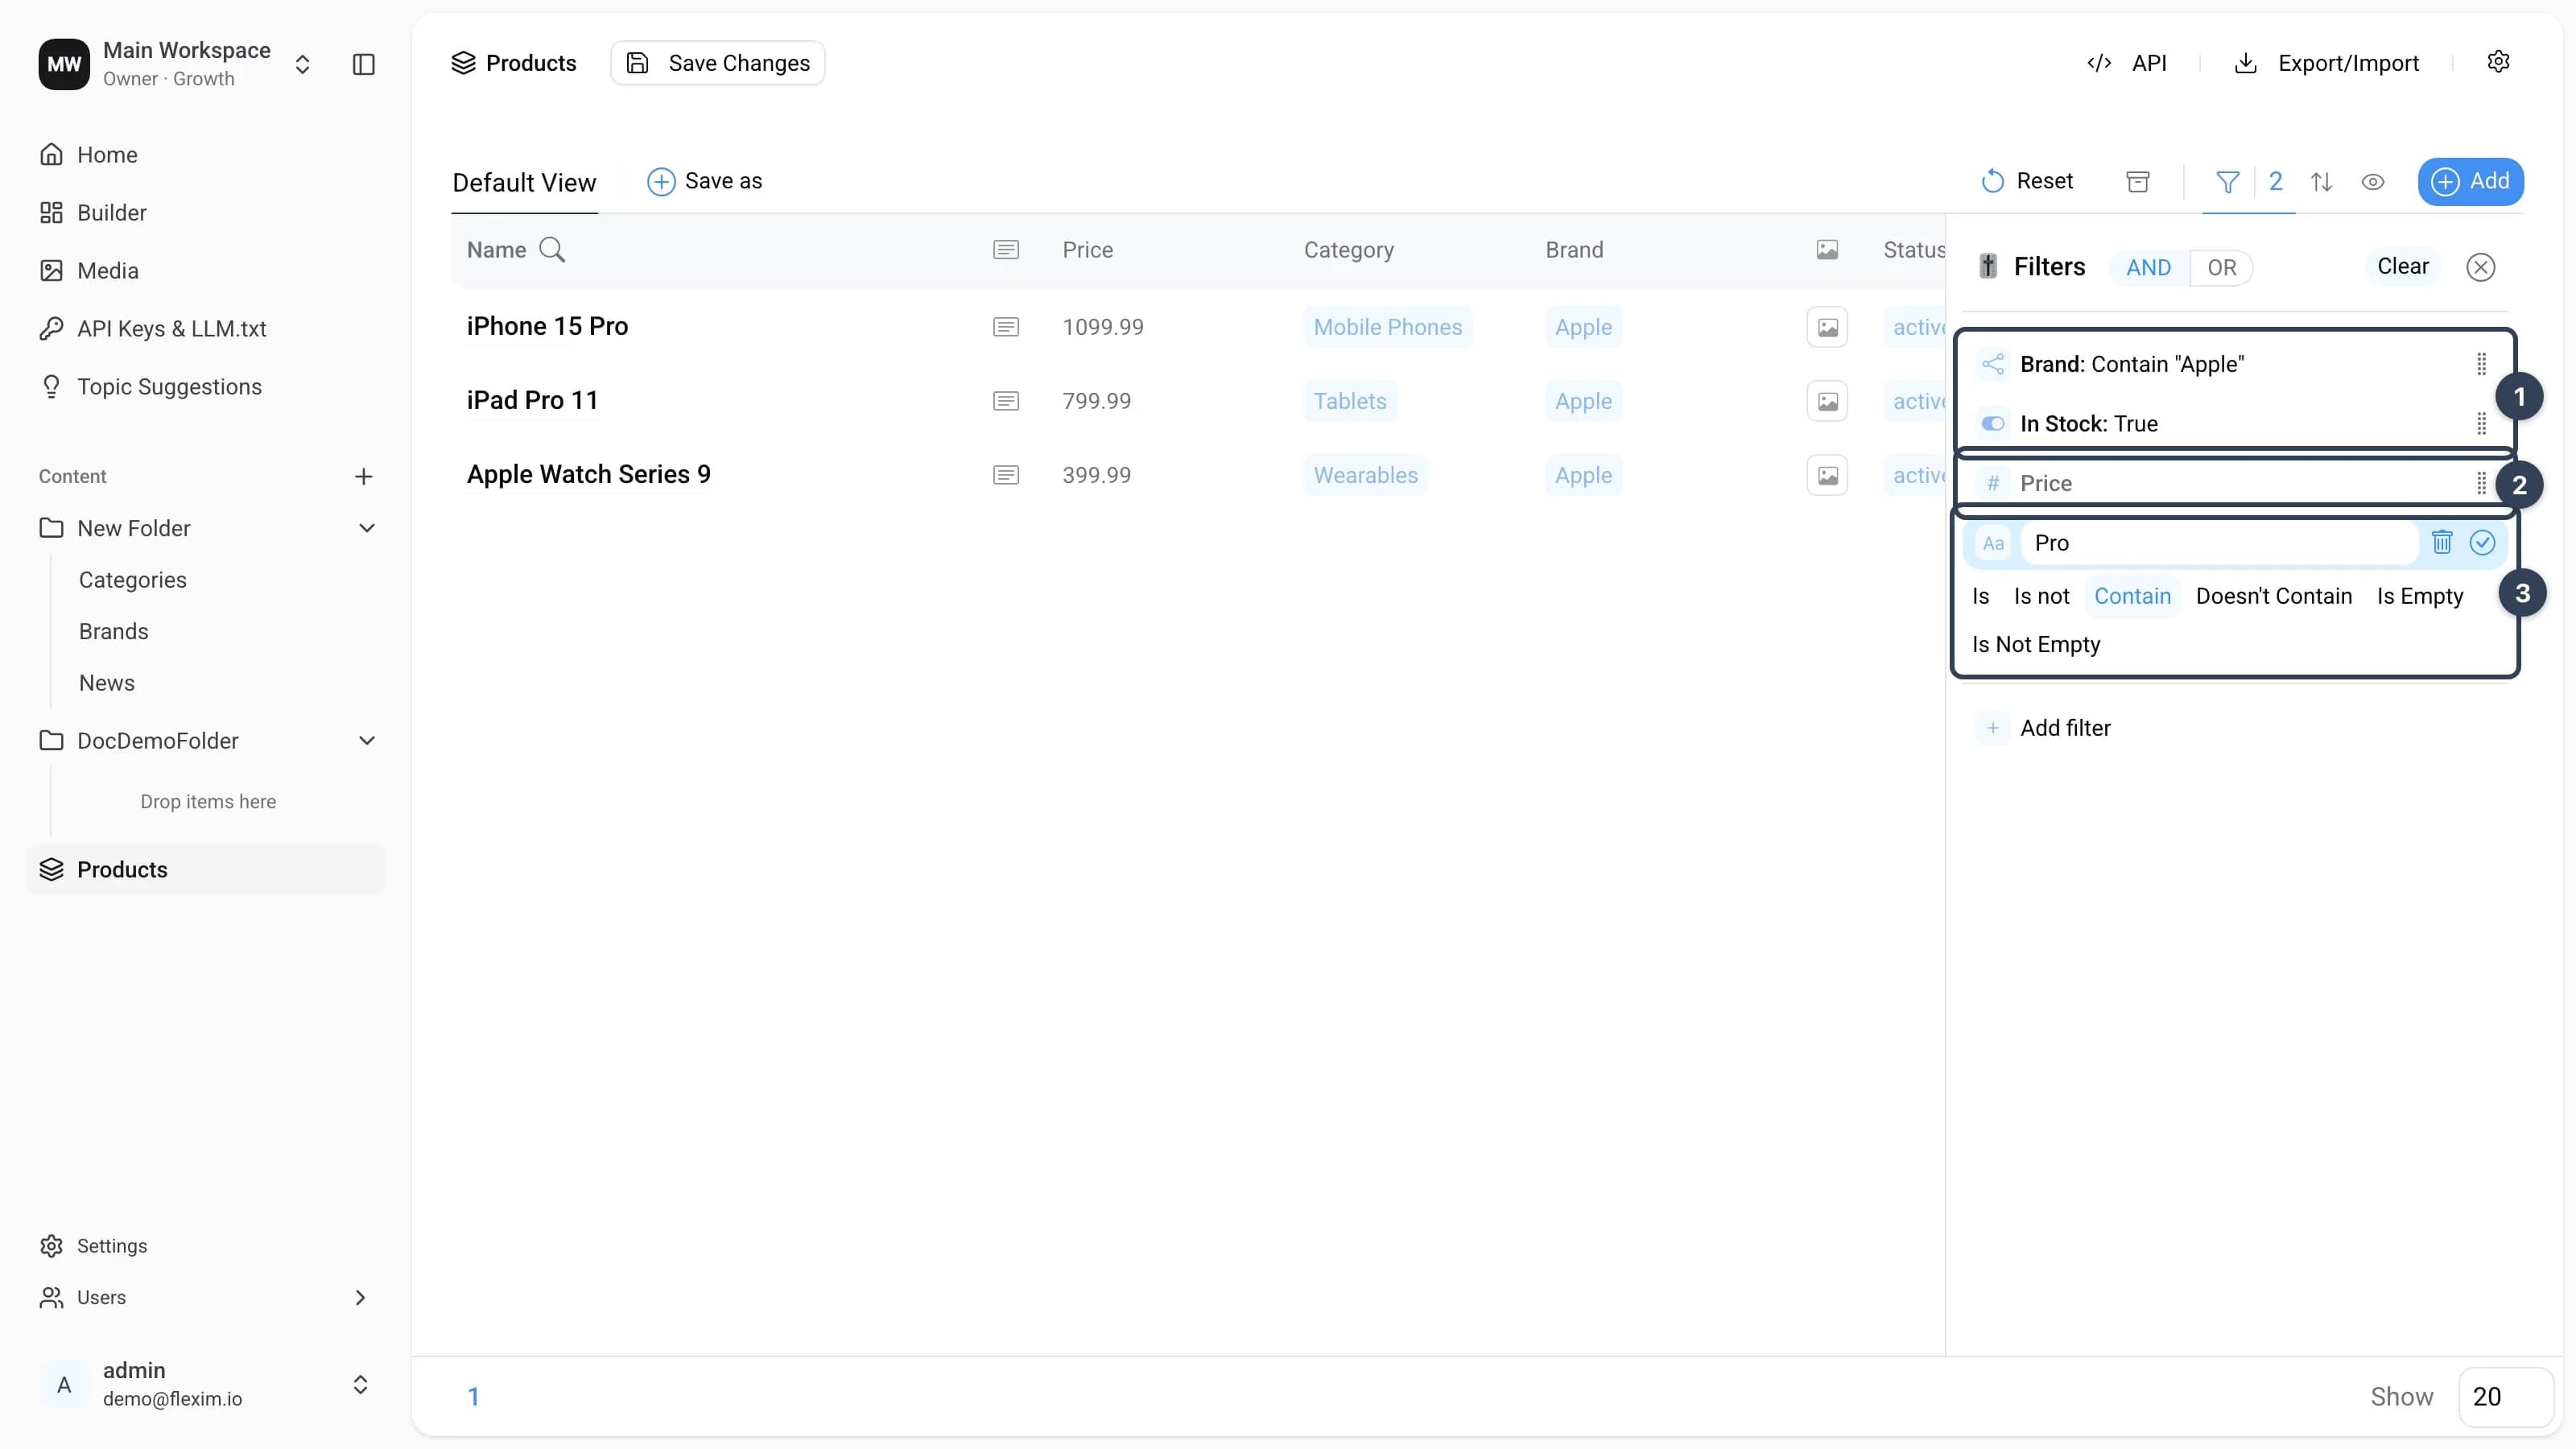
A filter can be in one of the following states:
-
Active Added, configured and confirmed with
✓. Active filters take part in filtering. -
Inactive Added, but the
✓button was never pressed. The name of such a filter is greyed out and it has no condition summary (for exampleContain "Apple"). It stays in the list but doesn't affect the result. You can open, configure and activate it at any time. This is handy when you want to line up all the filters you need first and configure them afterwards. -
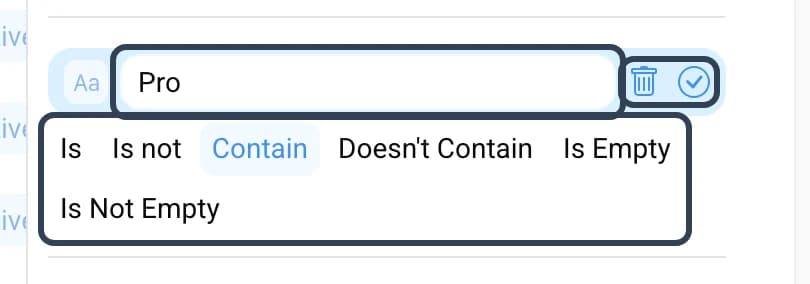
Editing A filter enters the editing state when you add it or click an existing one. The editor has three parts: the value input (depends on the filtering method), the control buttons (delete or save the filter), and the list of filtering methods for the selected field (see Filtering methods). Only one filter can be edited at a time.
Context Menu
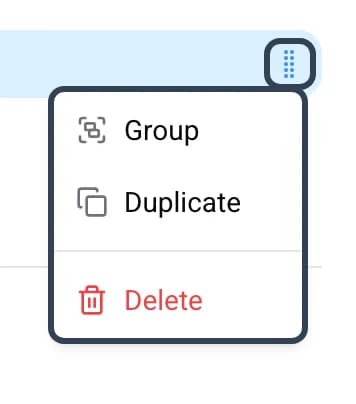
To open the context menu, click the grip icon on the right of a filter row.
It has three options: create a group, duplicate and delete.
When you duplicate a filter, the copy opens straight away in edit mode.
Filters inside a group have only two options — duplicate and delete. That's because a group can't be created inside another group.
Adding Filters
Our task: find Apple products that are in stock.
-
Let's add the first condition. Click
Add filter.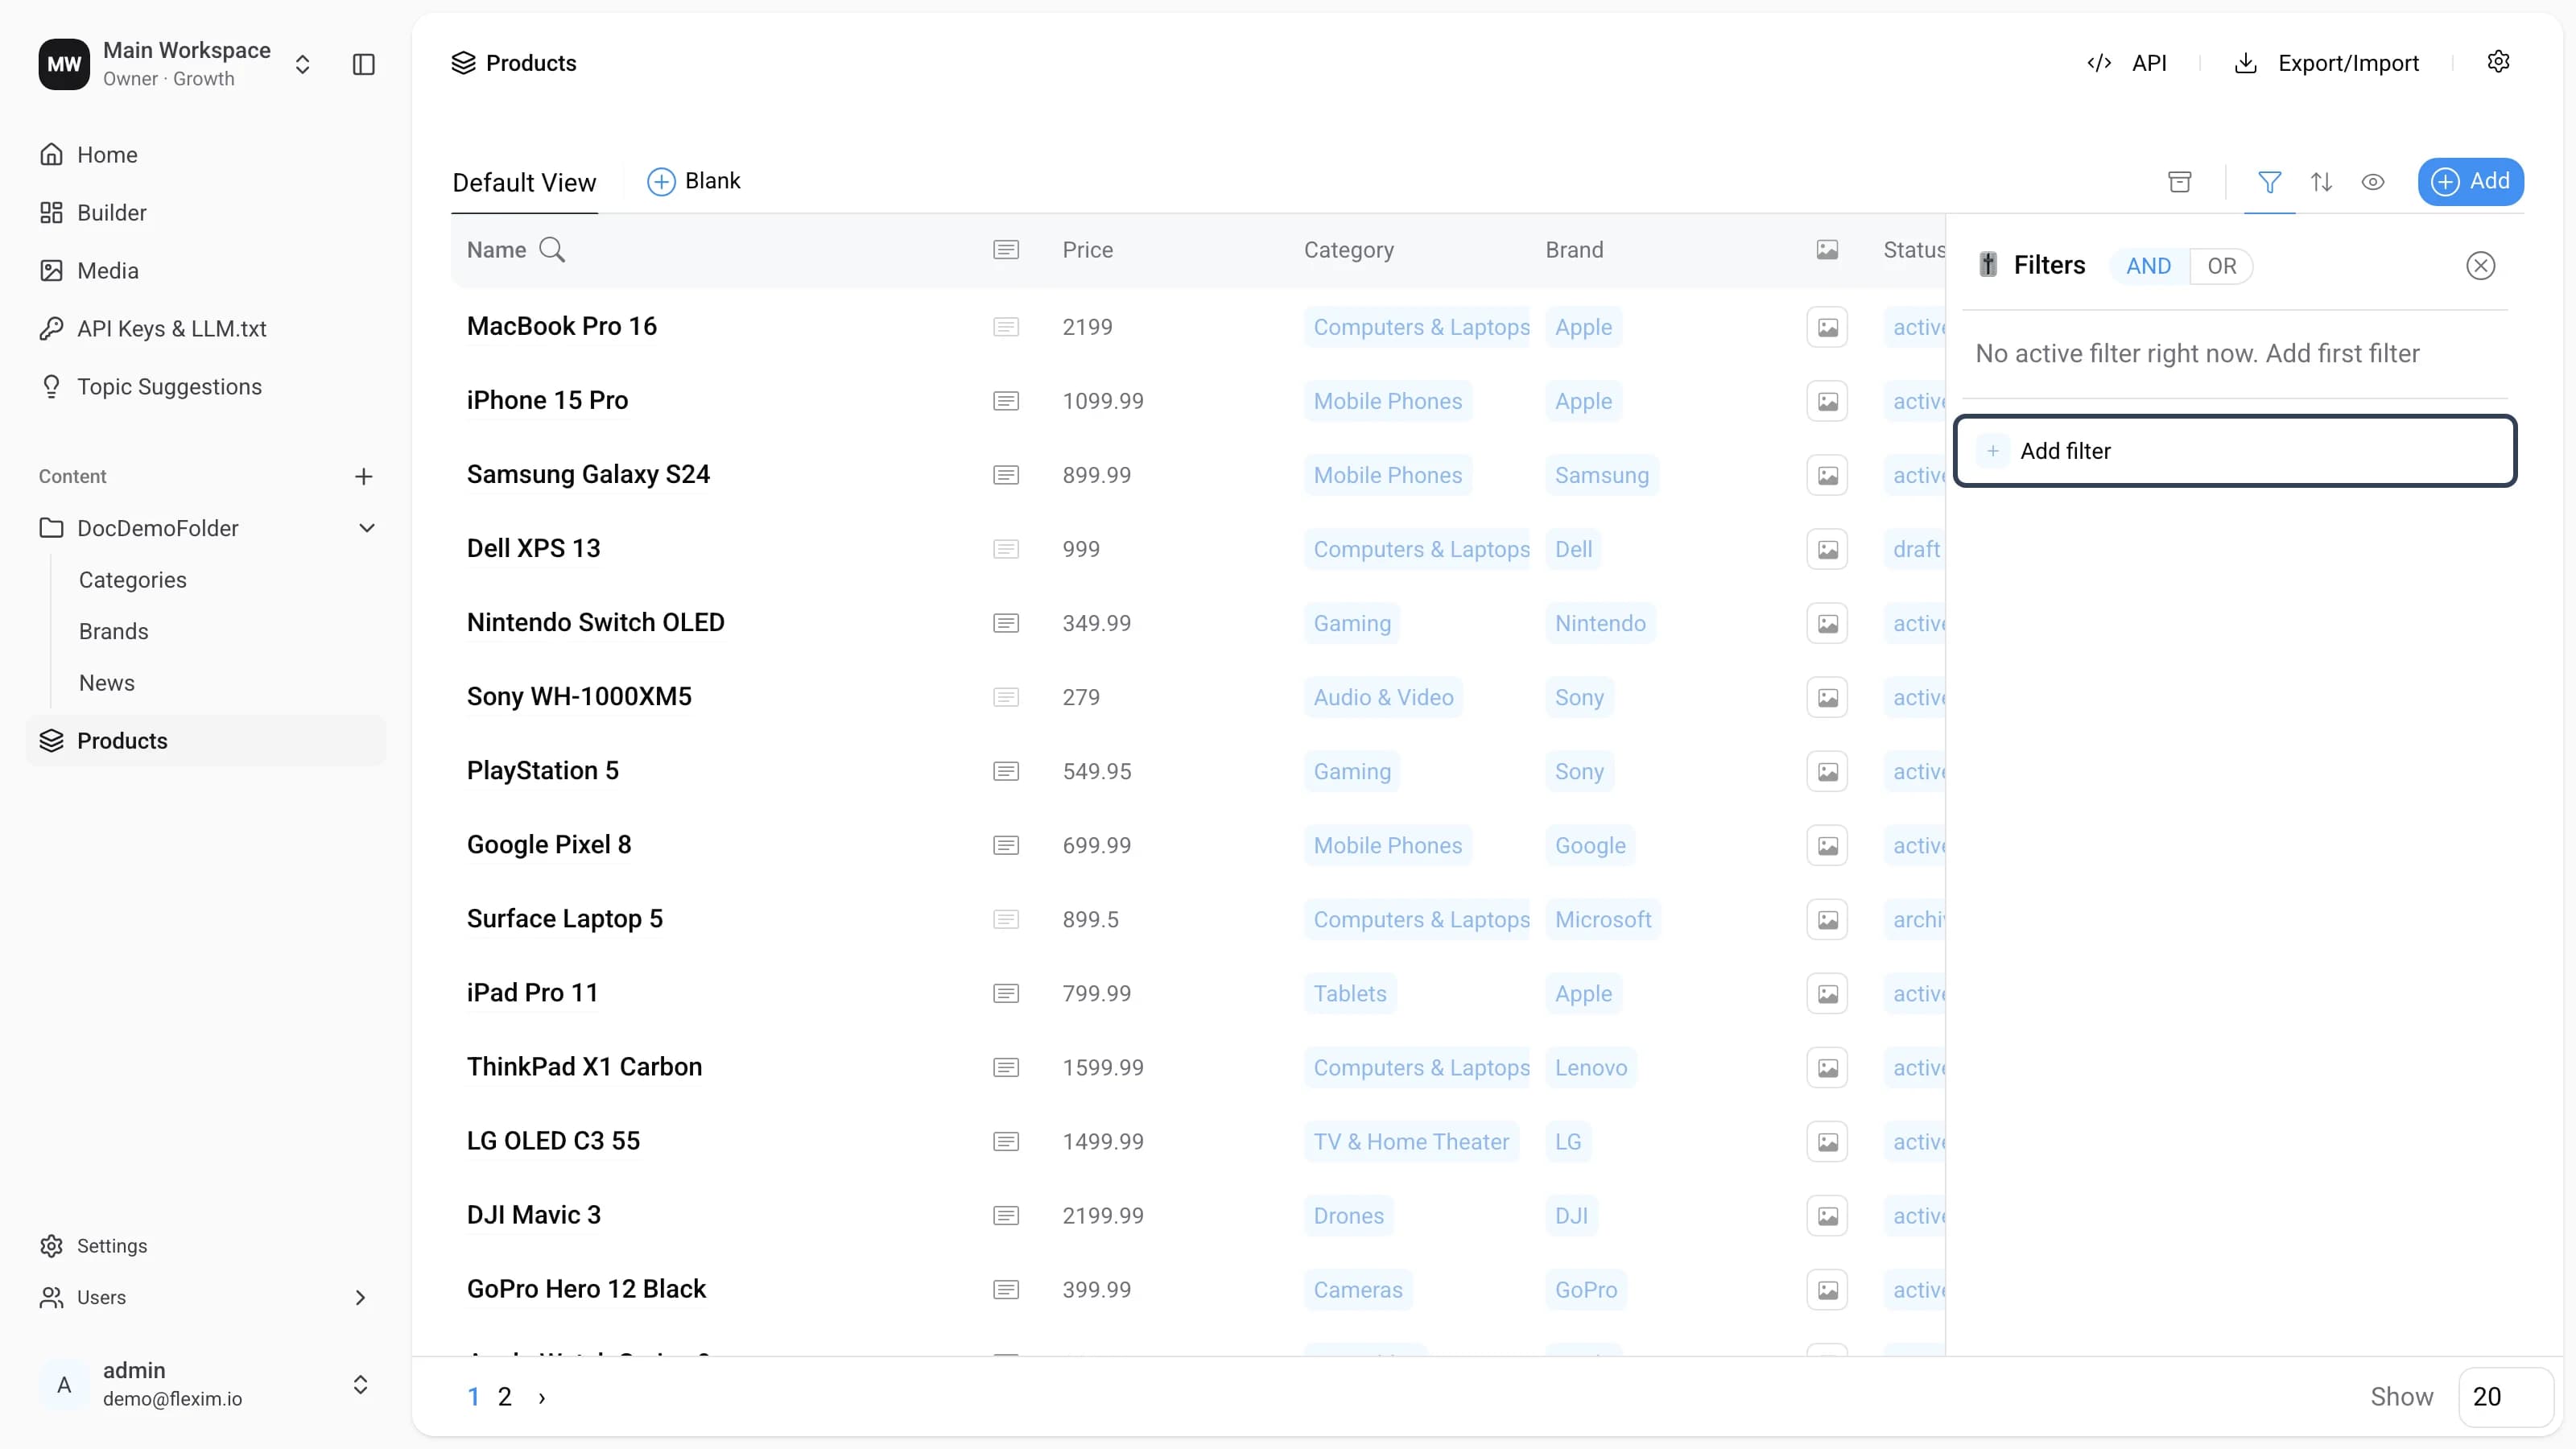
-
Pick
Brandfrom the field list.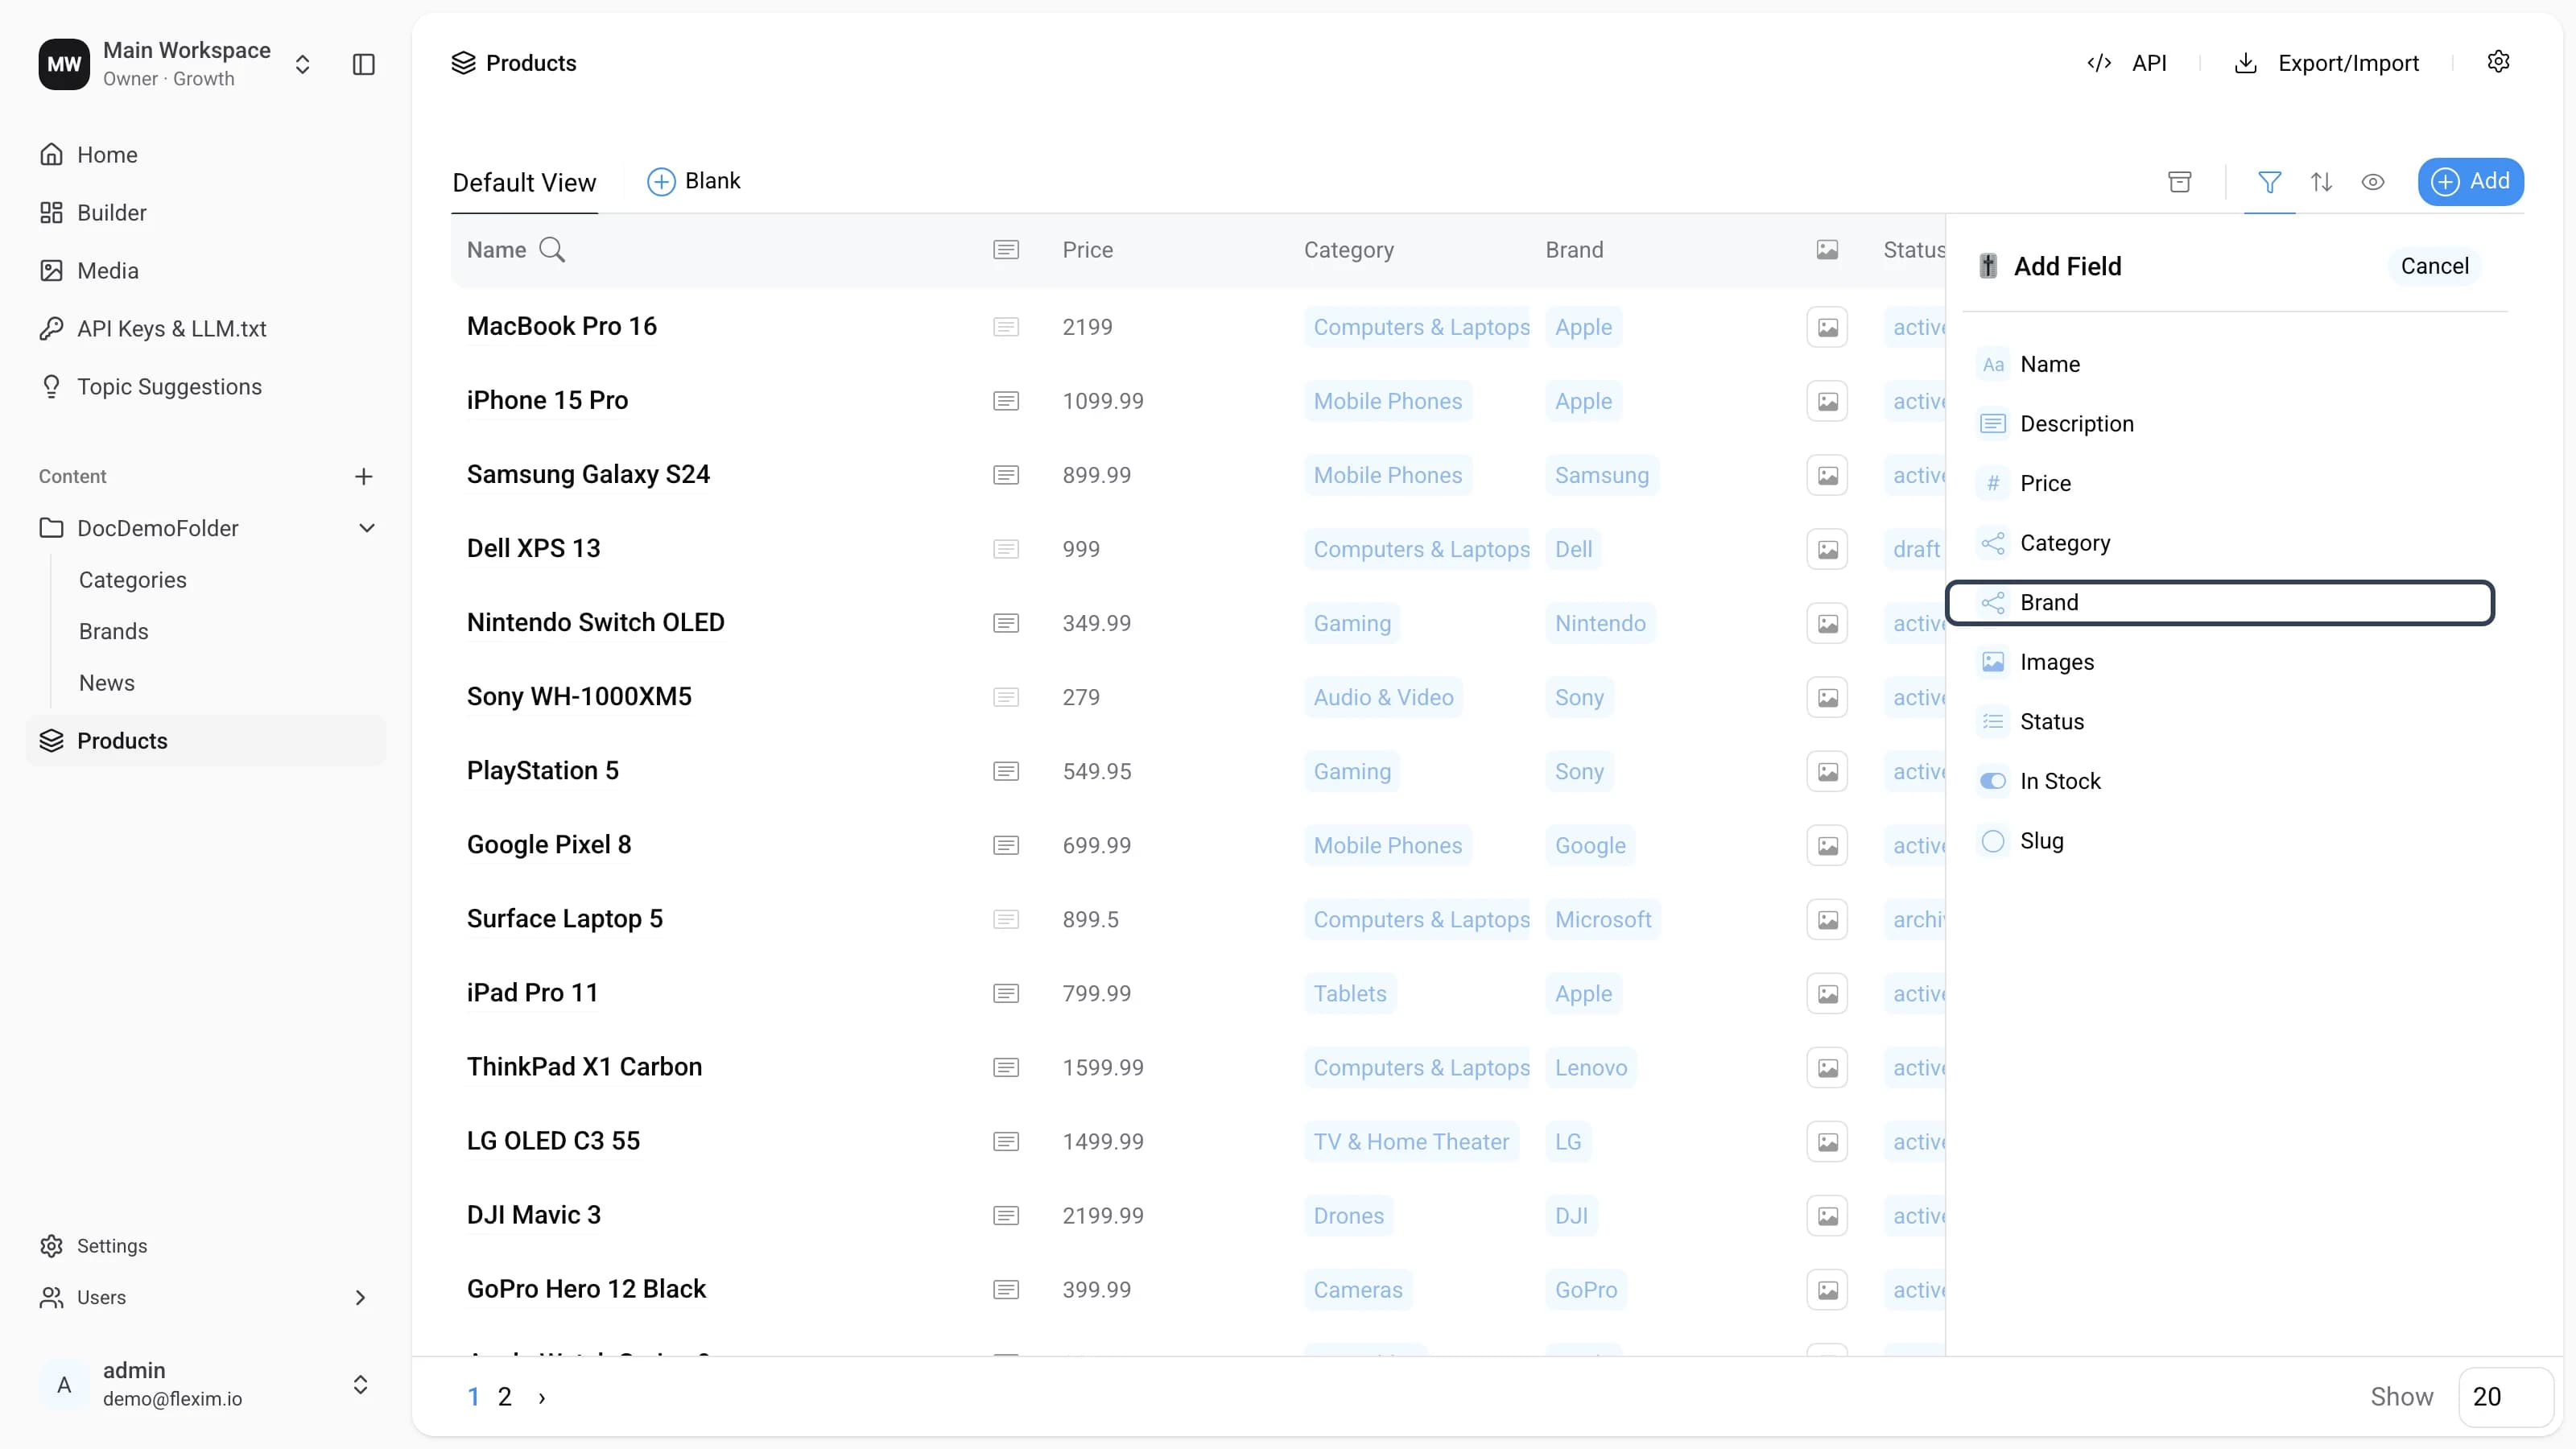
-
After you pick a field, it opens in edit mode. The first filtering method in the list is selected automatically. For a reference field that's
Contain(see Filtering methods). While no option is chosen, the✓button stays disabled, so the filter doesn't take part in the search yet.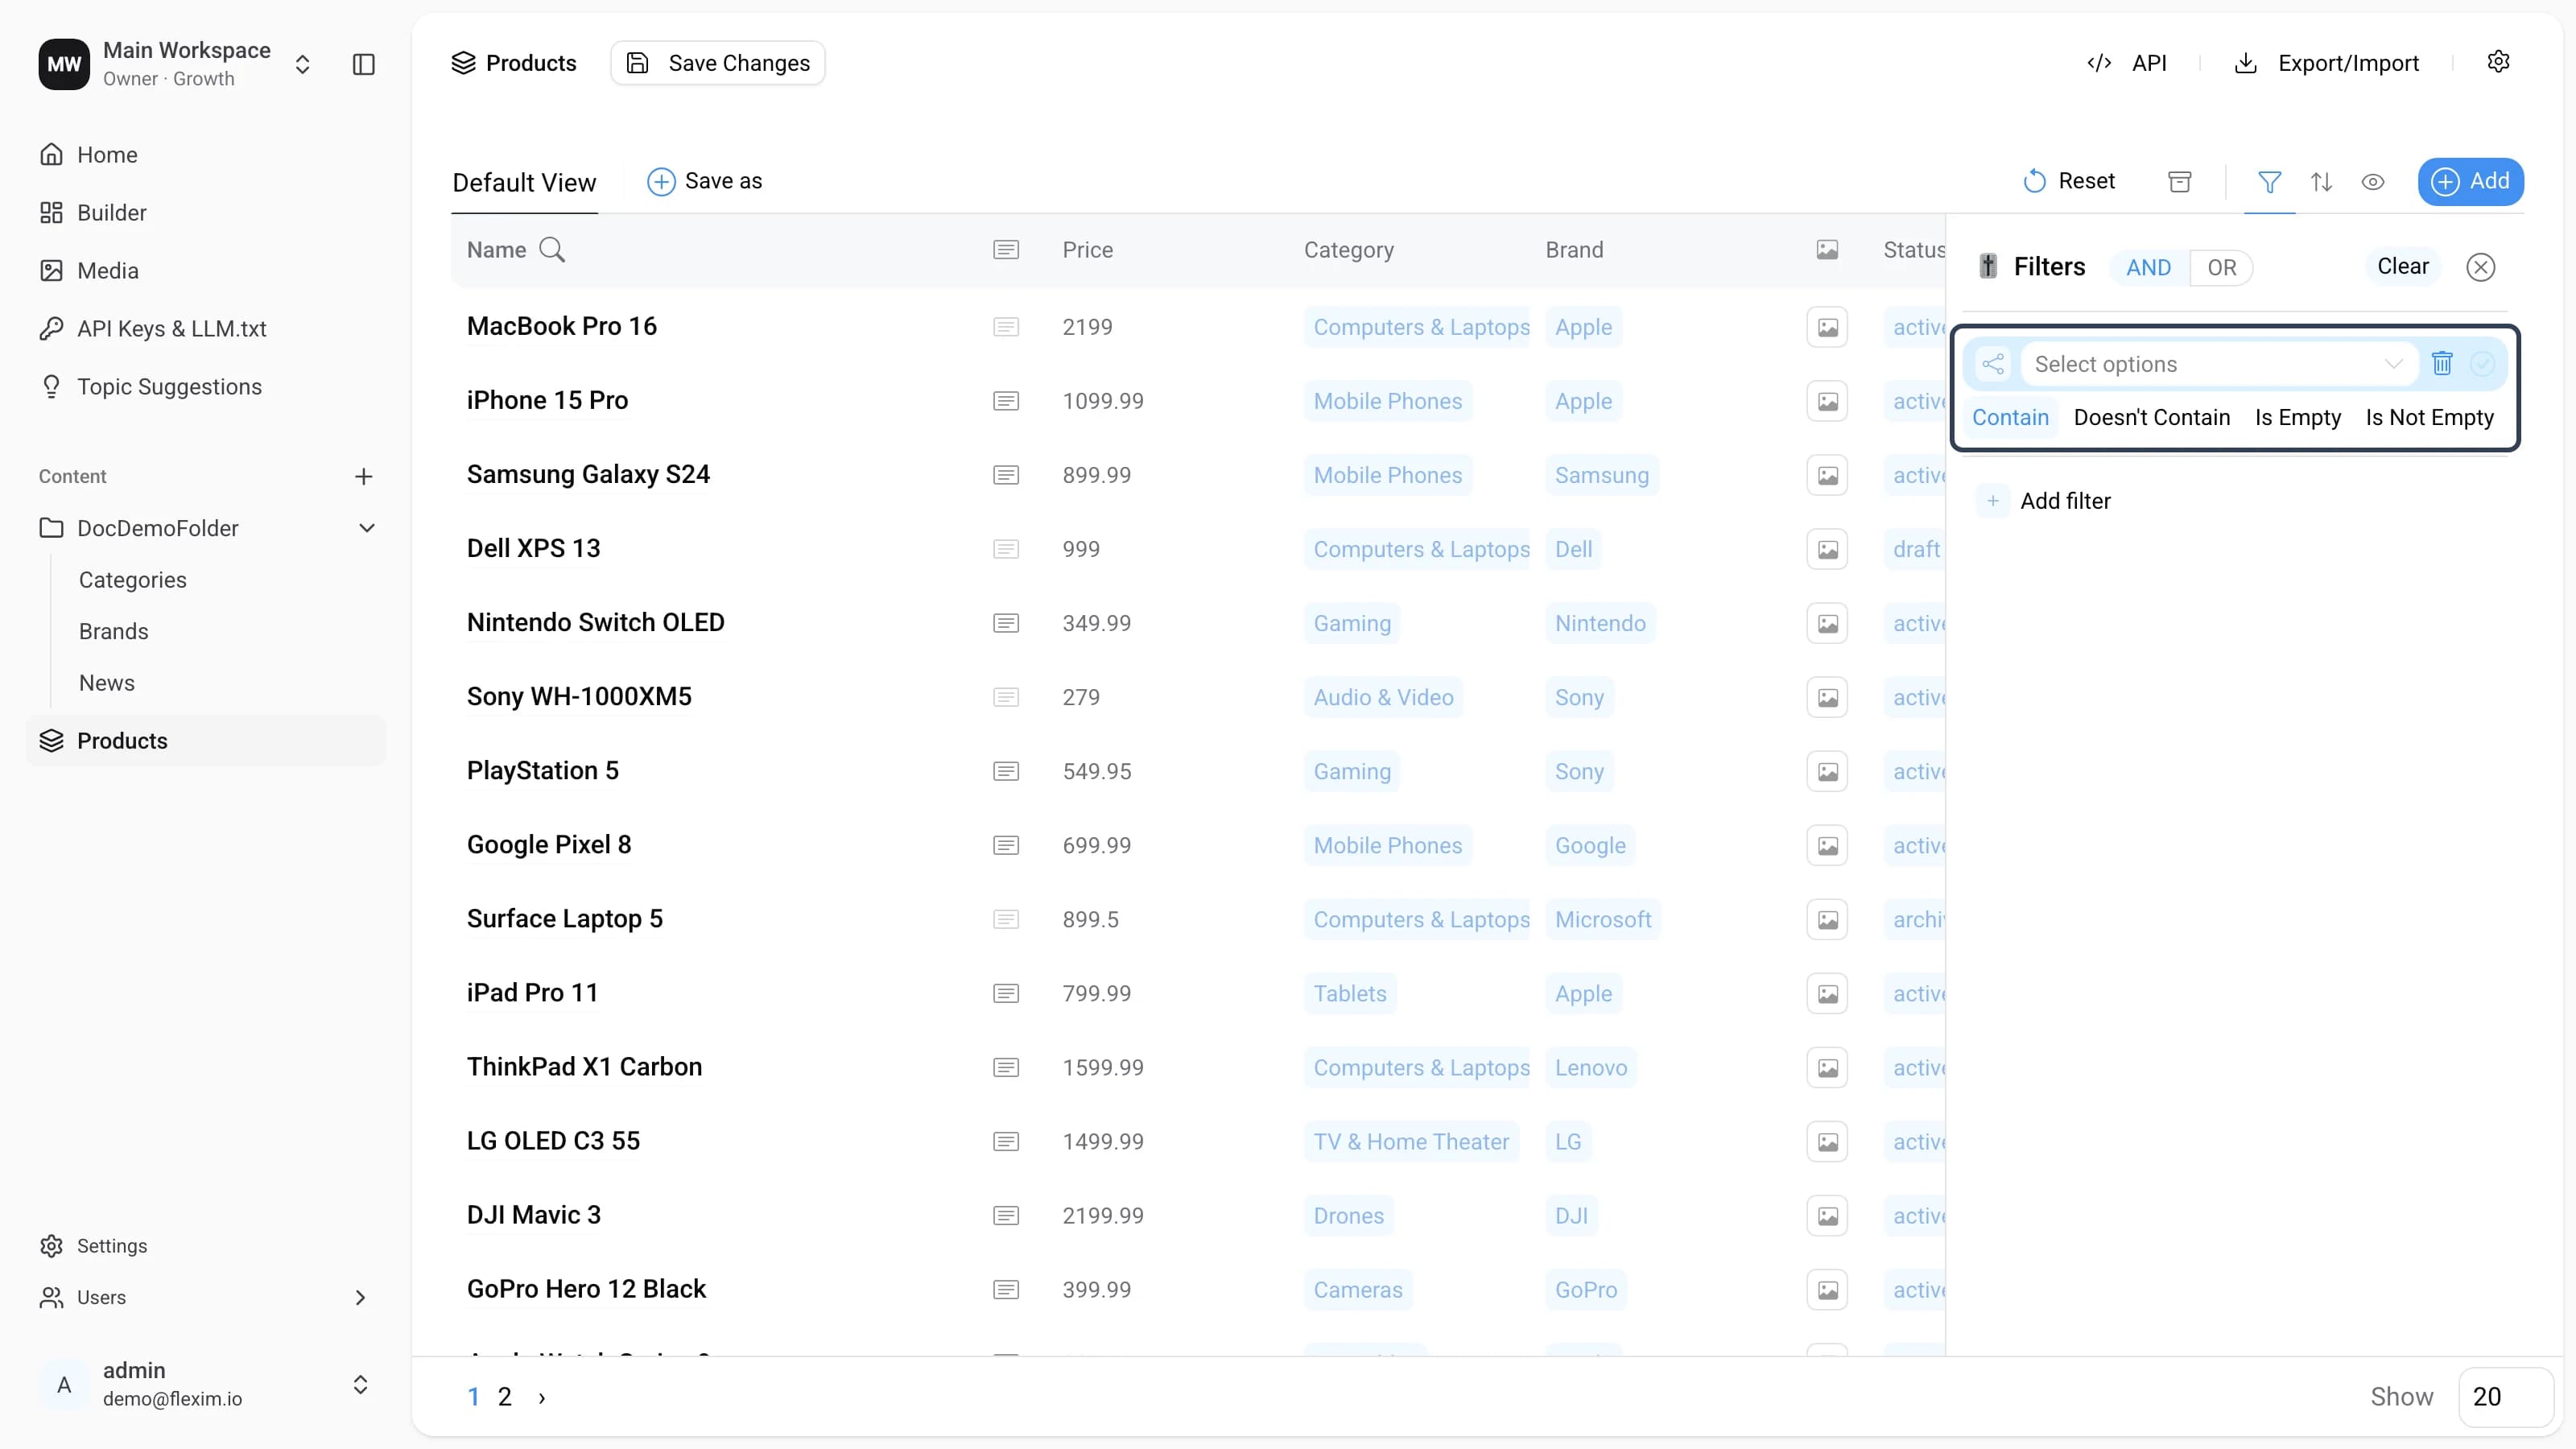
-
Choose
Applefrom the dropdown. The defaultContainmethod is exactly what we need. Click✓.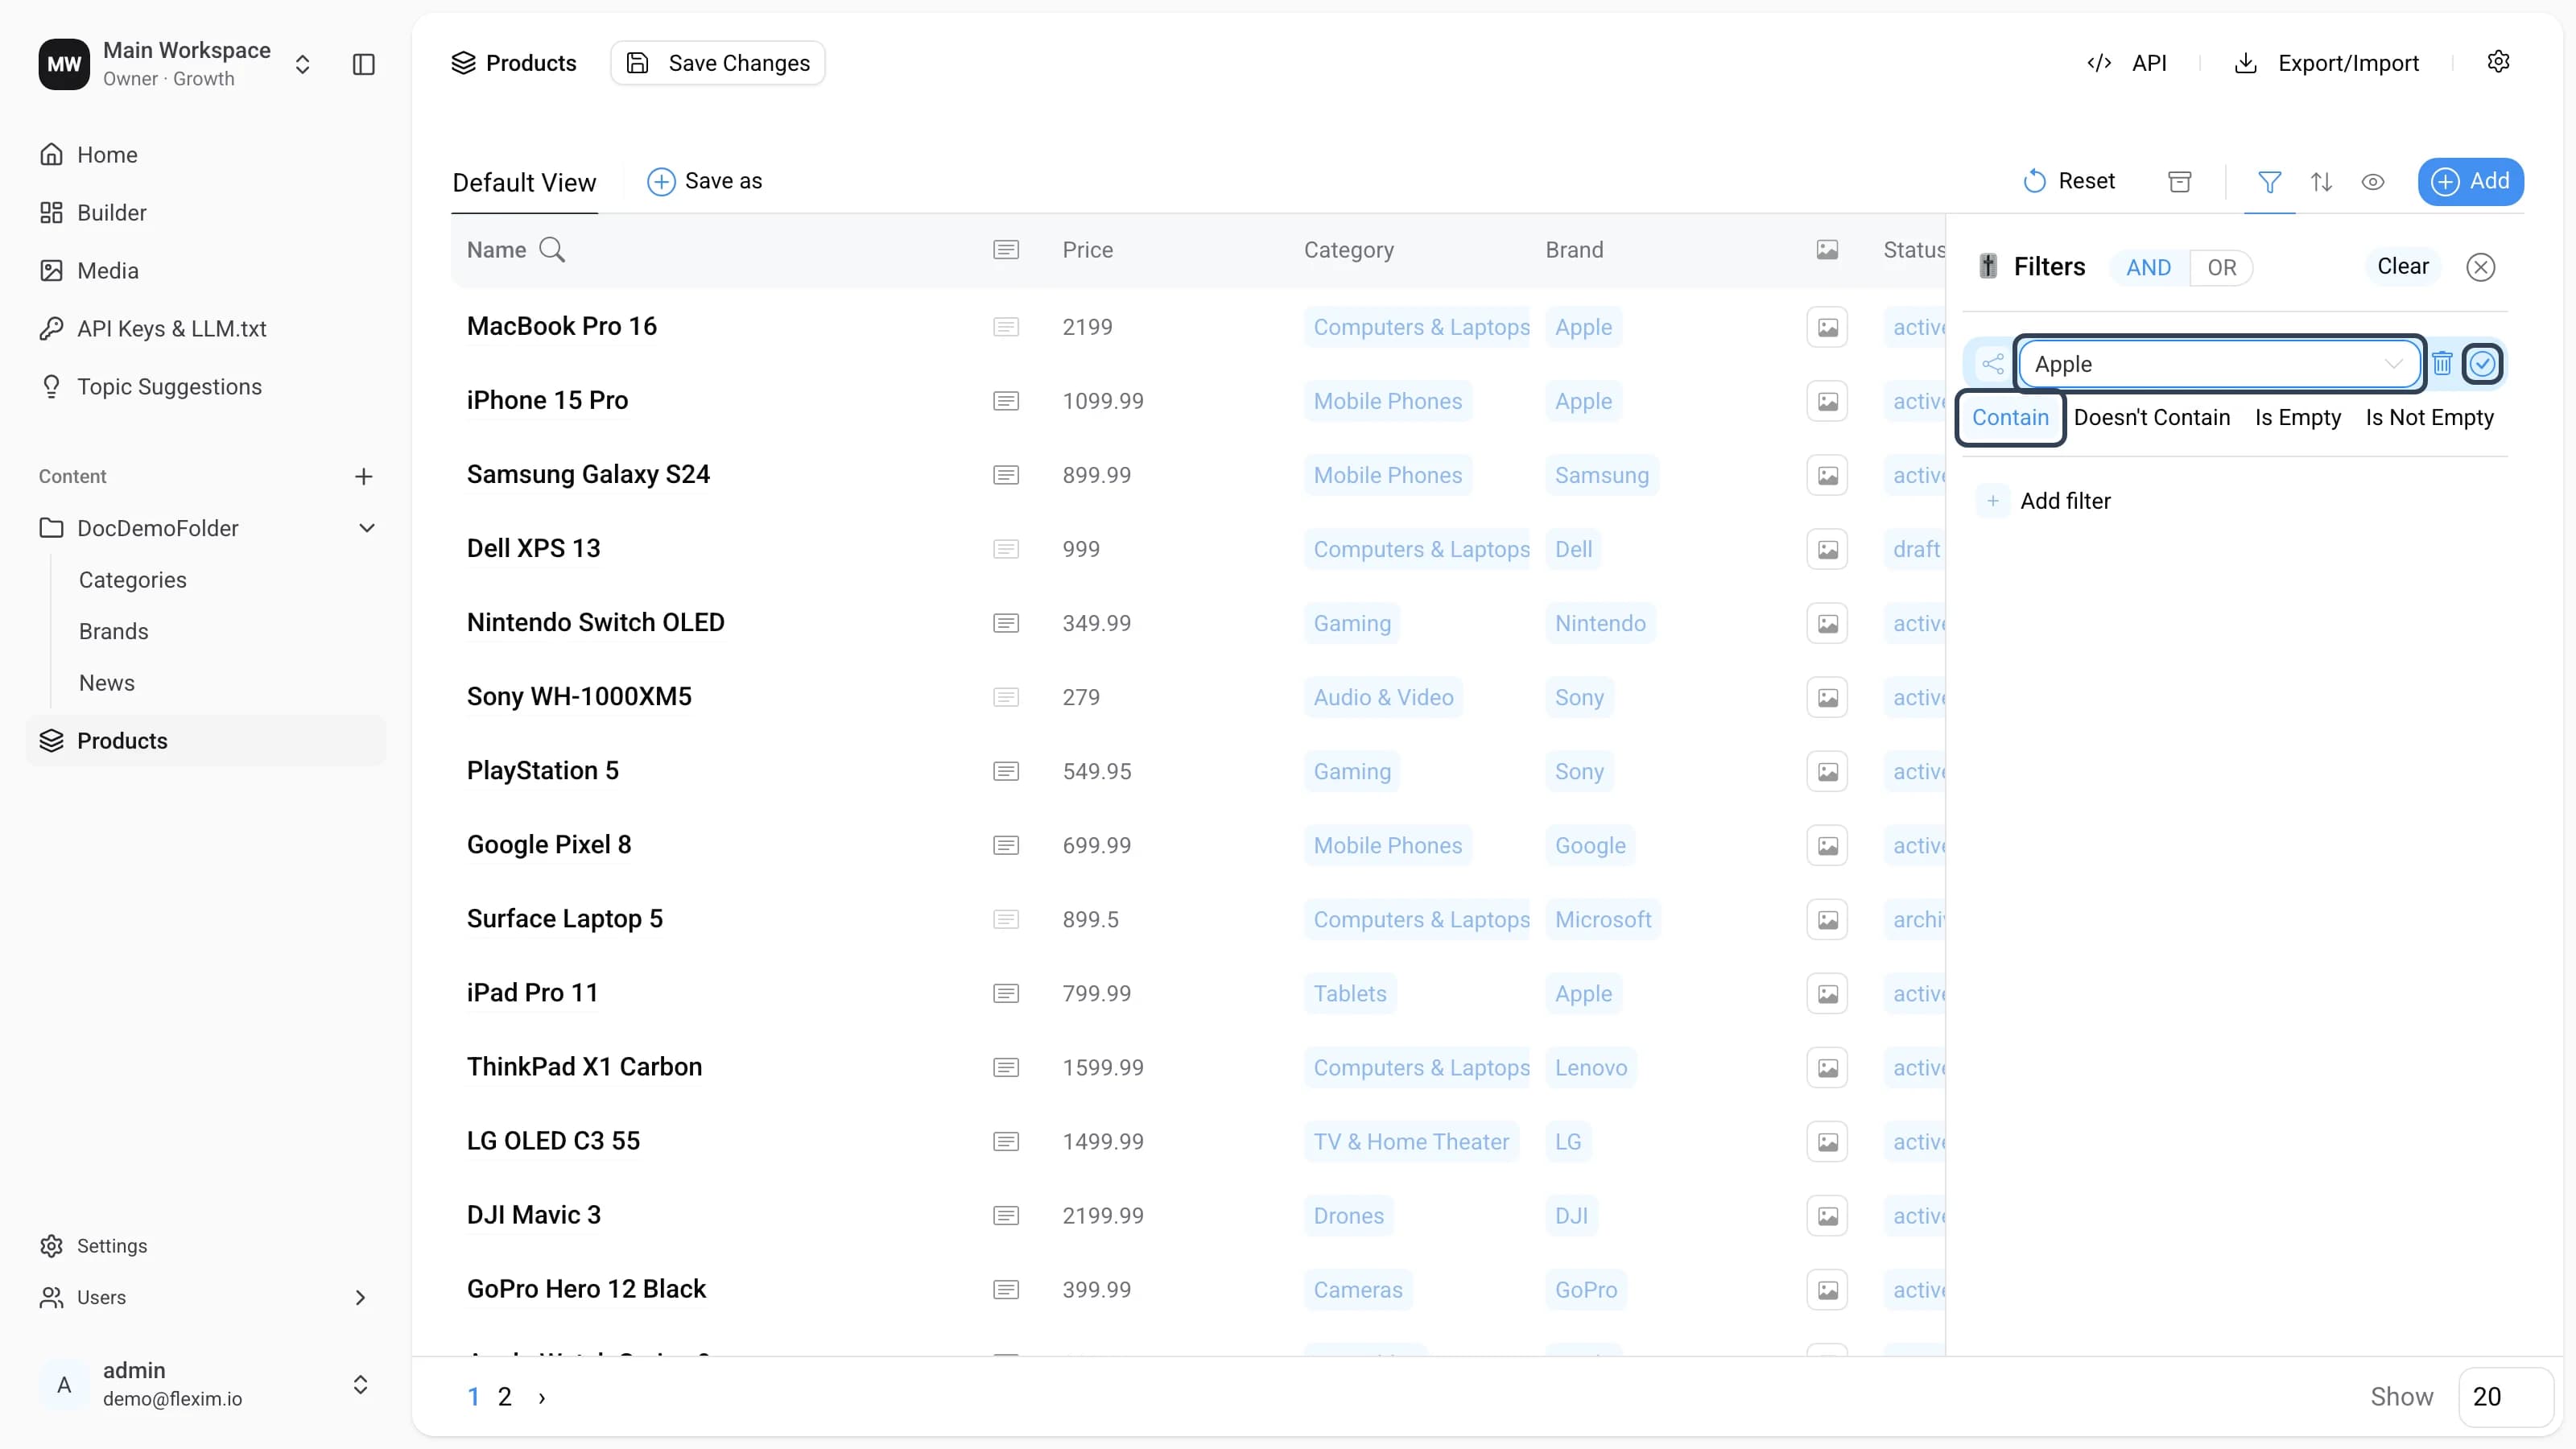
-
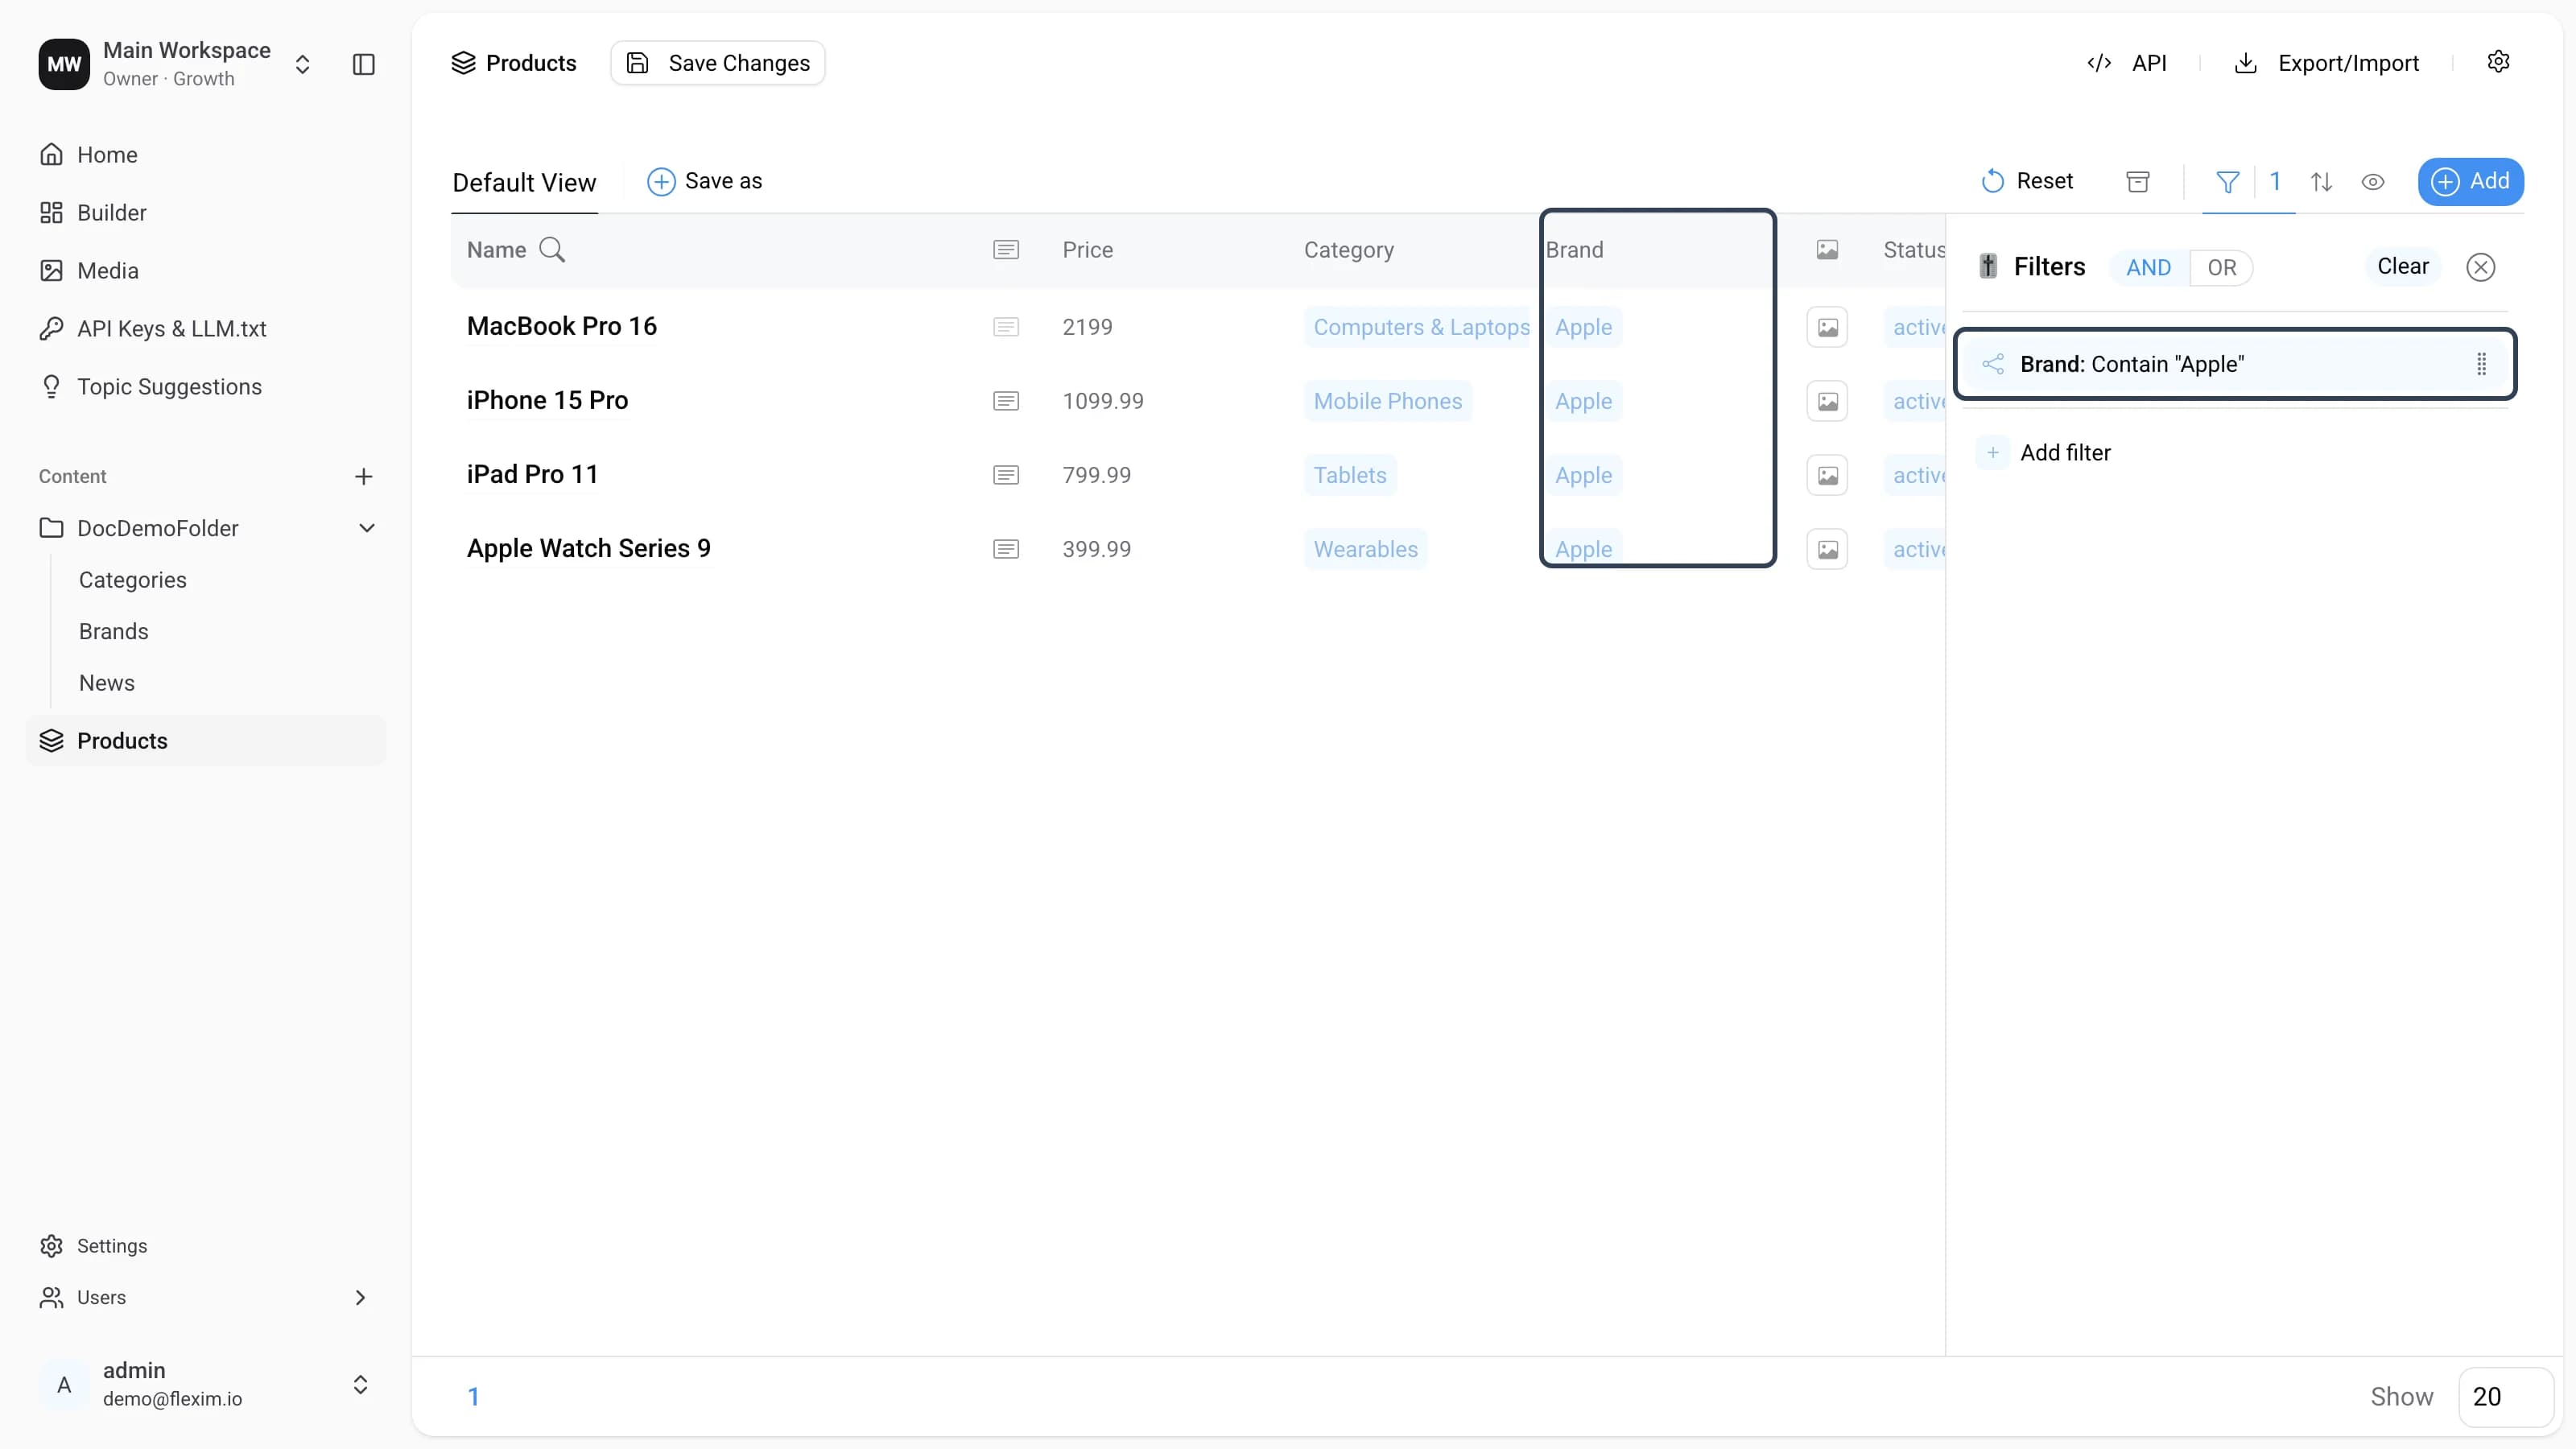
The first condition is applied — only Apple products remain in the list. Now we just need to add a condition for stock availability.
-
Click
Add filterand pickIn Stockfrom the field list.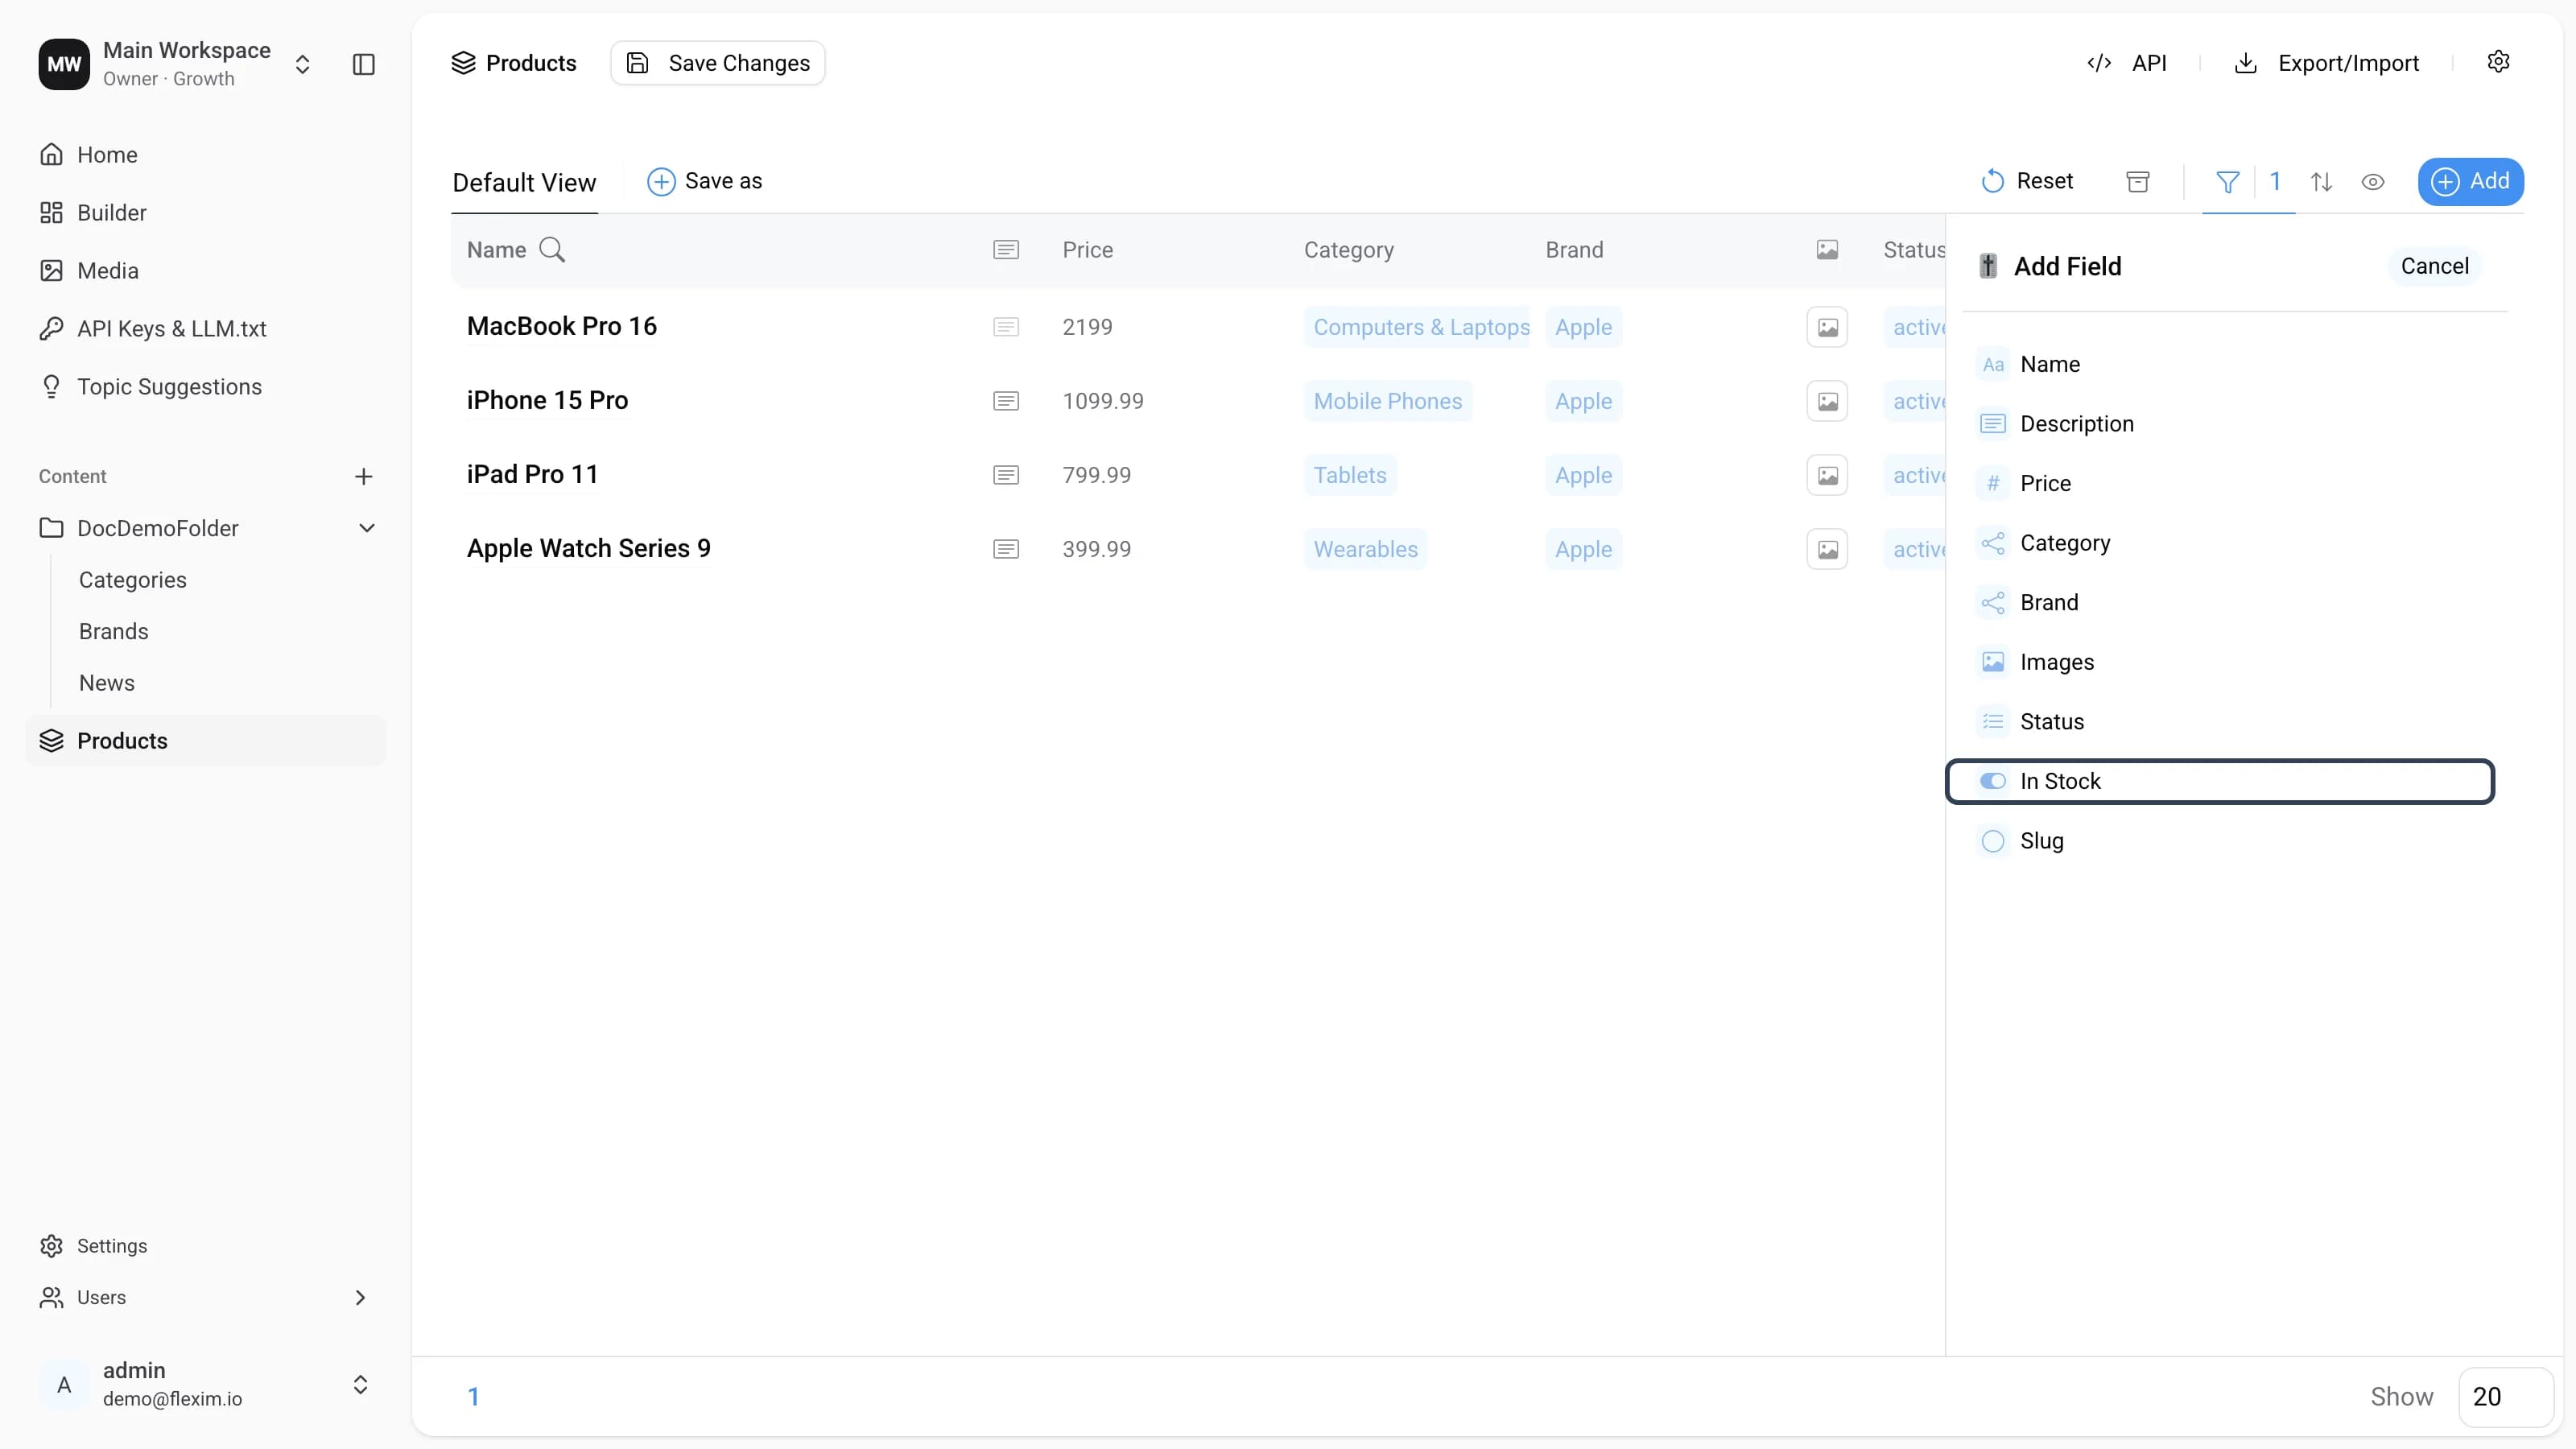
-
A boolean field only offers the
TrueandFalsemethods. It has no value input or option list. By defaultTrueis selected and the✓button is already active. We want in-stock products, so leave it onTrueand click✓.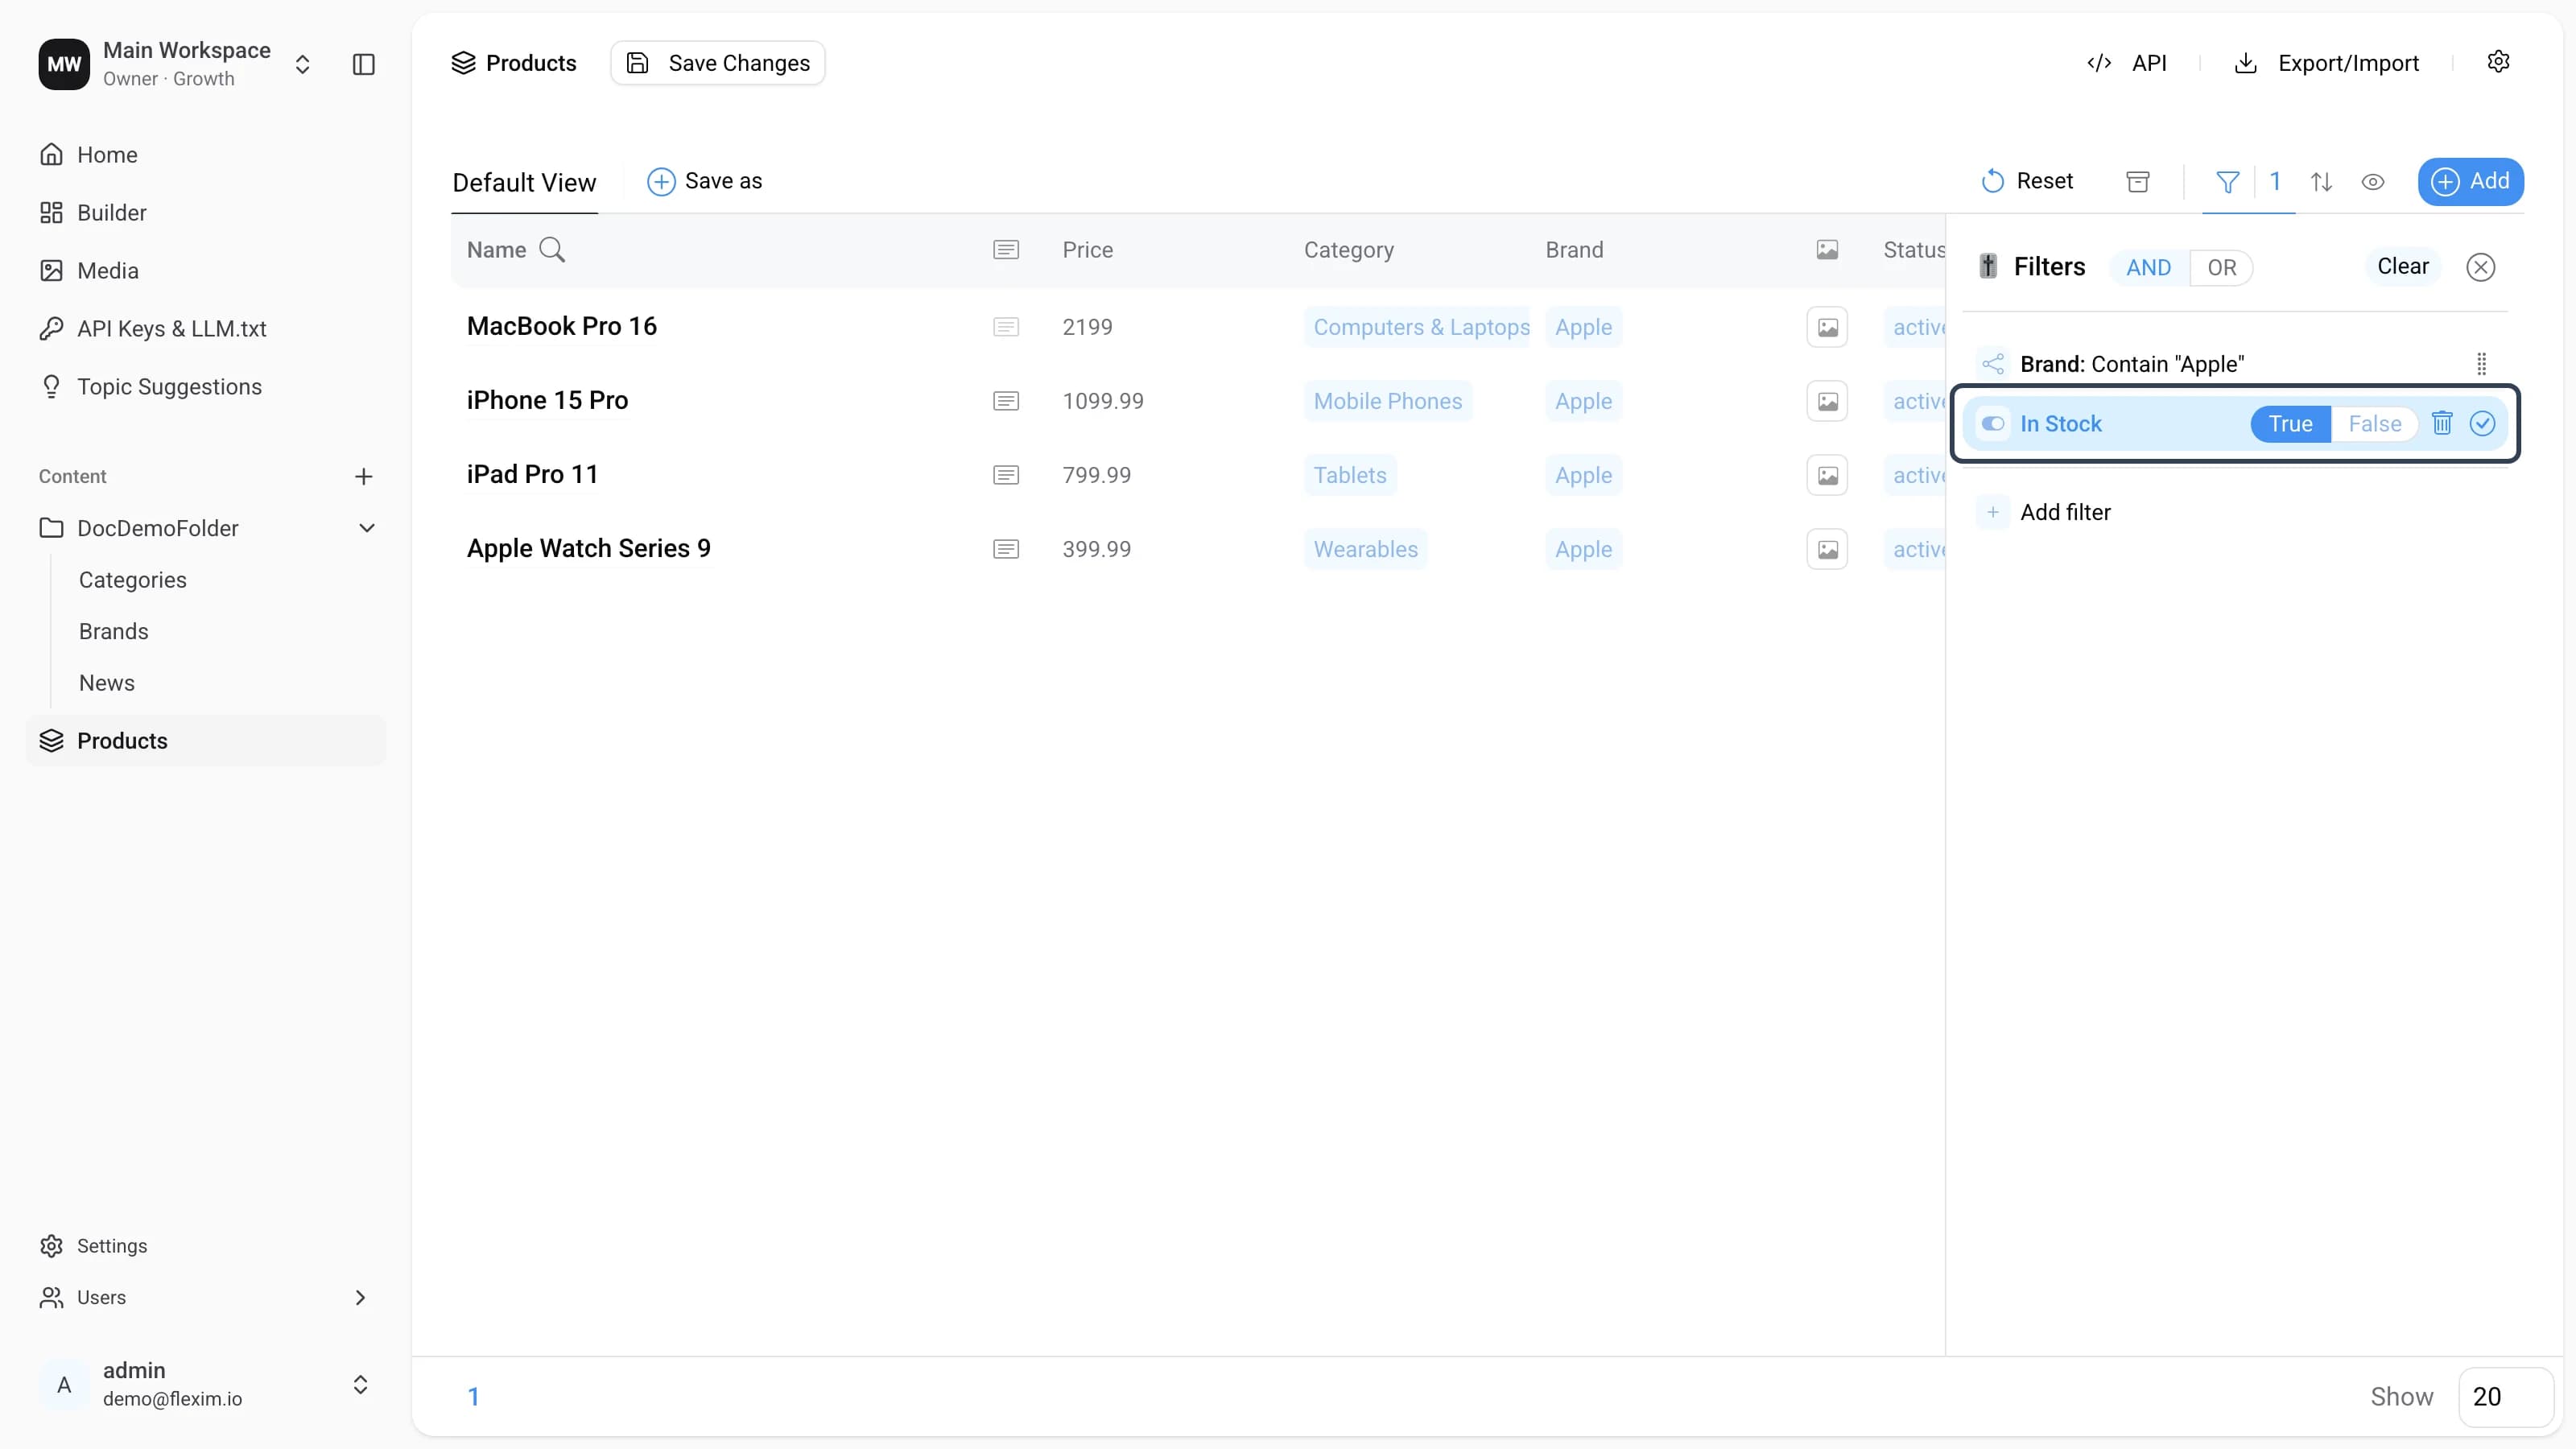
-
Done! The table now shows only Apple products that are in stock.
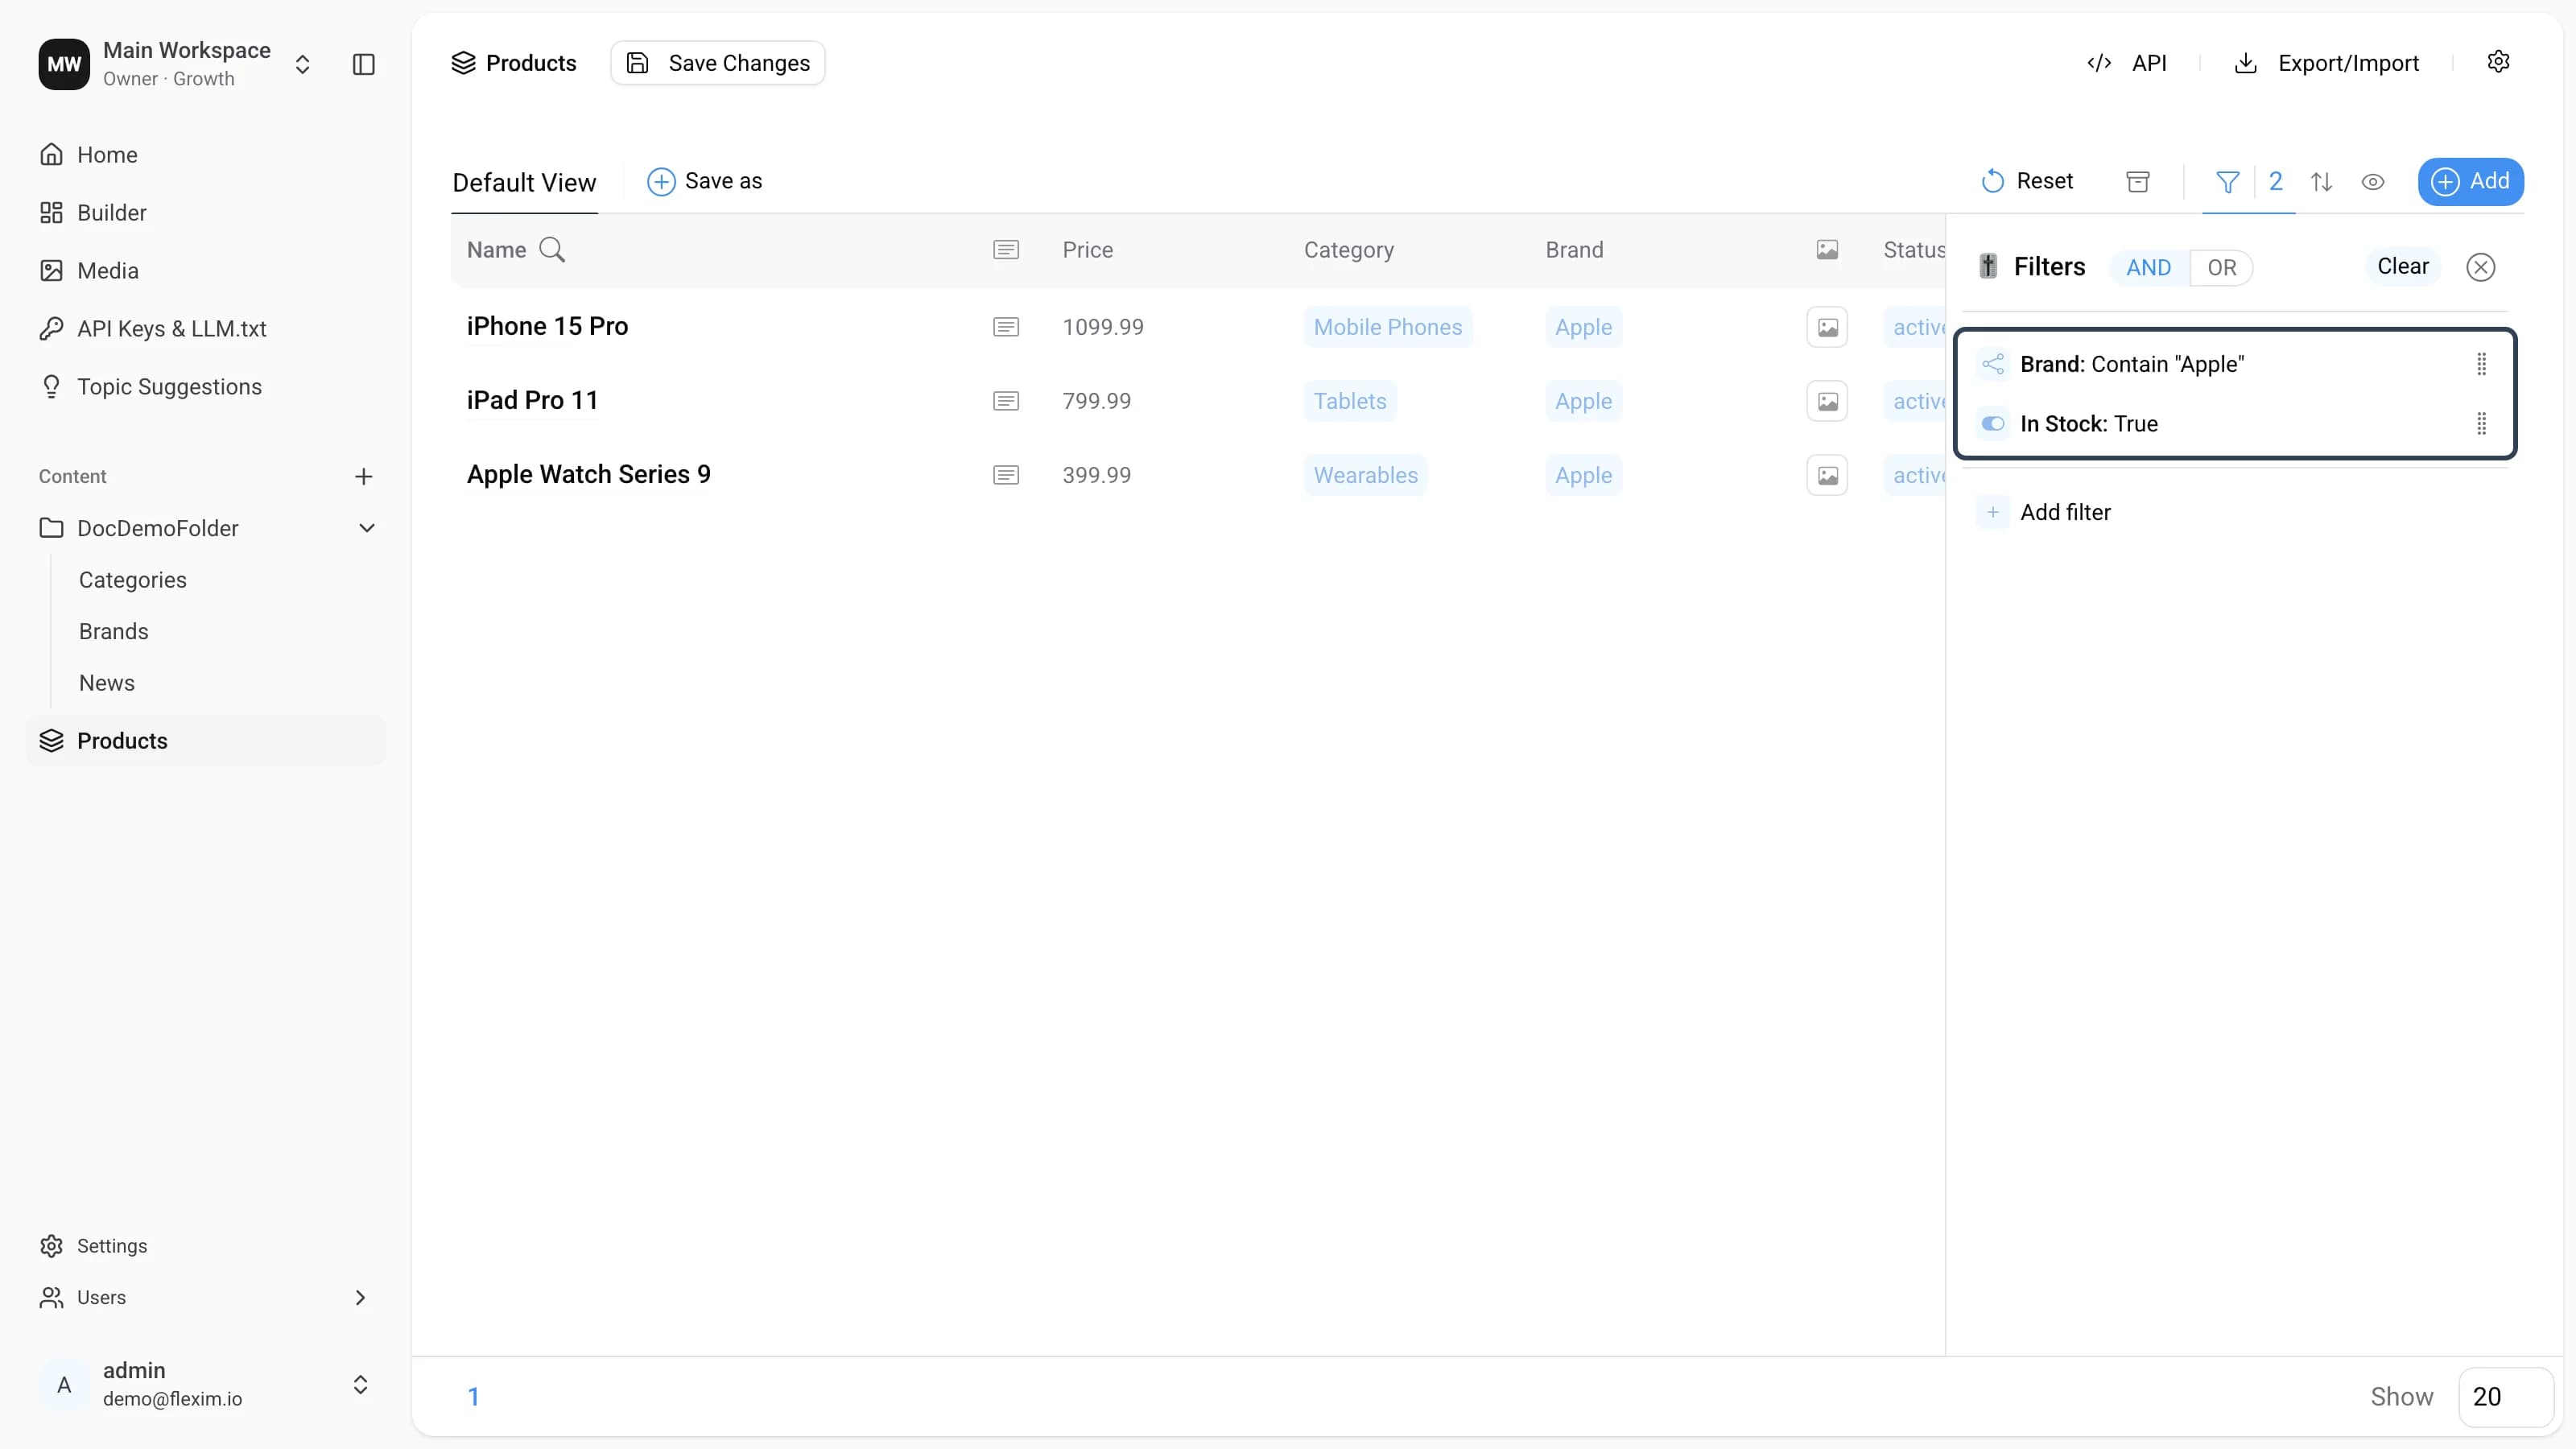
Creating a group
Task: show in-stock products from the Apple and Samsung brands.
Since a product's brand is a single value, we can't just ask for both at once — we need the scheme (Apple or Samsung) and In Stock. A group lets us combine the two brand conditions with OR while the rest of the panel stays on AND.
-
Let's start by turning the existing brand filter into a group. We already have the Apple filter — click its grip icon to open the context menu.
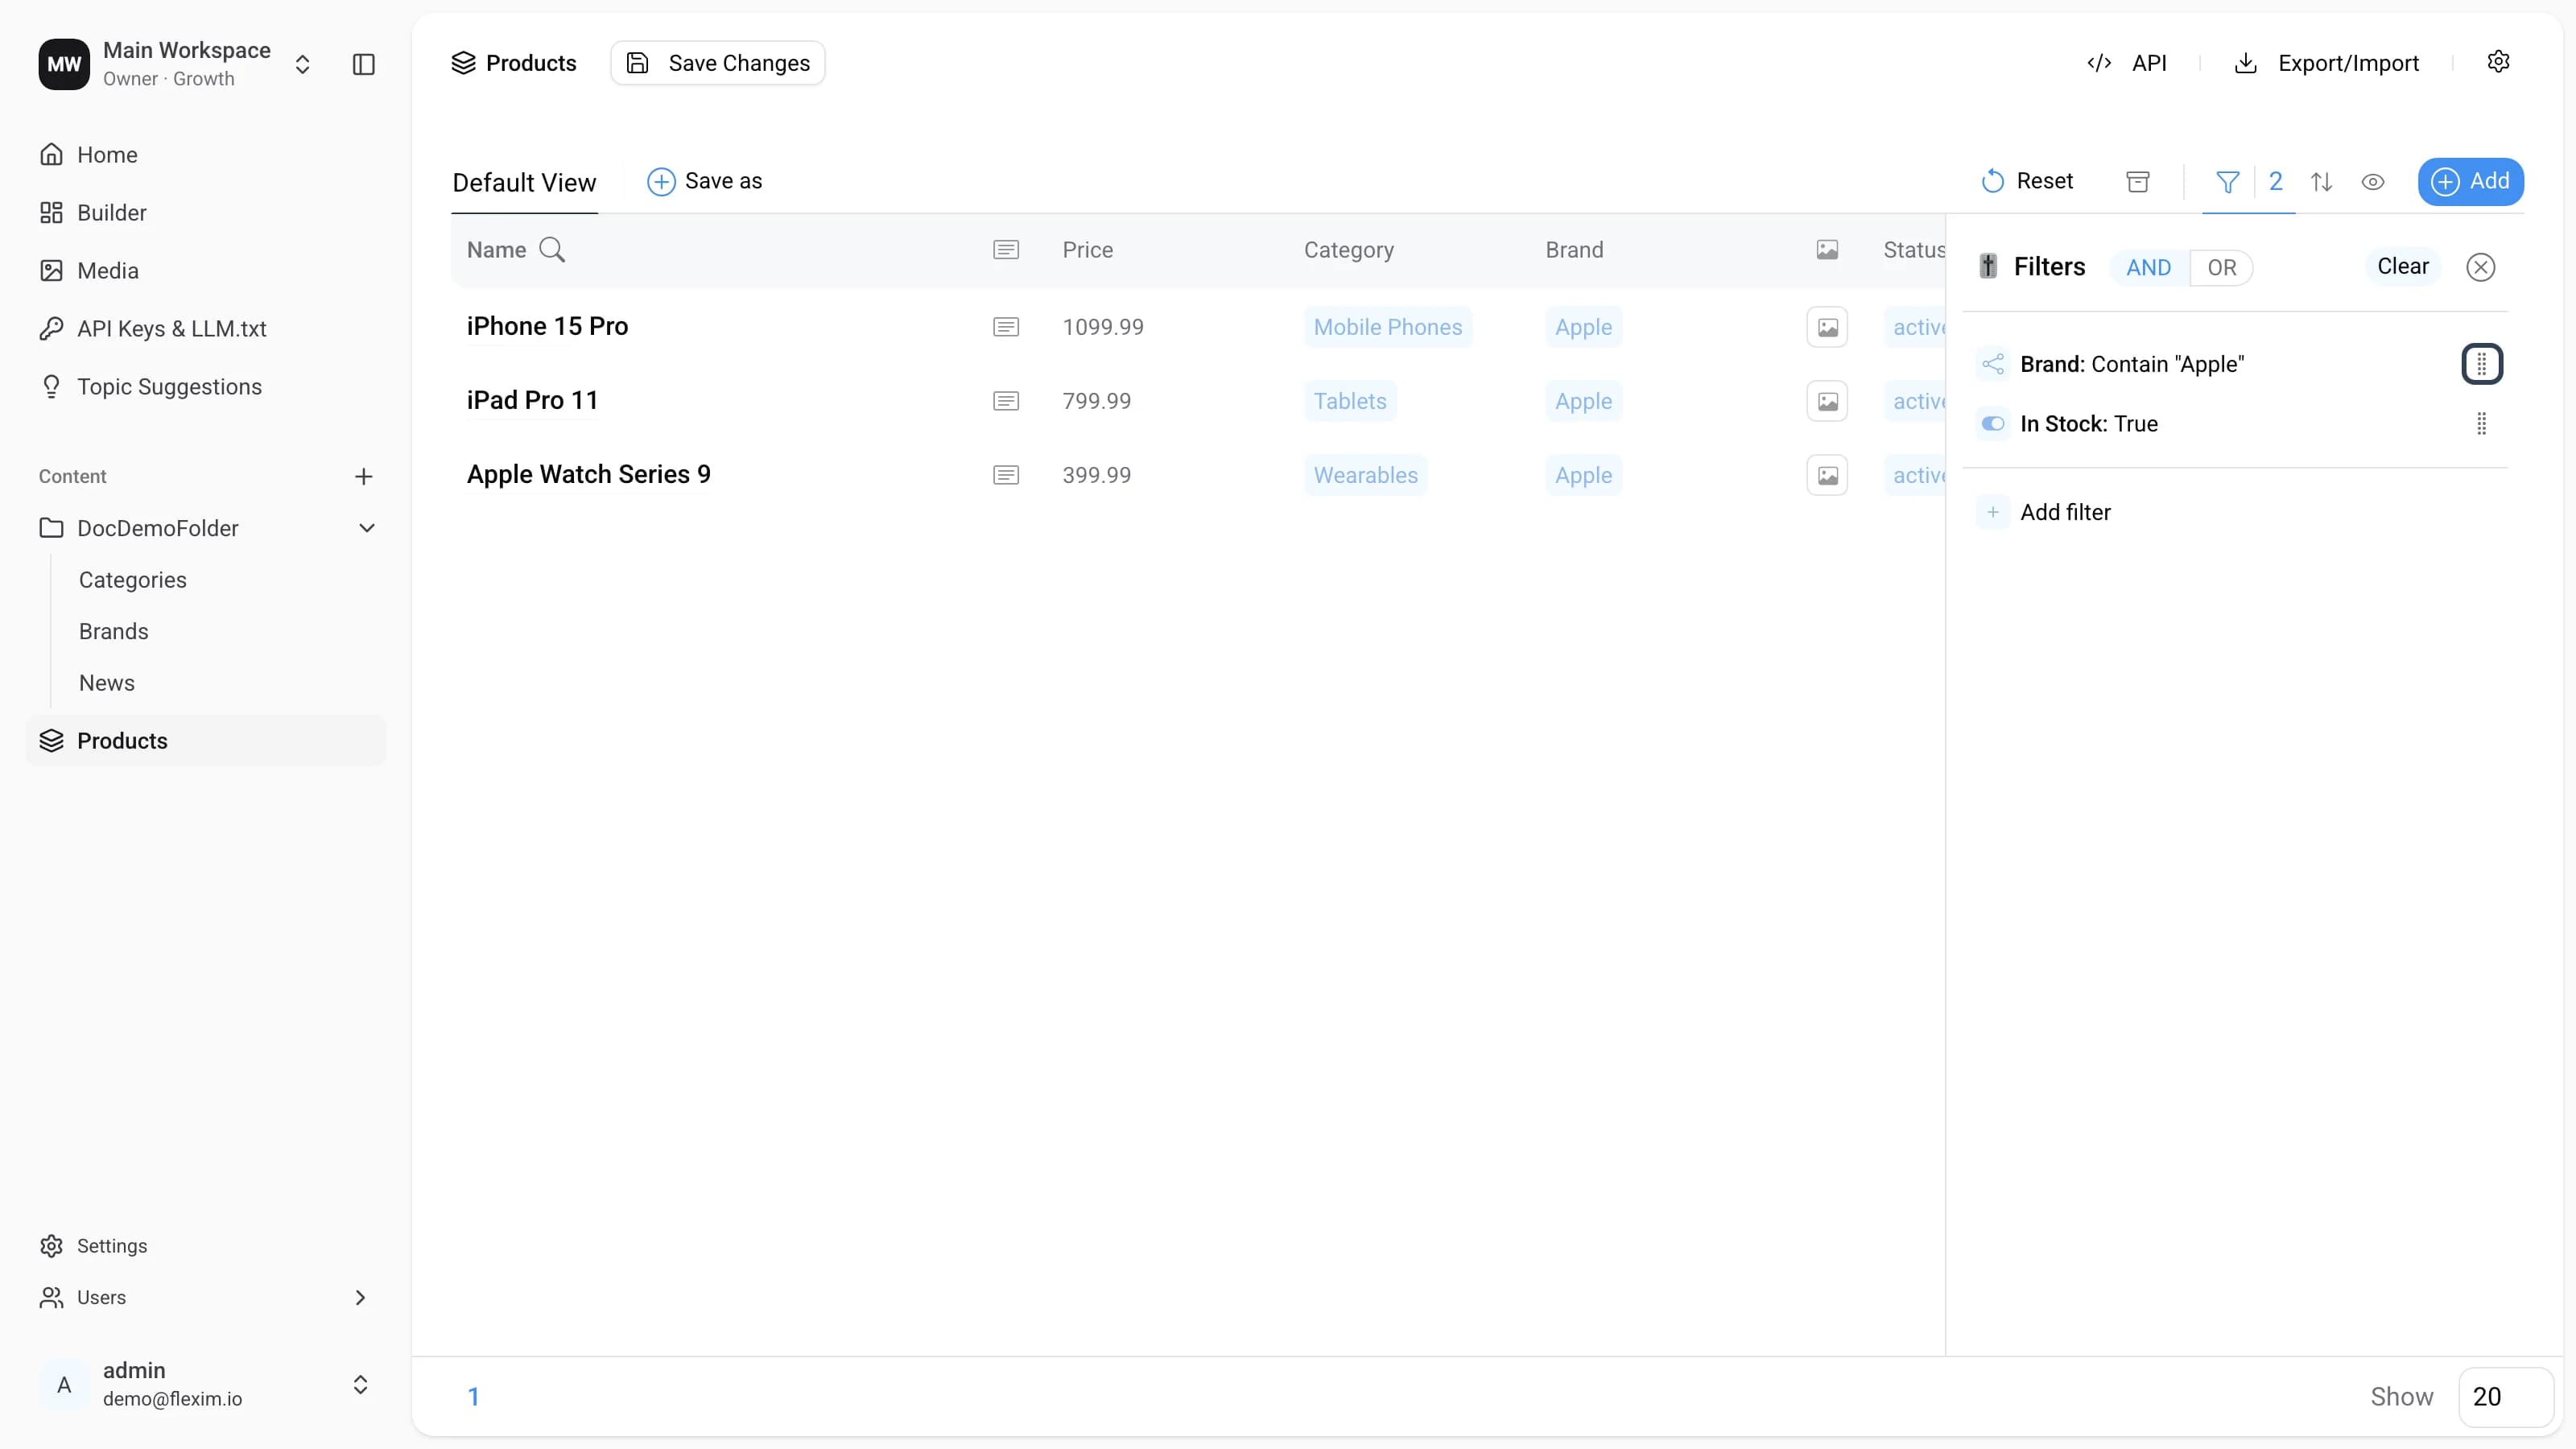
-
In the context menu, select
Group.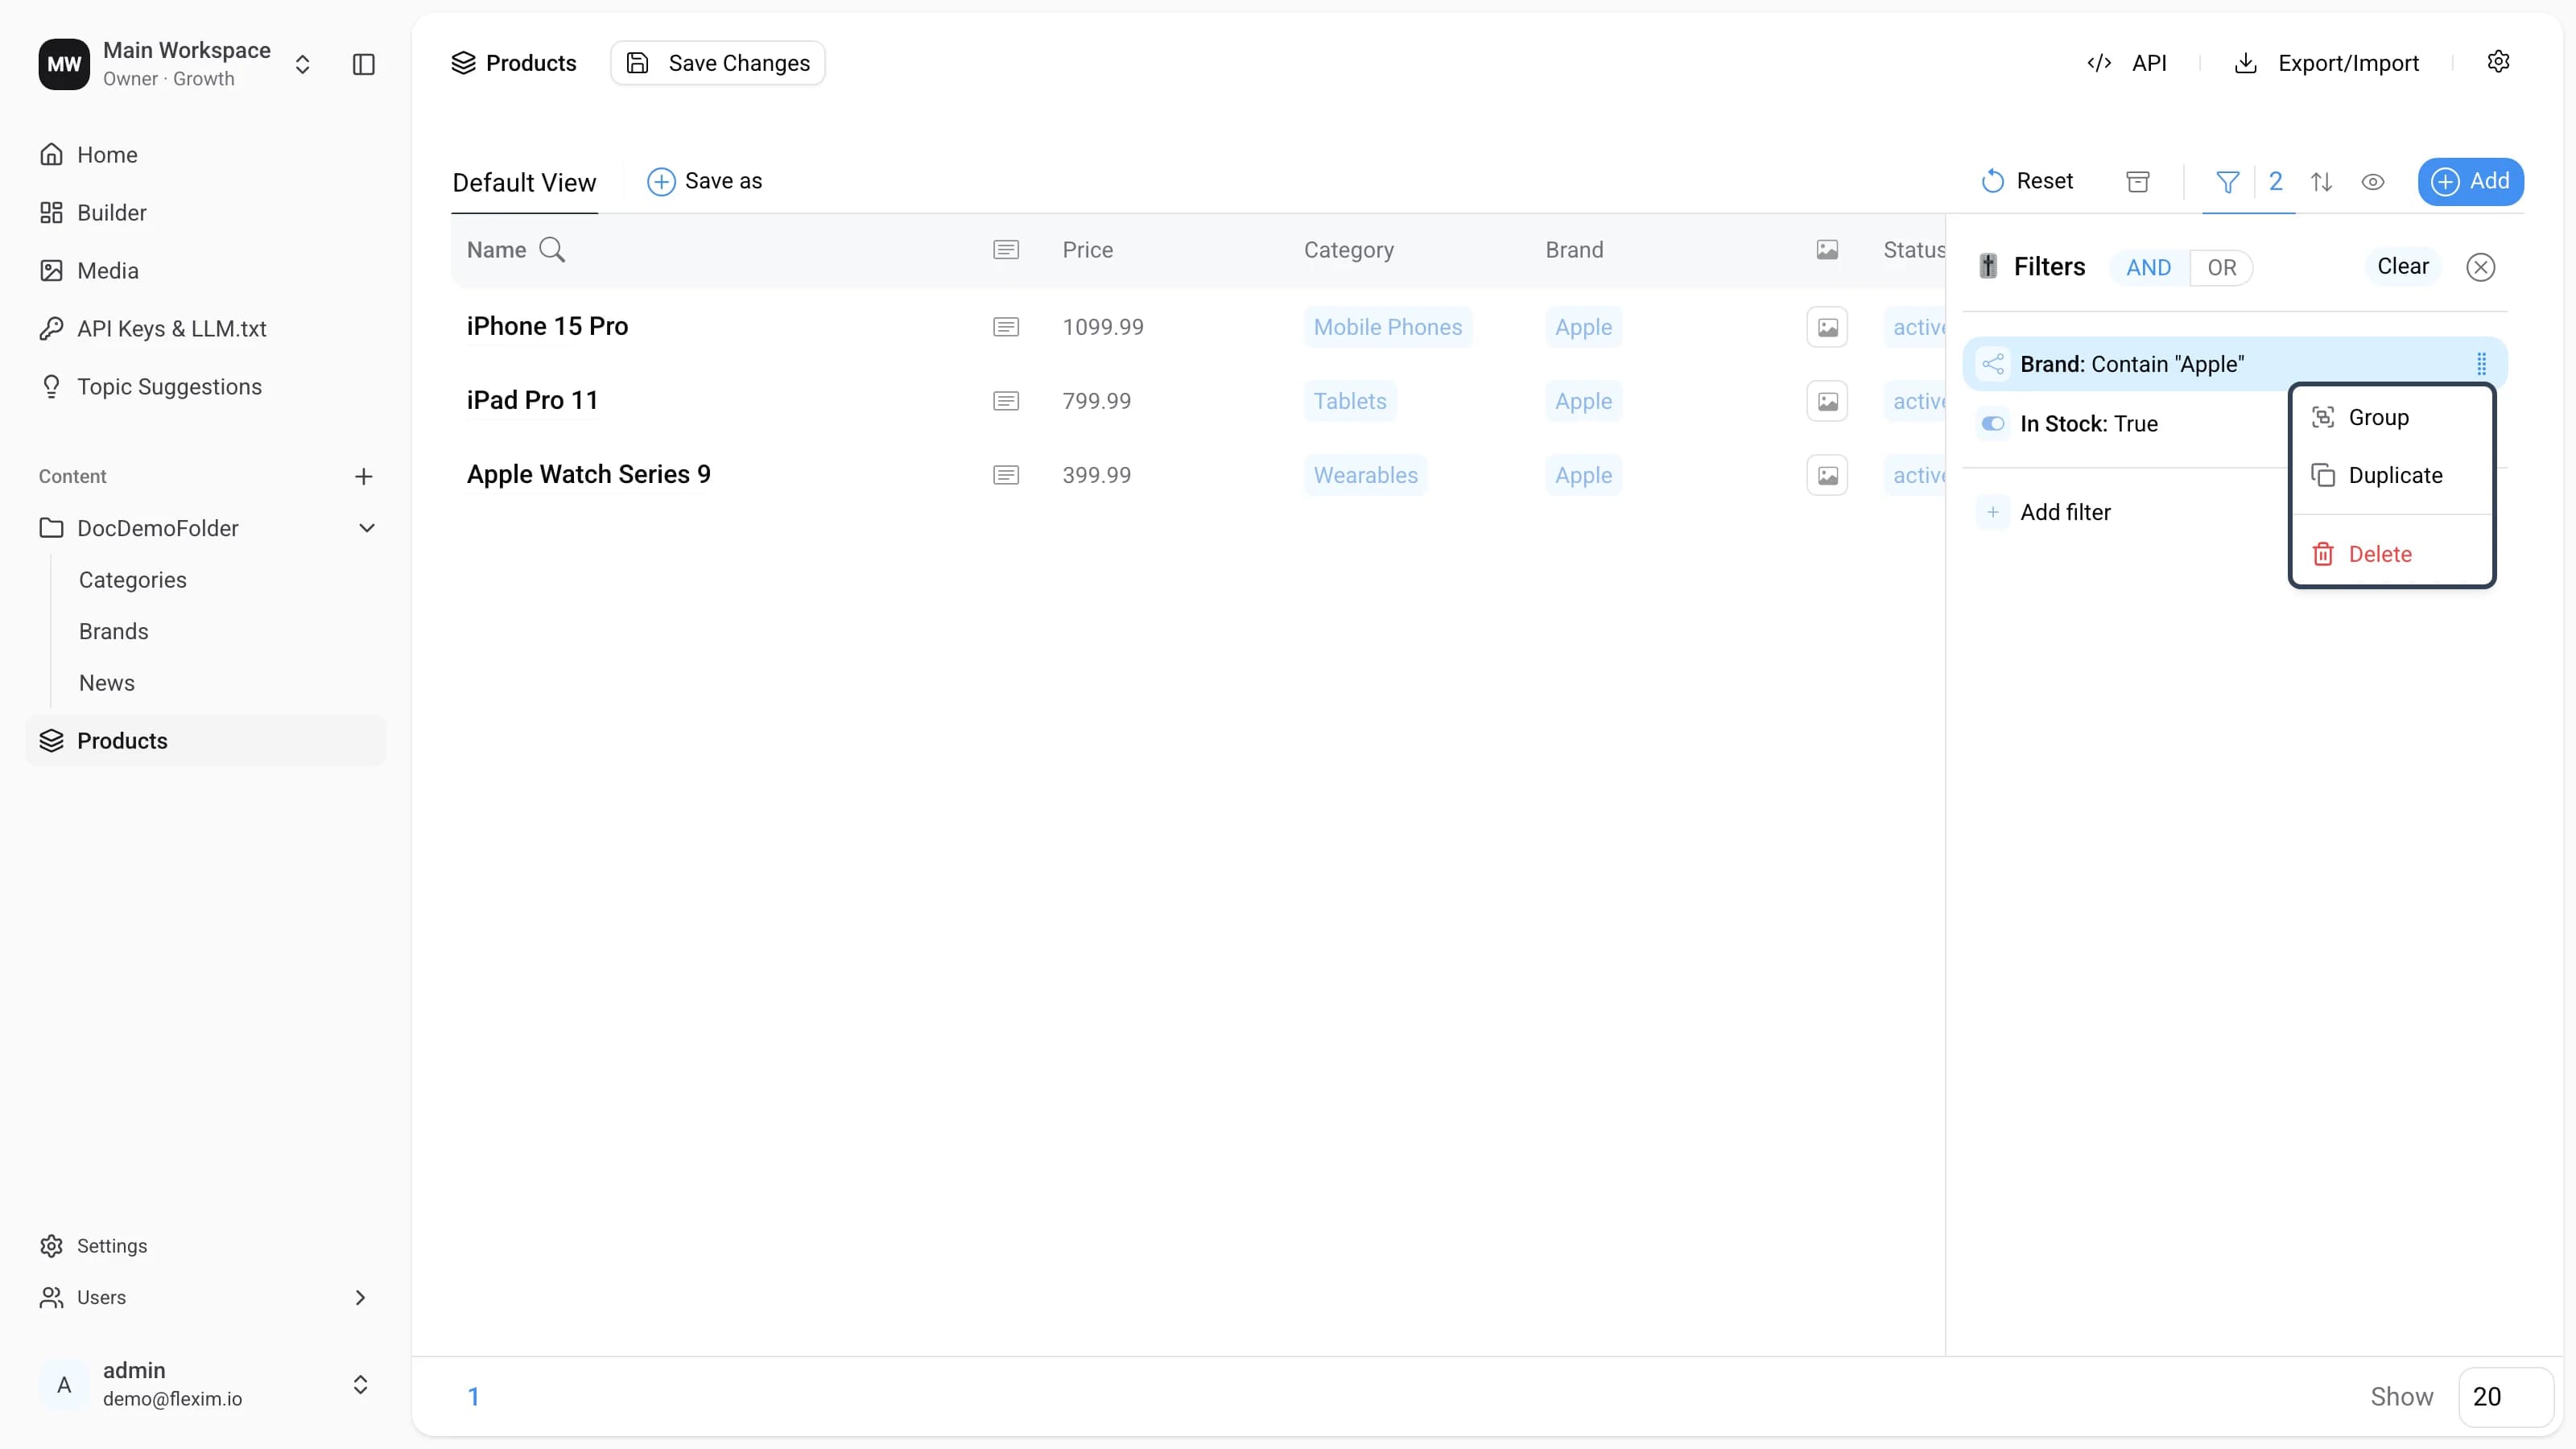
-
The group is created. Note: a new group is created with the
ANDmatch. We switch it toOR, because we want products from either of the two brands.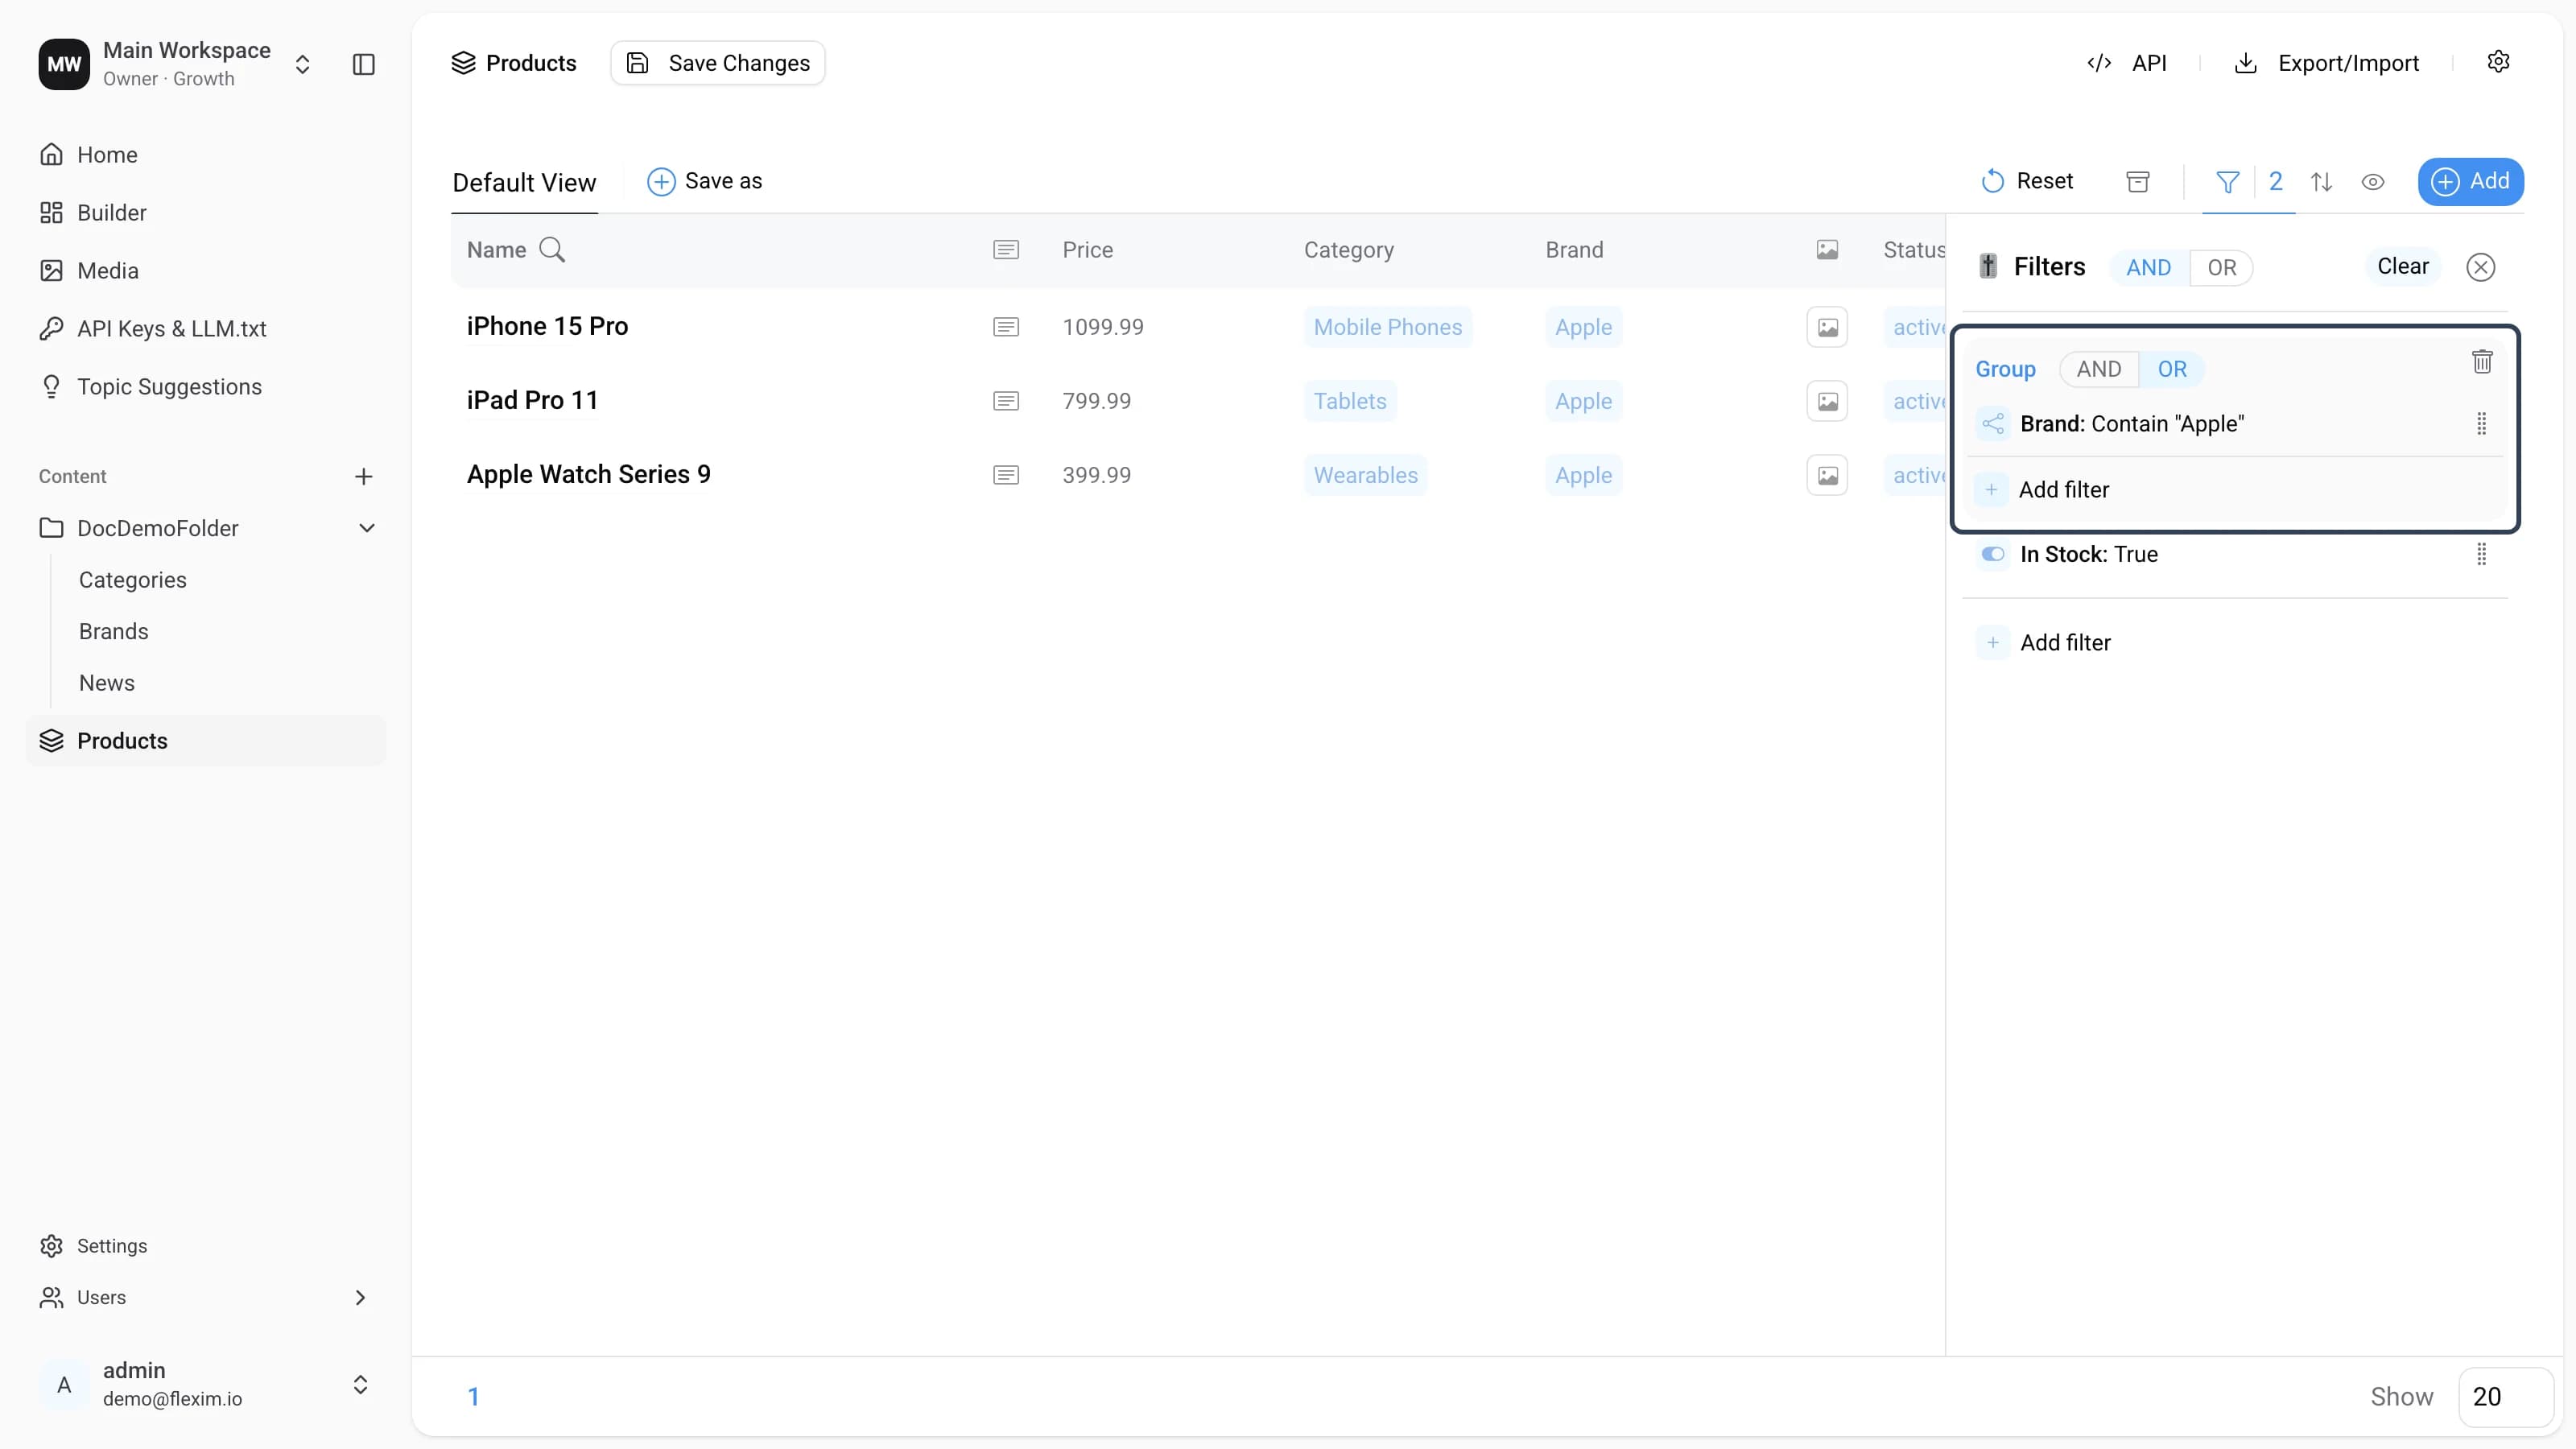
-
Now we need a second brand condition. You can add one with
Add filterinside the group, or by duplicating the existing filter. Let's use the second option — open the filter's context menu (inside a group it has onlyDuplicateandDelete) and selectDuplicate.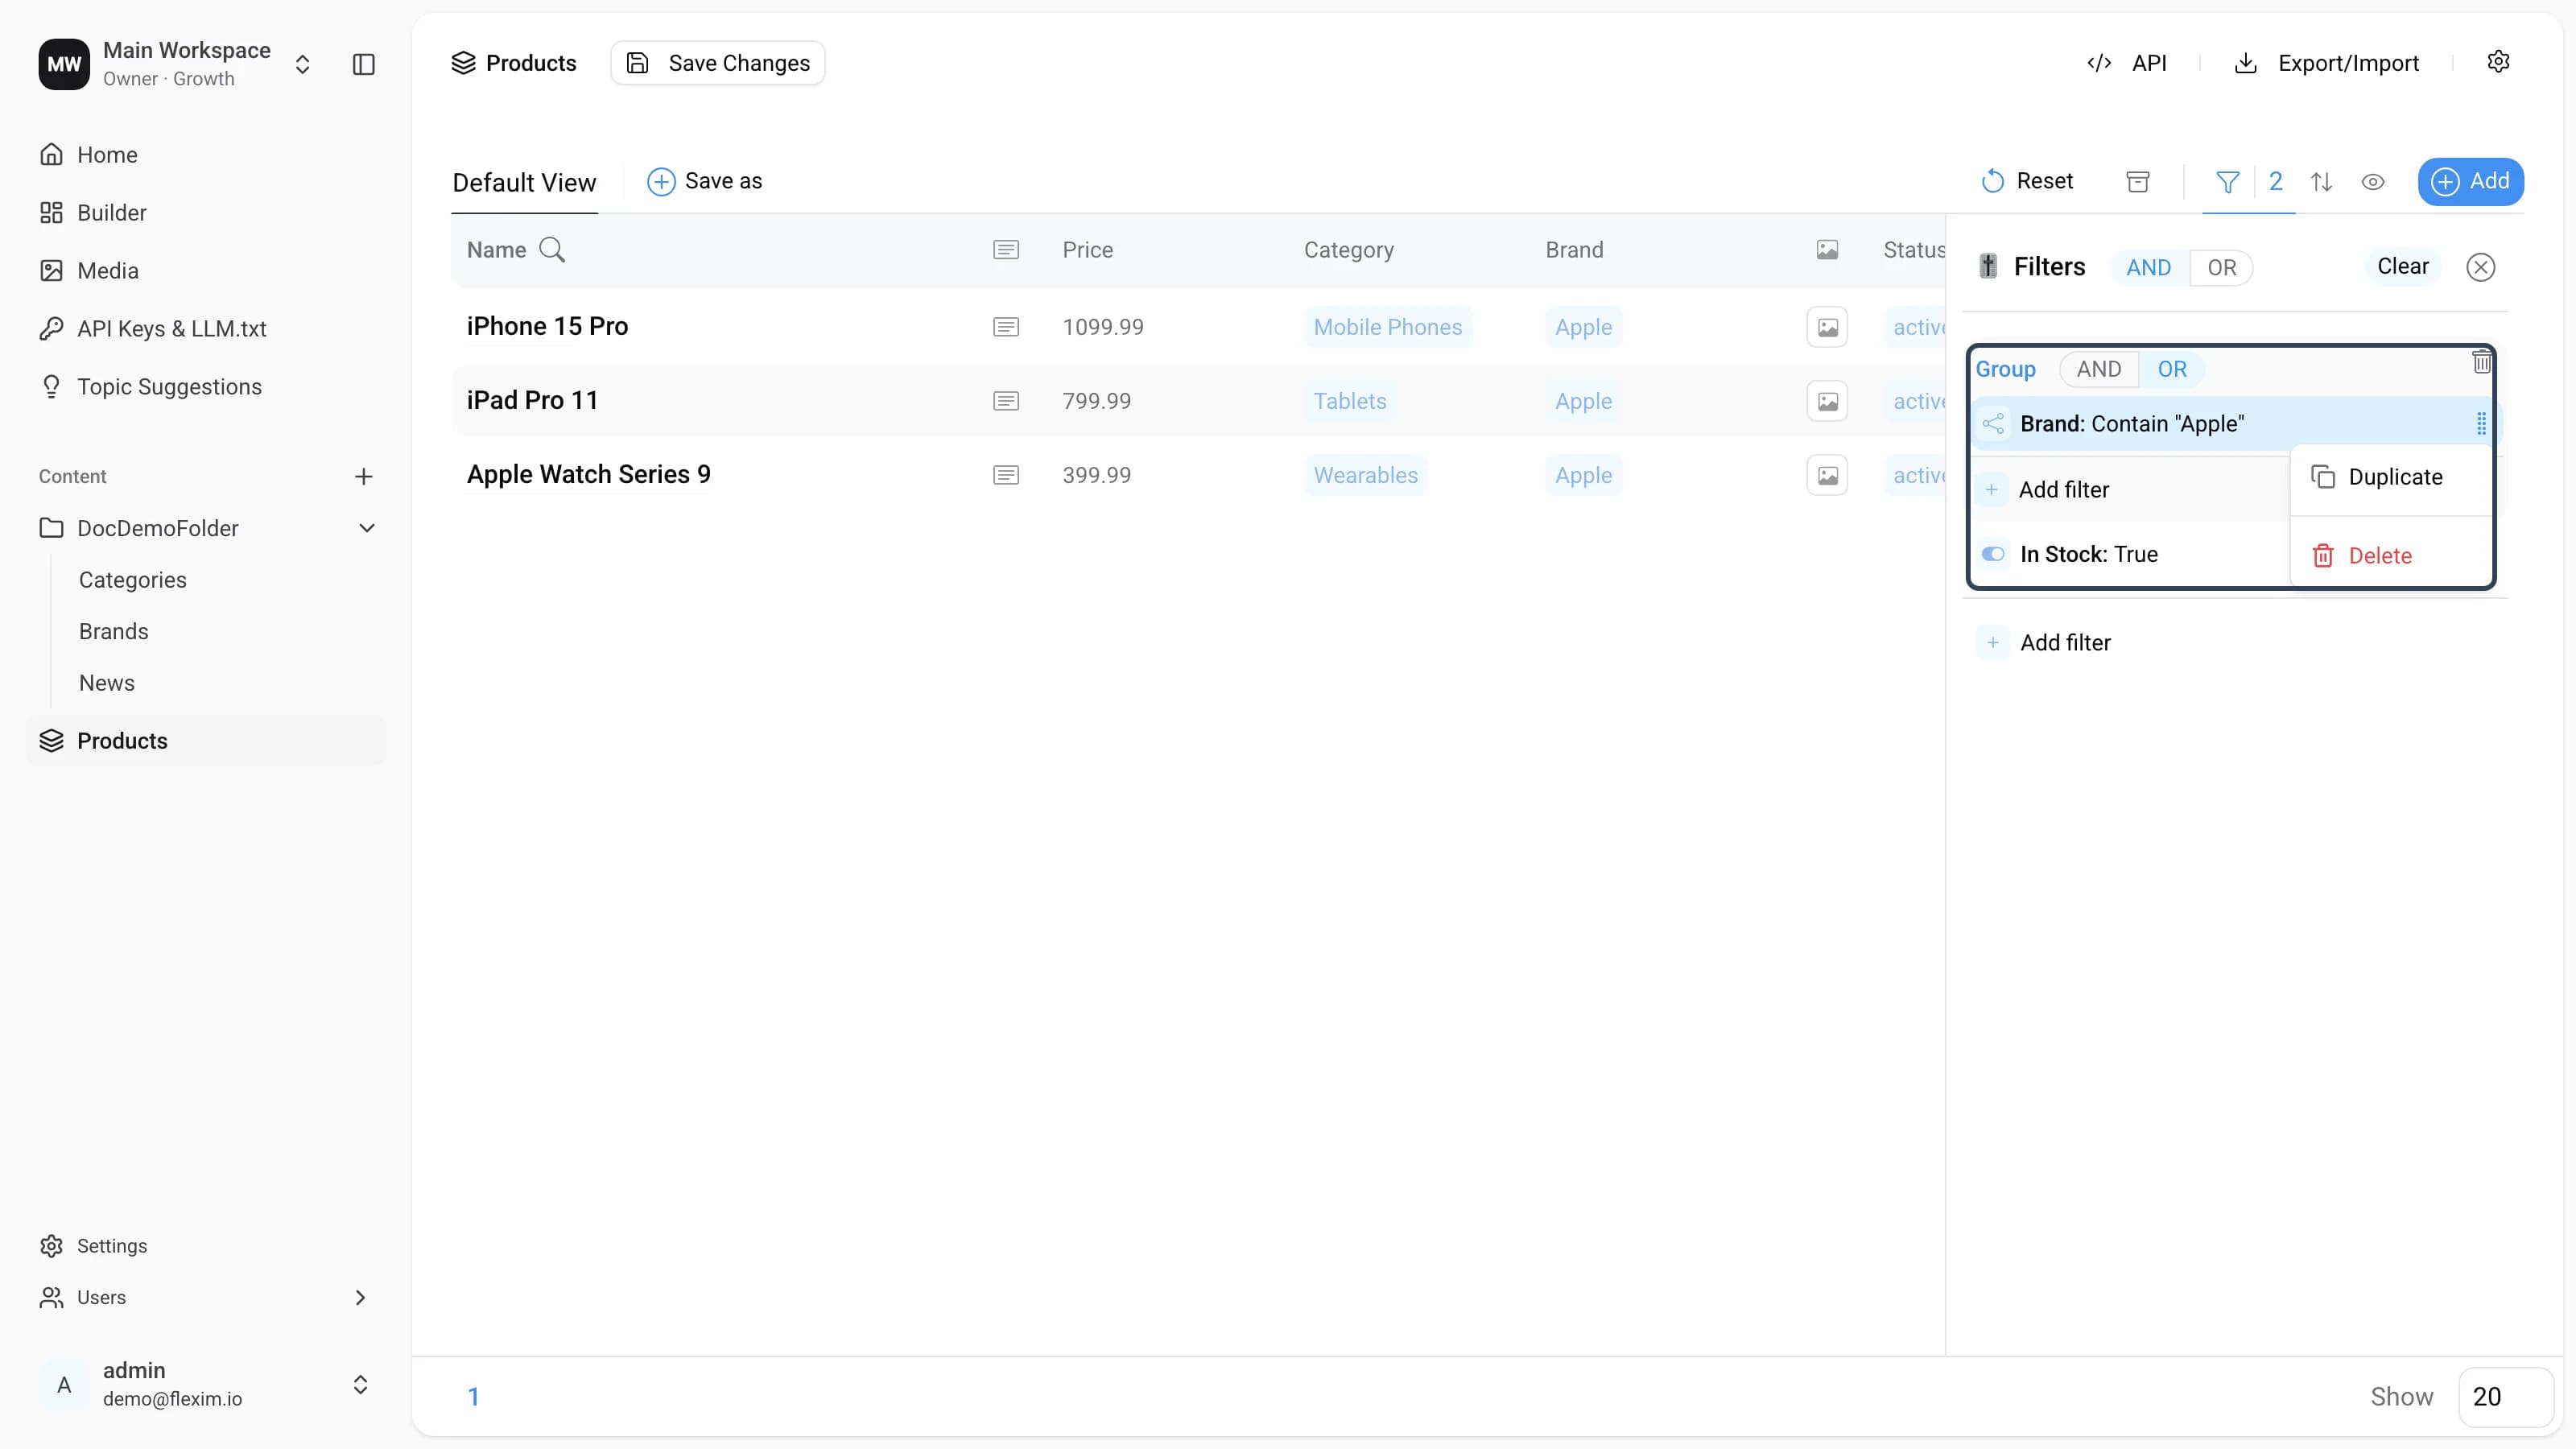
-
The filter is duplicated and opens in edit mode.
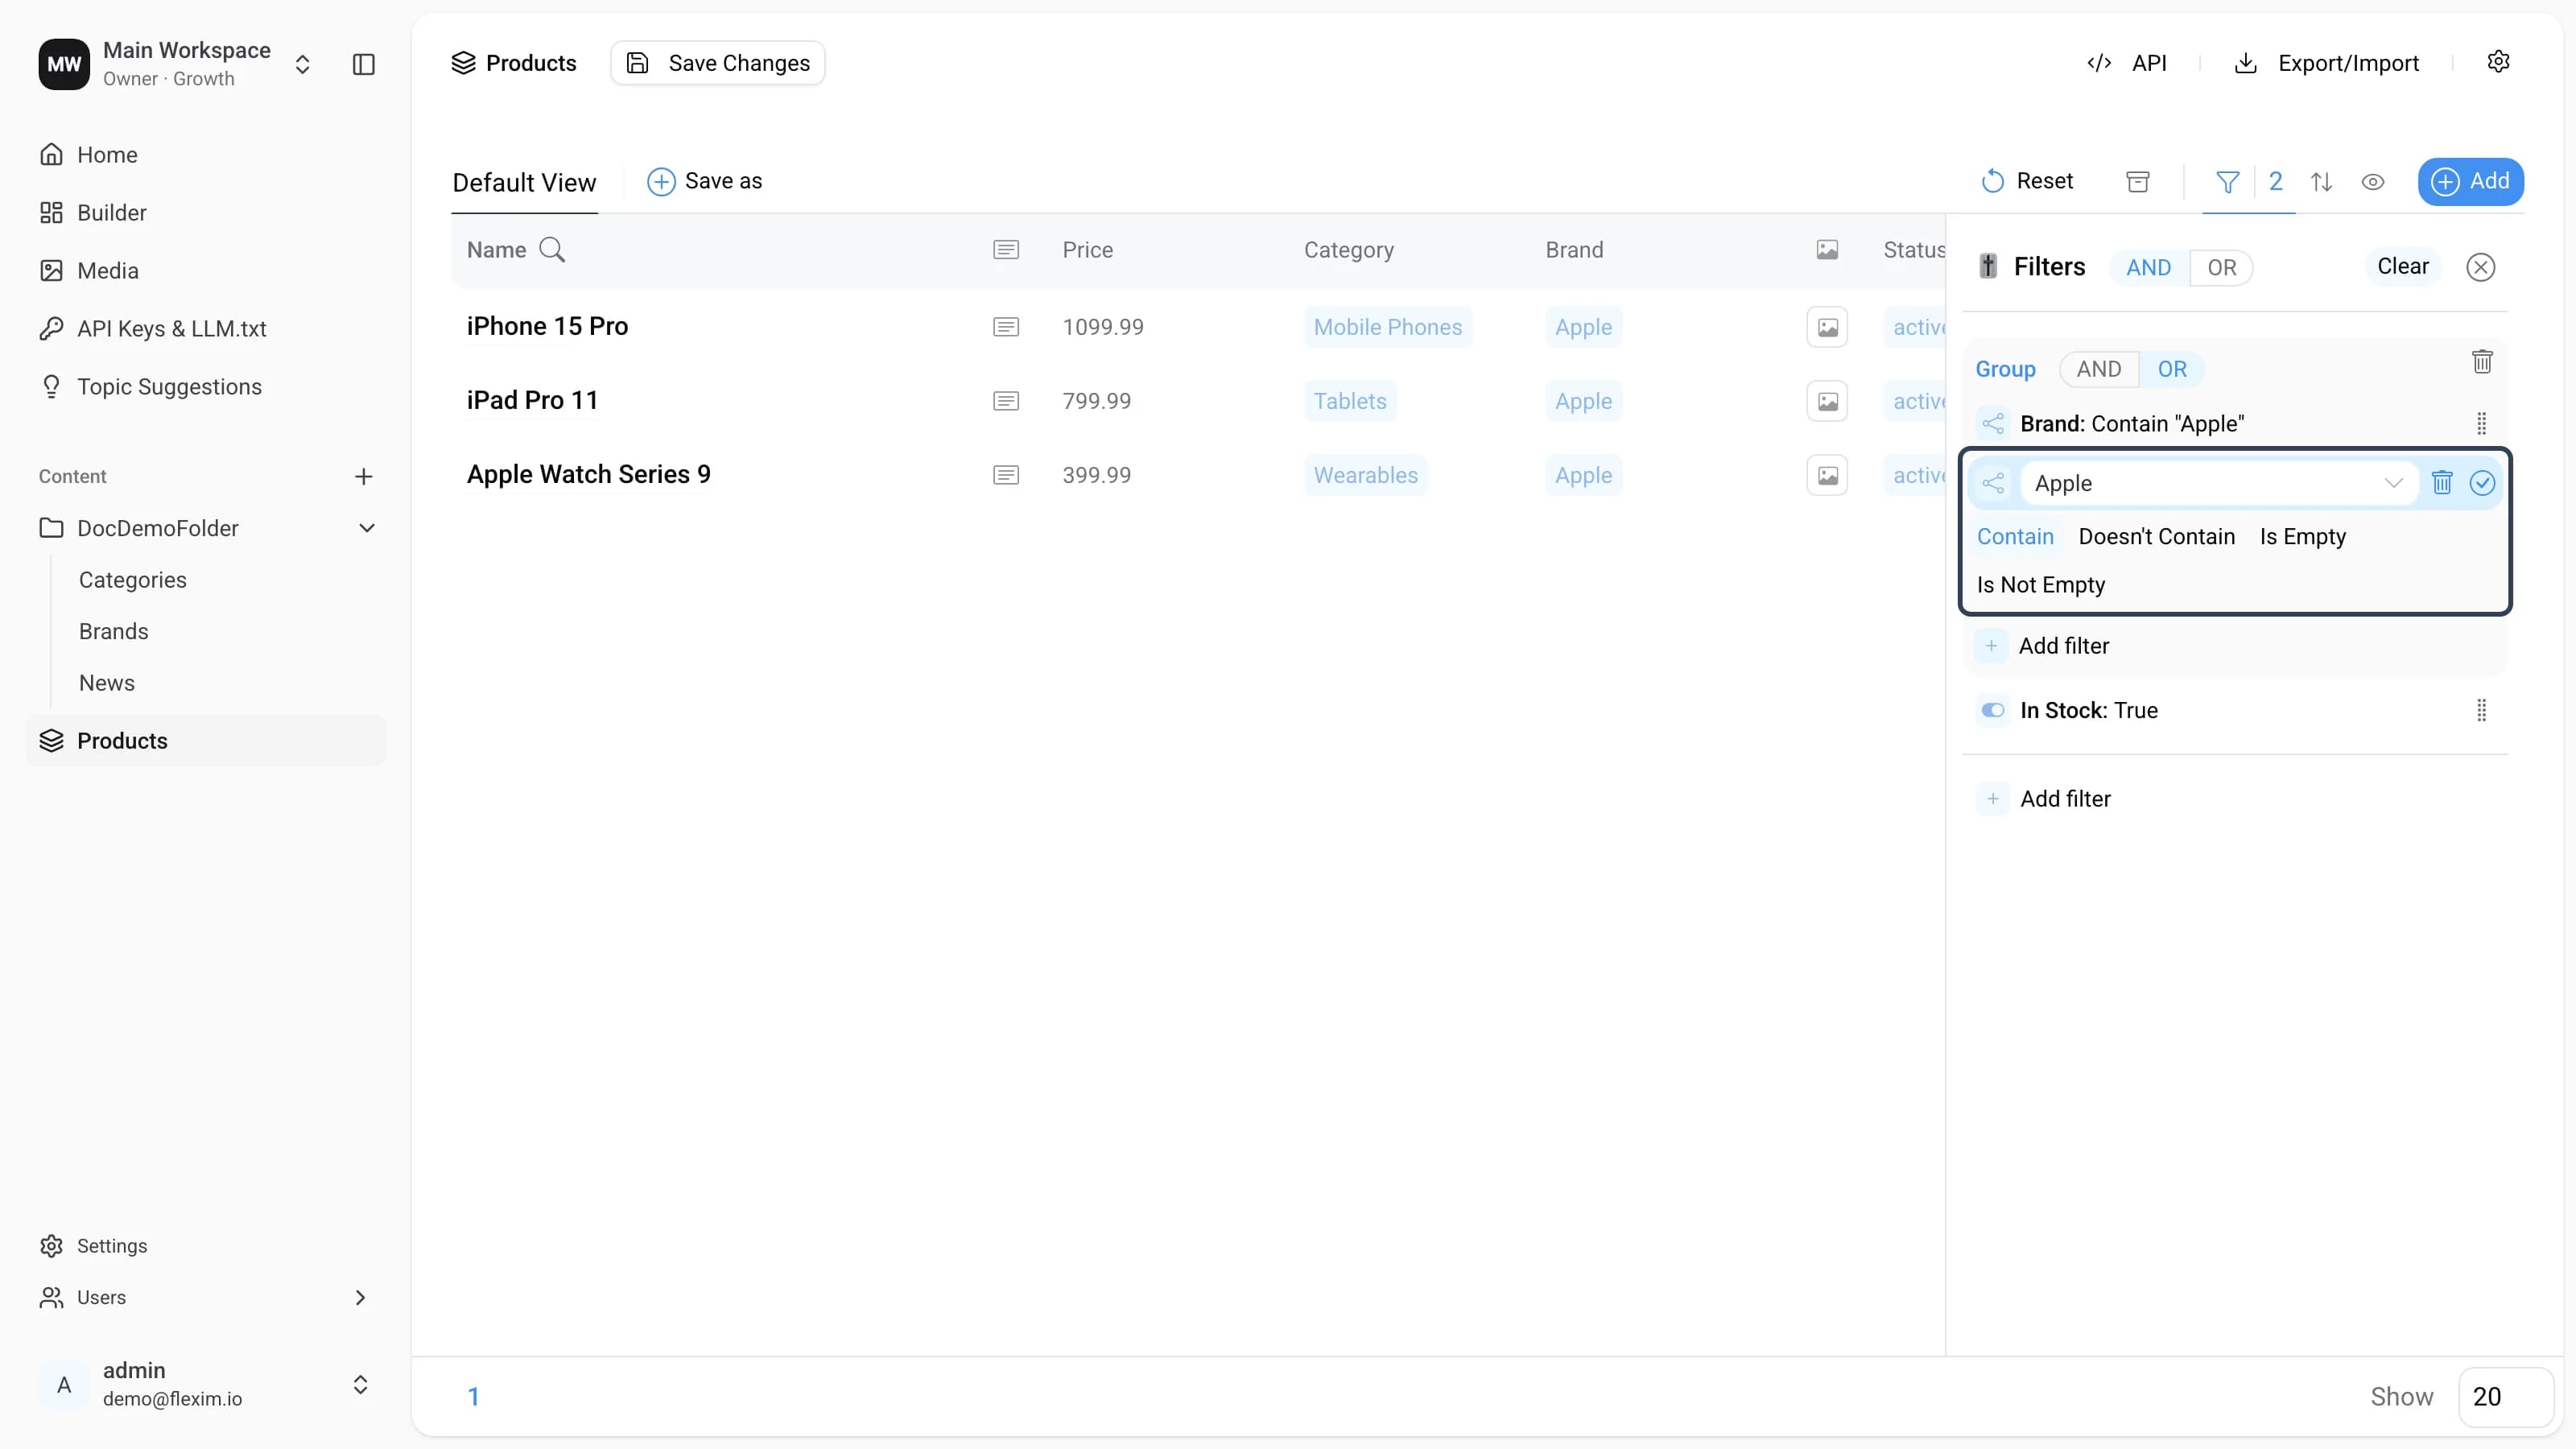
-
Keep
Contain, choose theSamsungbrand and click✓.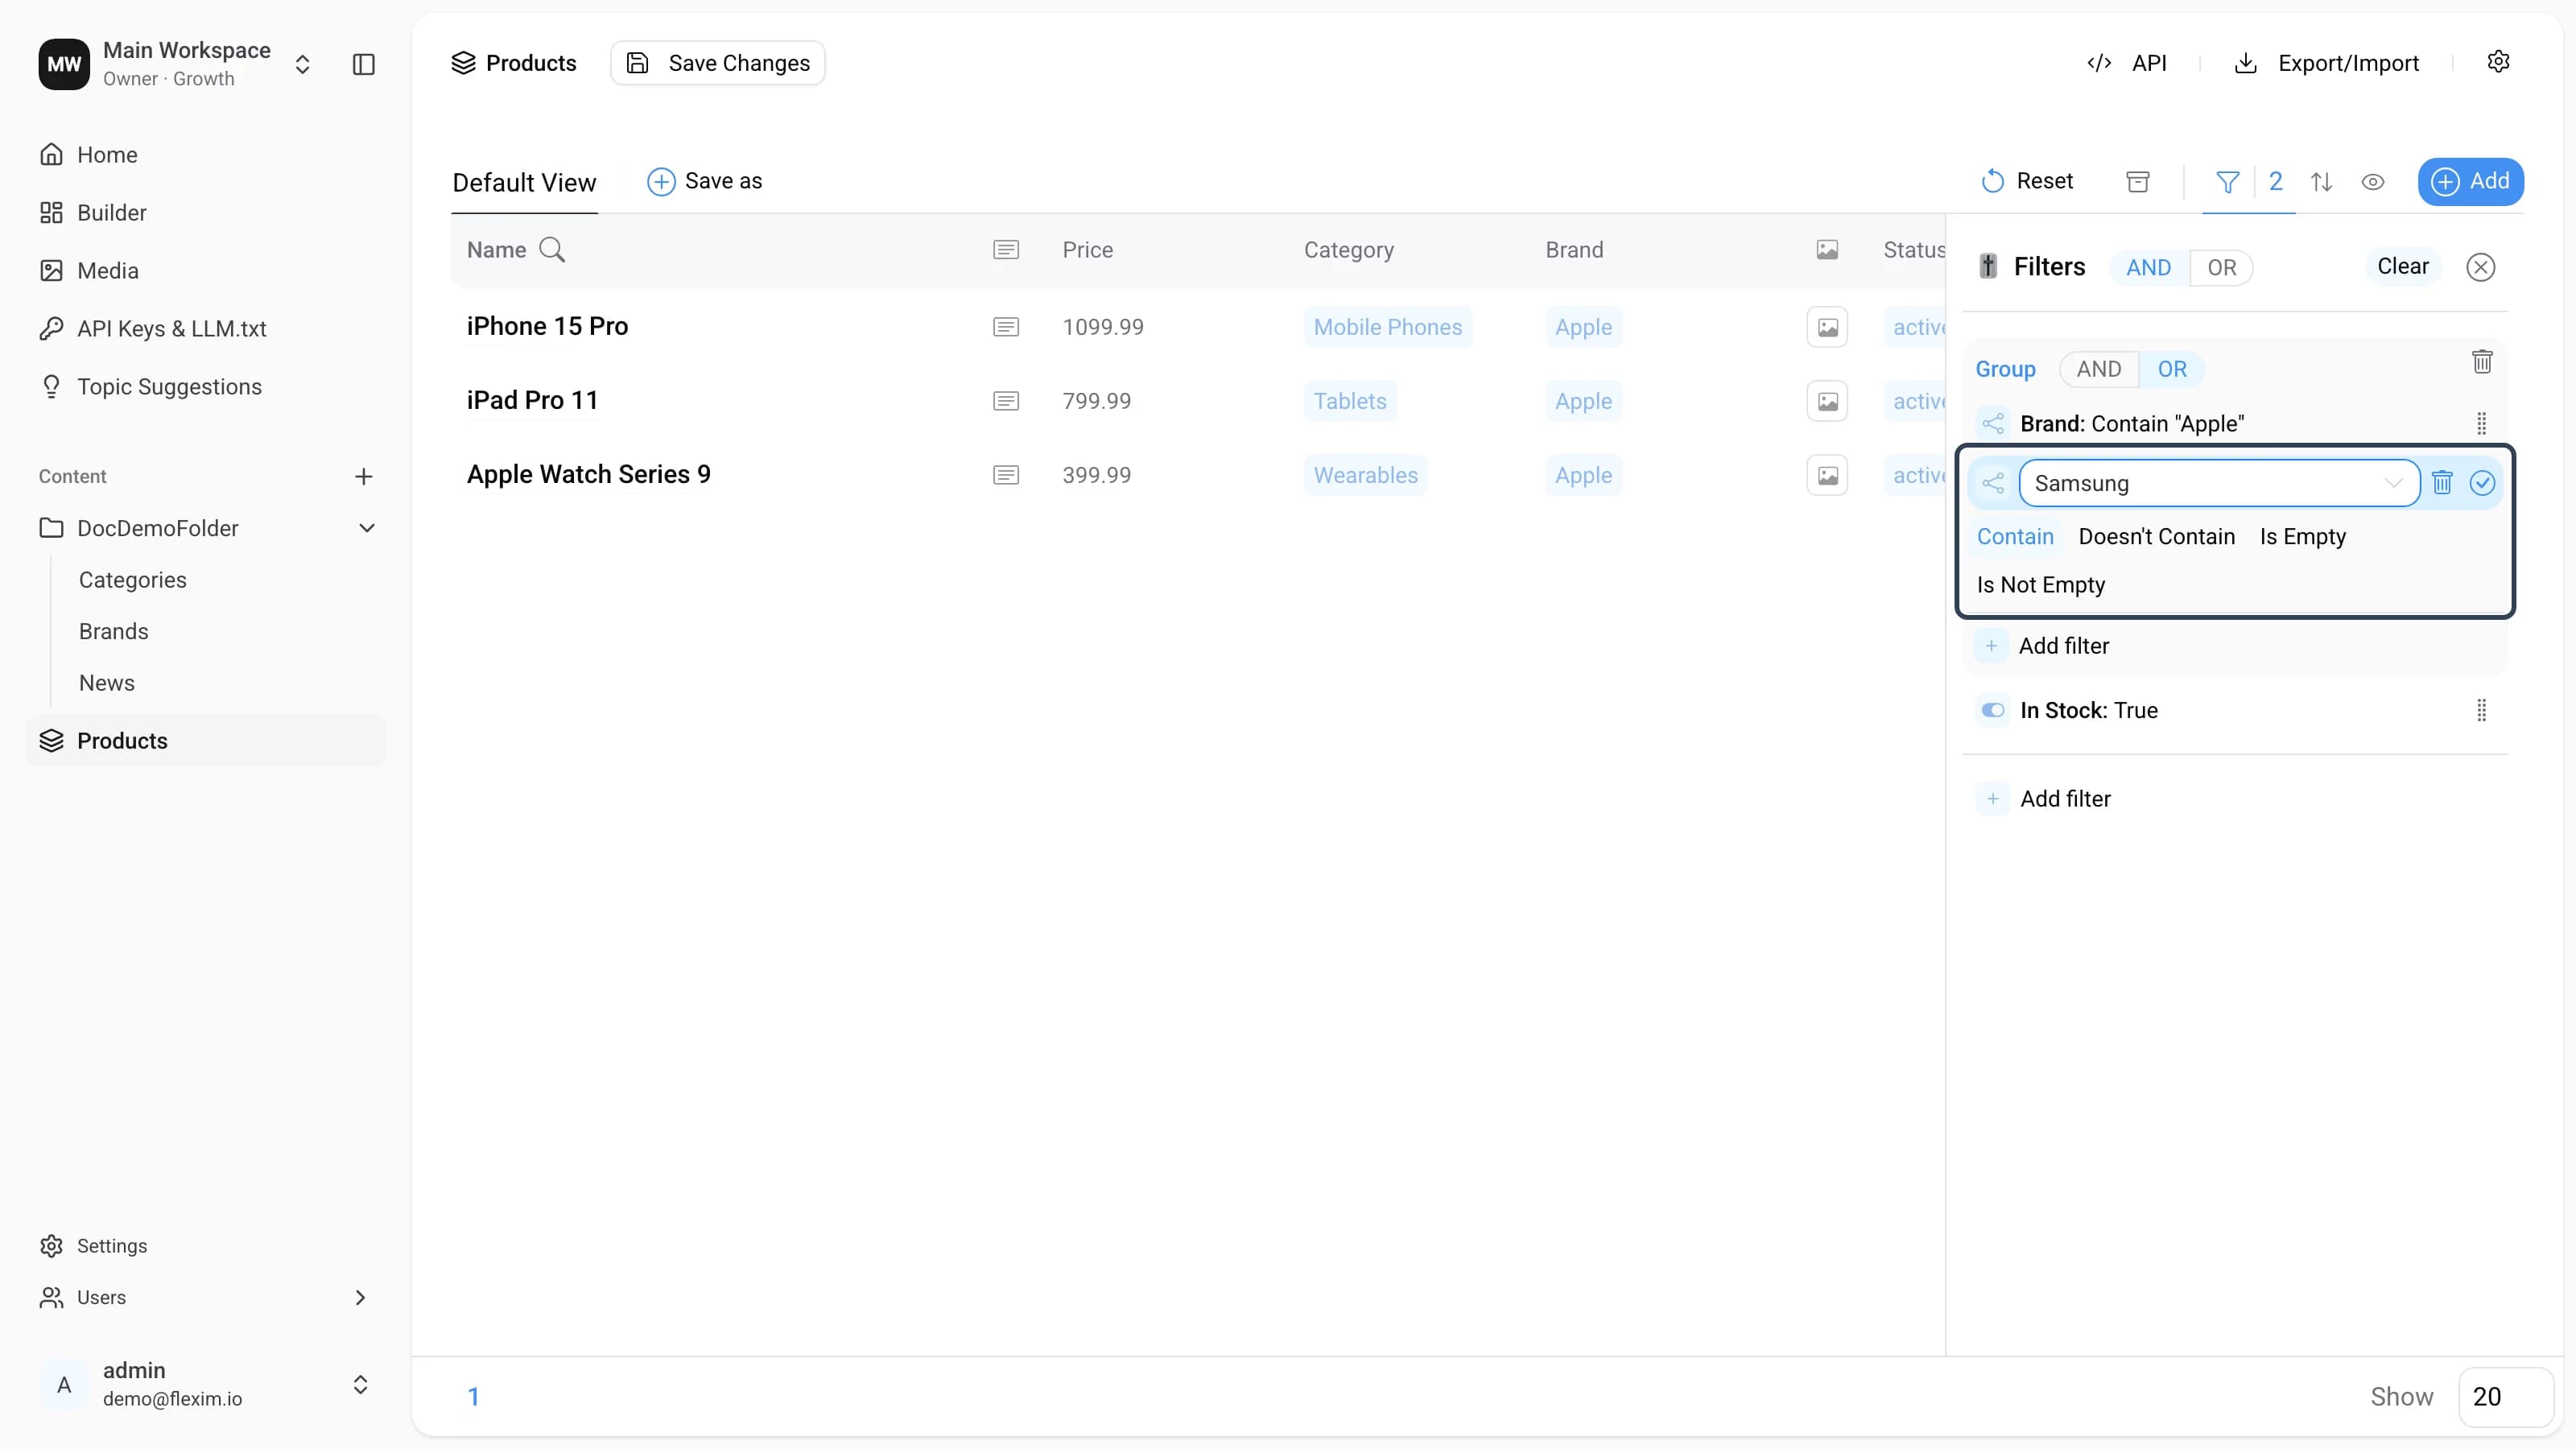
-
Done! The panel now reads
Brand Contain "Apple"ORBrand Contain "Samsung", combined withIn Stock: True— so only in-stock products from Apple and Samsung are shown.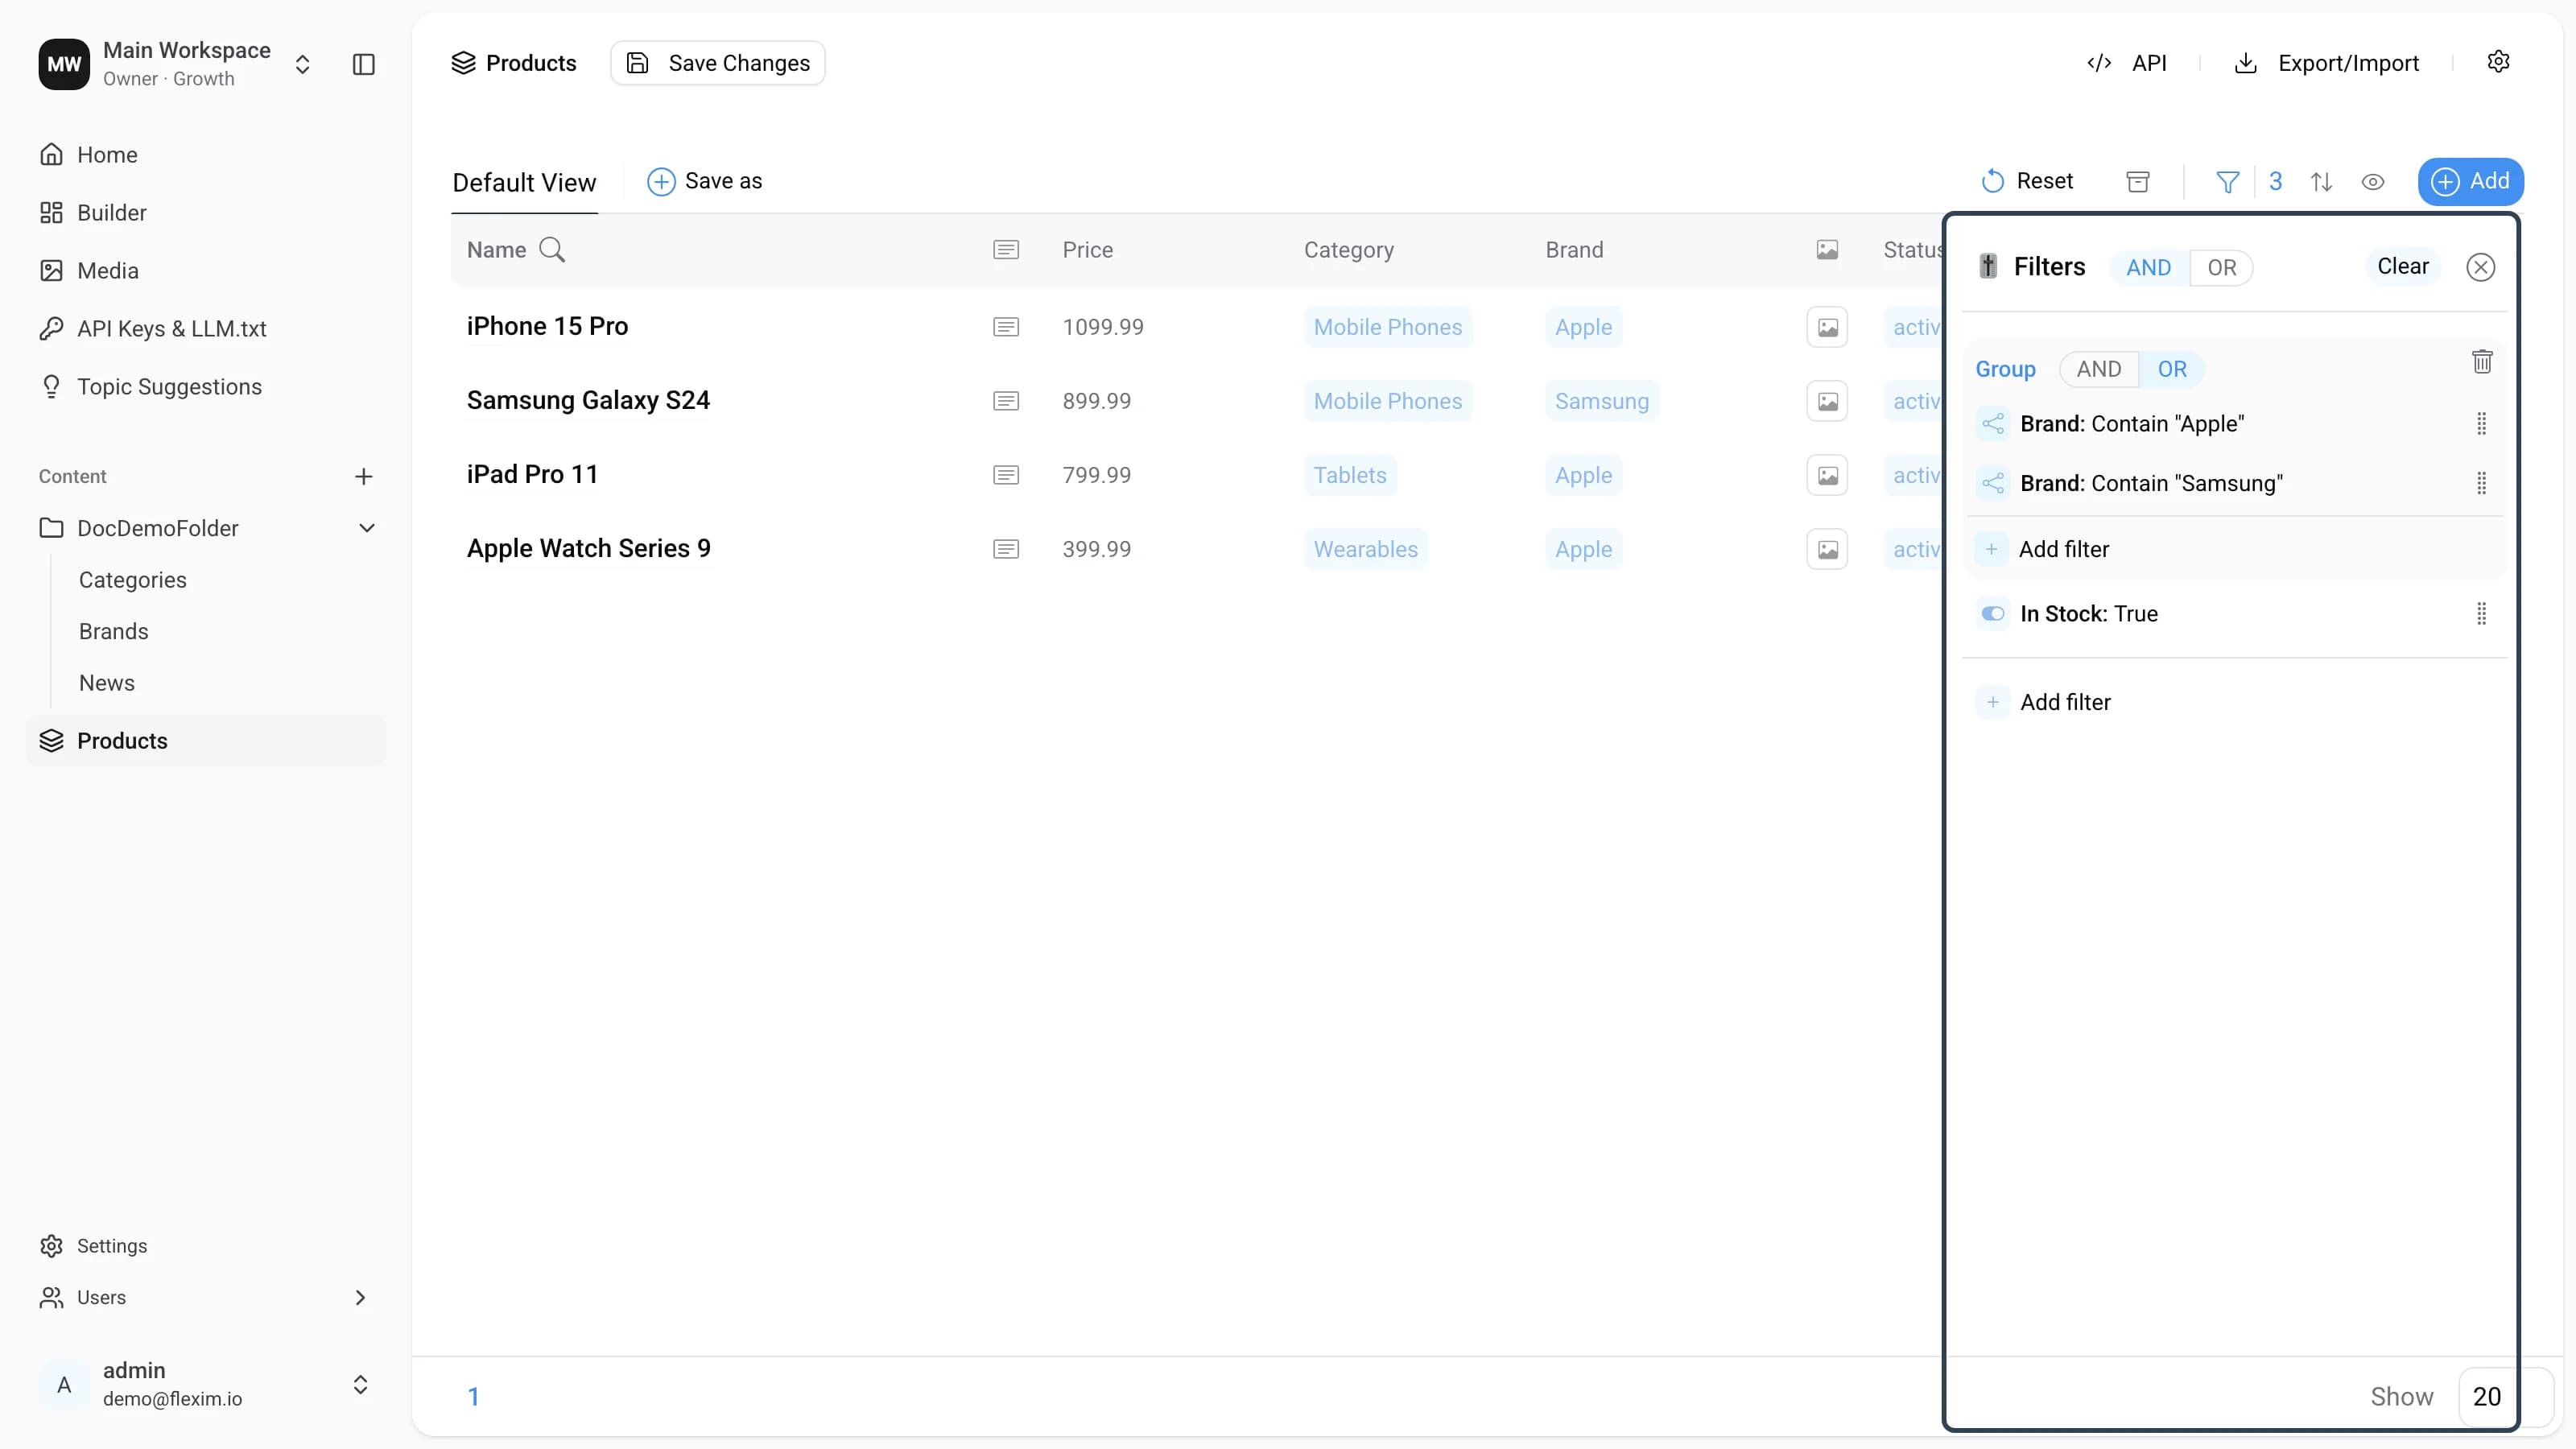
Edge cases
-
Deleting the last filter inside a group doesn't delete the group — you can still add new filters to it. To remove a group, click the trash icon in its header.
-
If you add a new filter and then close the panel, add another filter, or start editing a different one without clicking
✓, the filter stays inactive. -
If you edit an active filter and switch away without clicking
✓, the filter stays active but your changes aren't saved. -
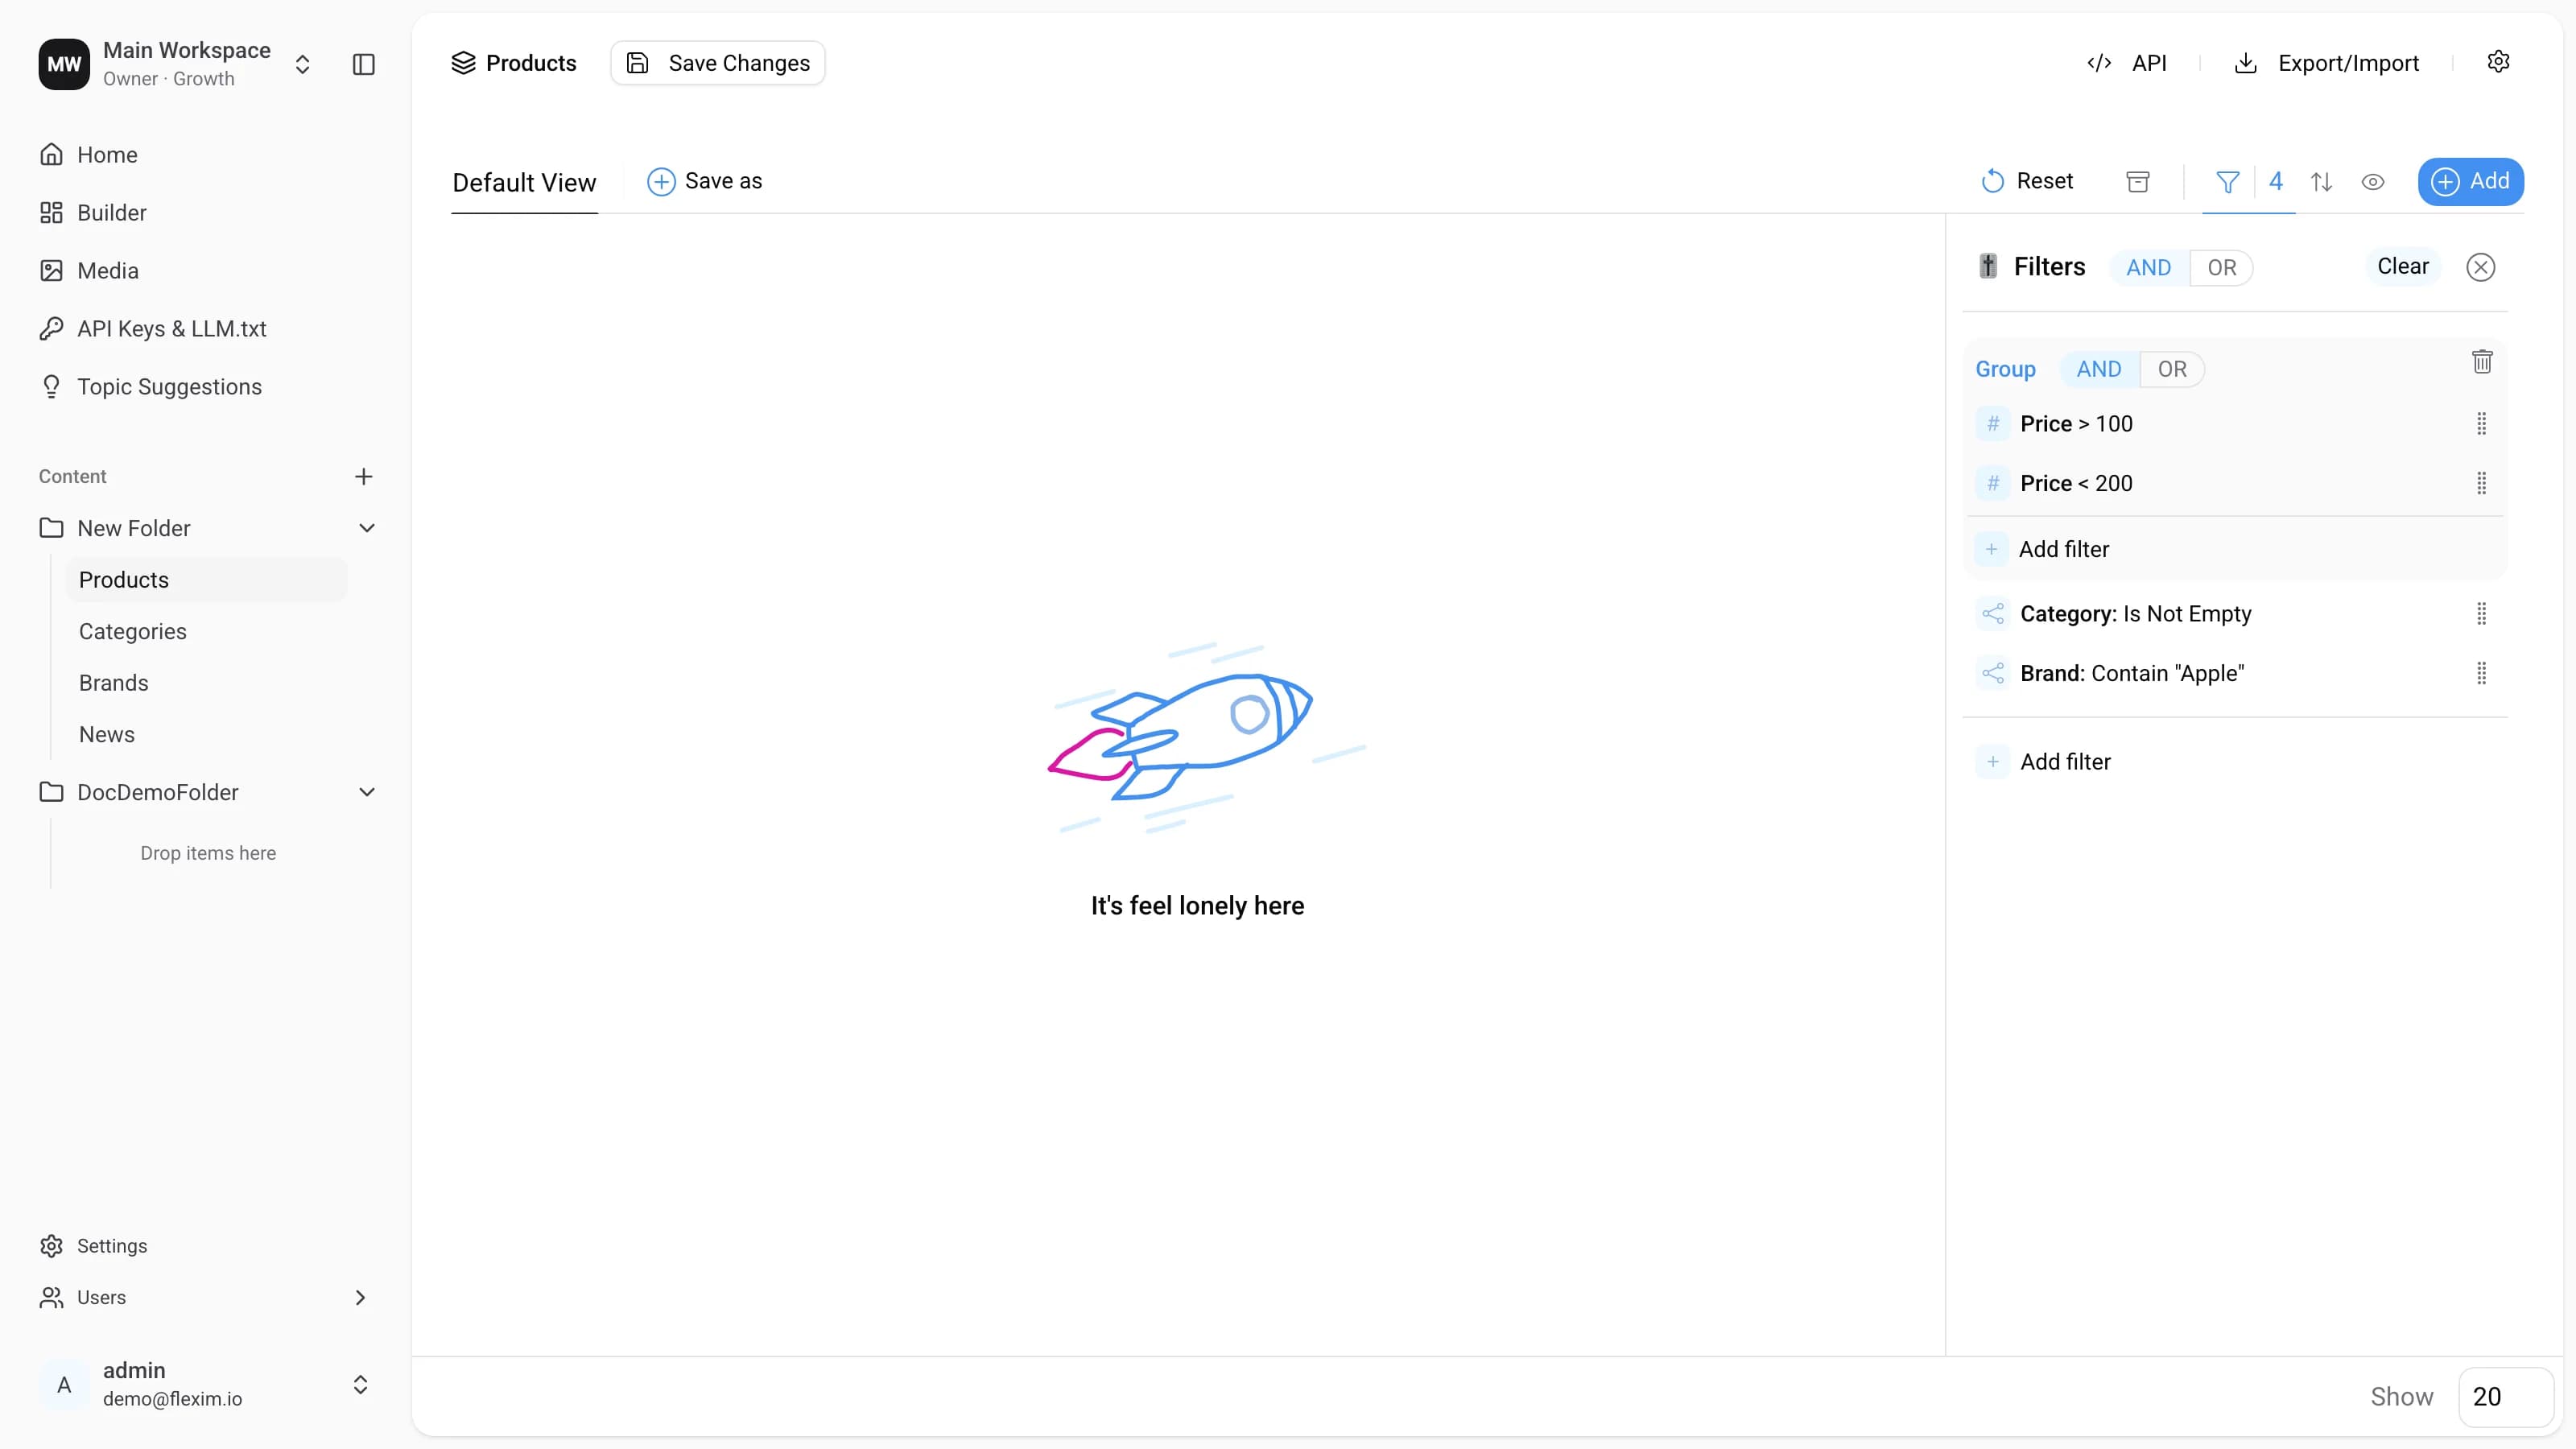
When no records match the filters, you'll see the following message.
Read more on this topic