Sorting
Sort Flexim collection records with one or more field rules and control how ties are resolved across multiple conditions.
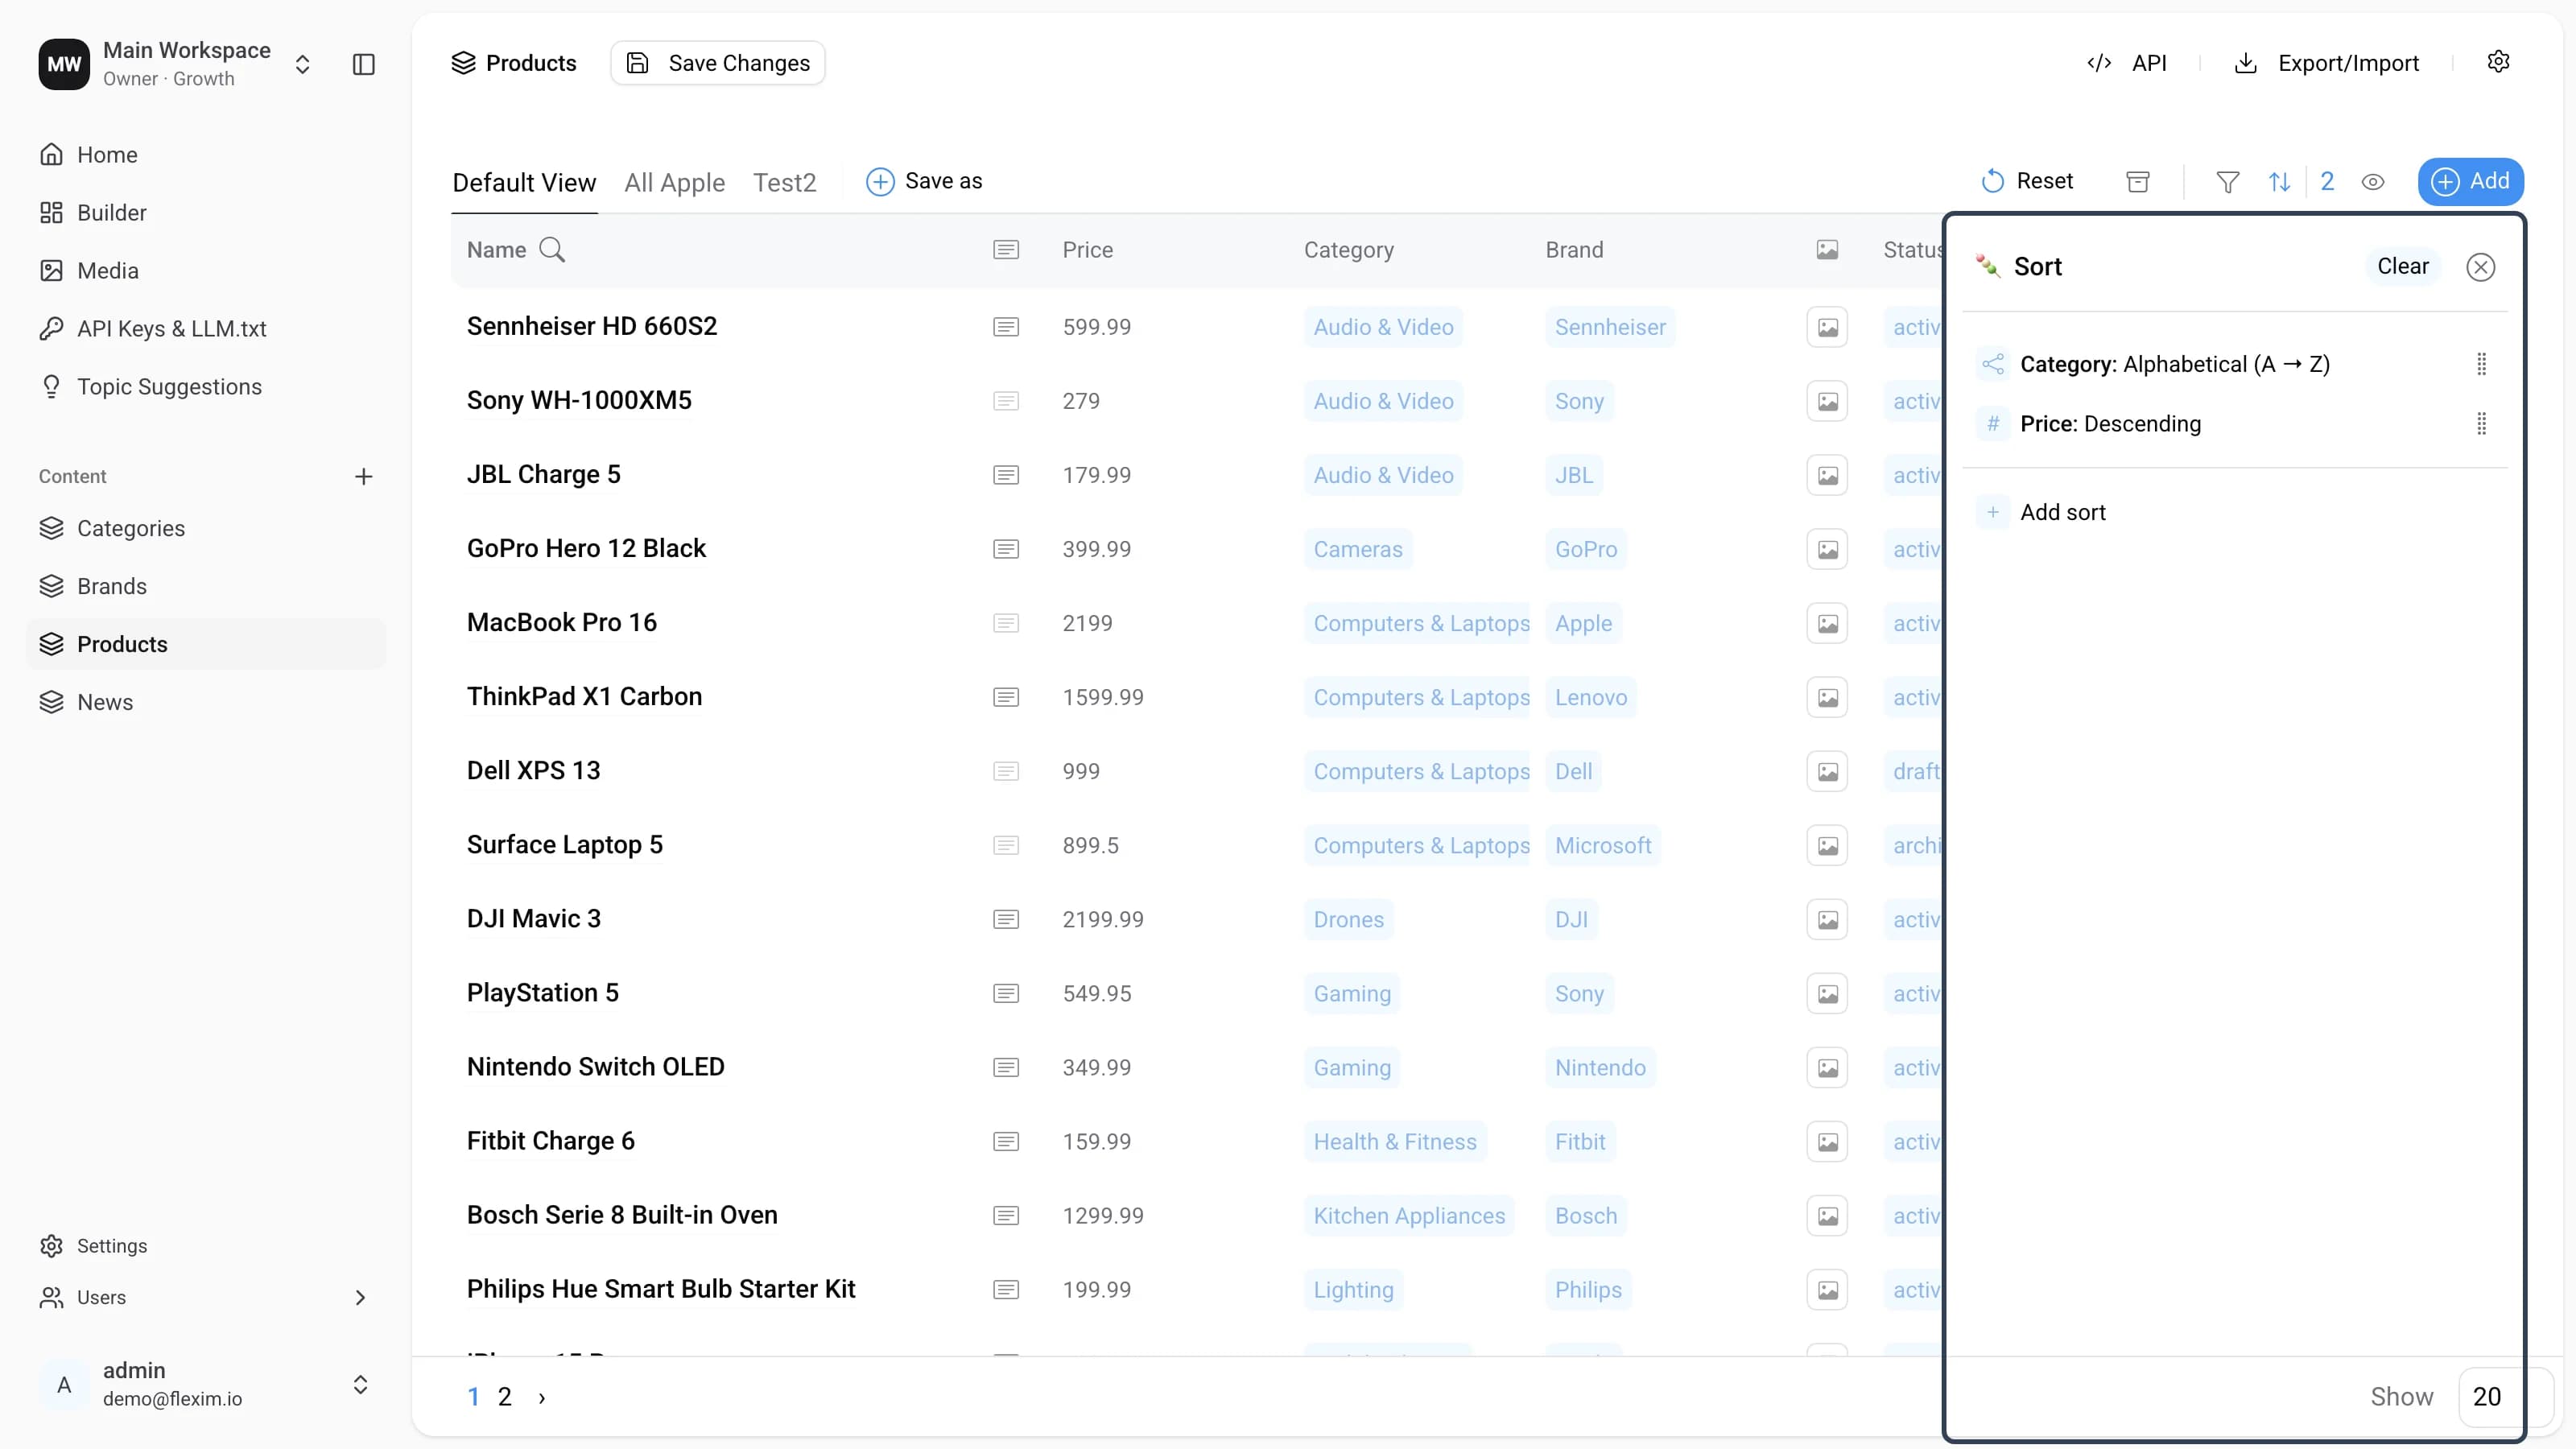
Sorting lets you arrange the records in a collection in the order you need. You can build multi-level sorting by adding several sort conditions: records are ordered by the first rule, and any ties are broken by the next rule, and so on.
Main elements
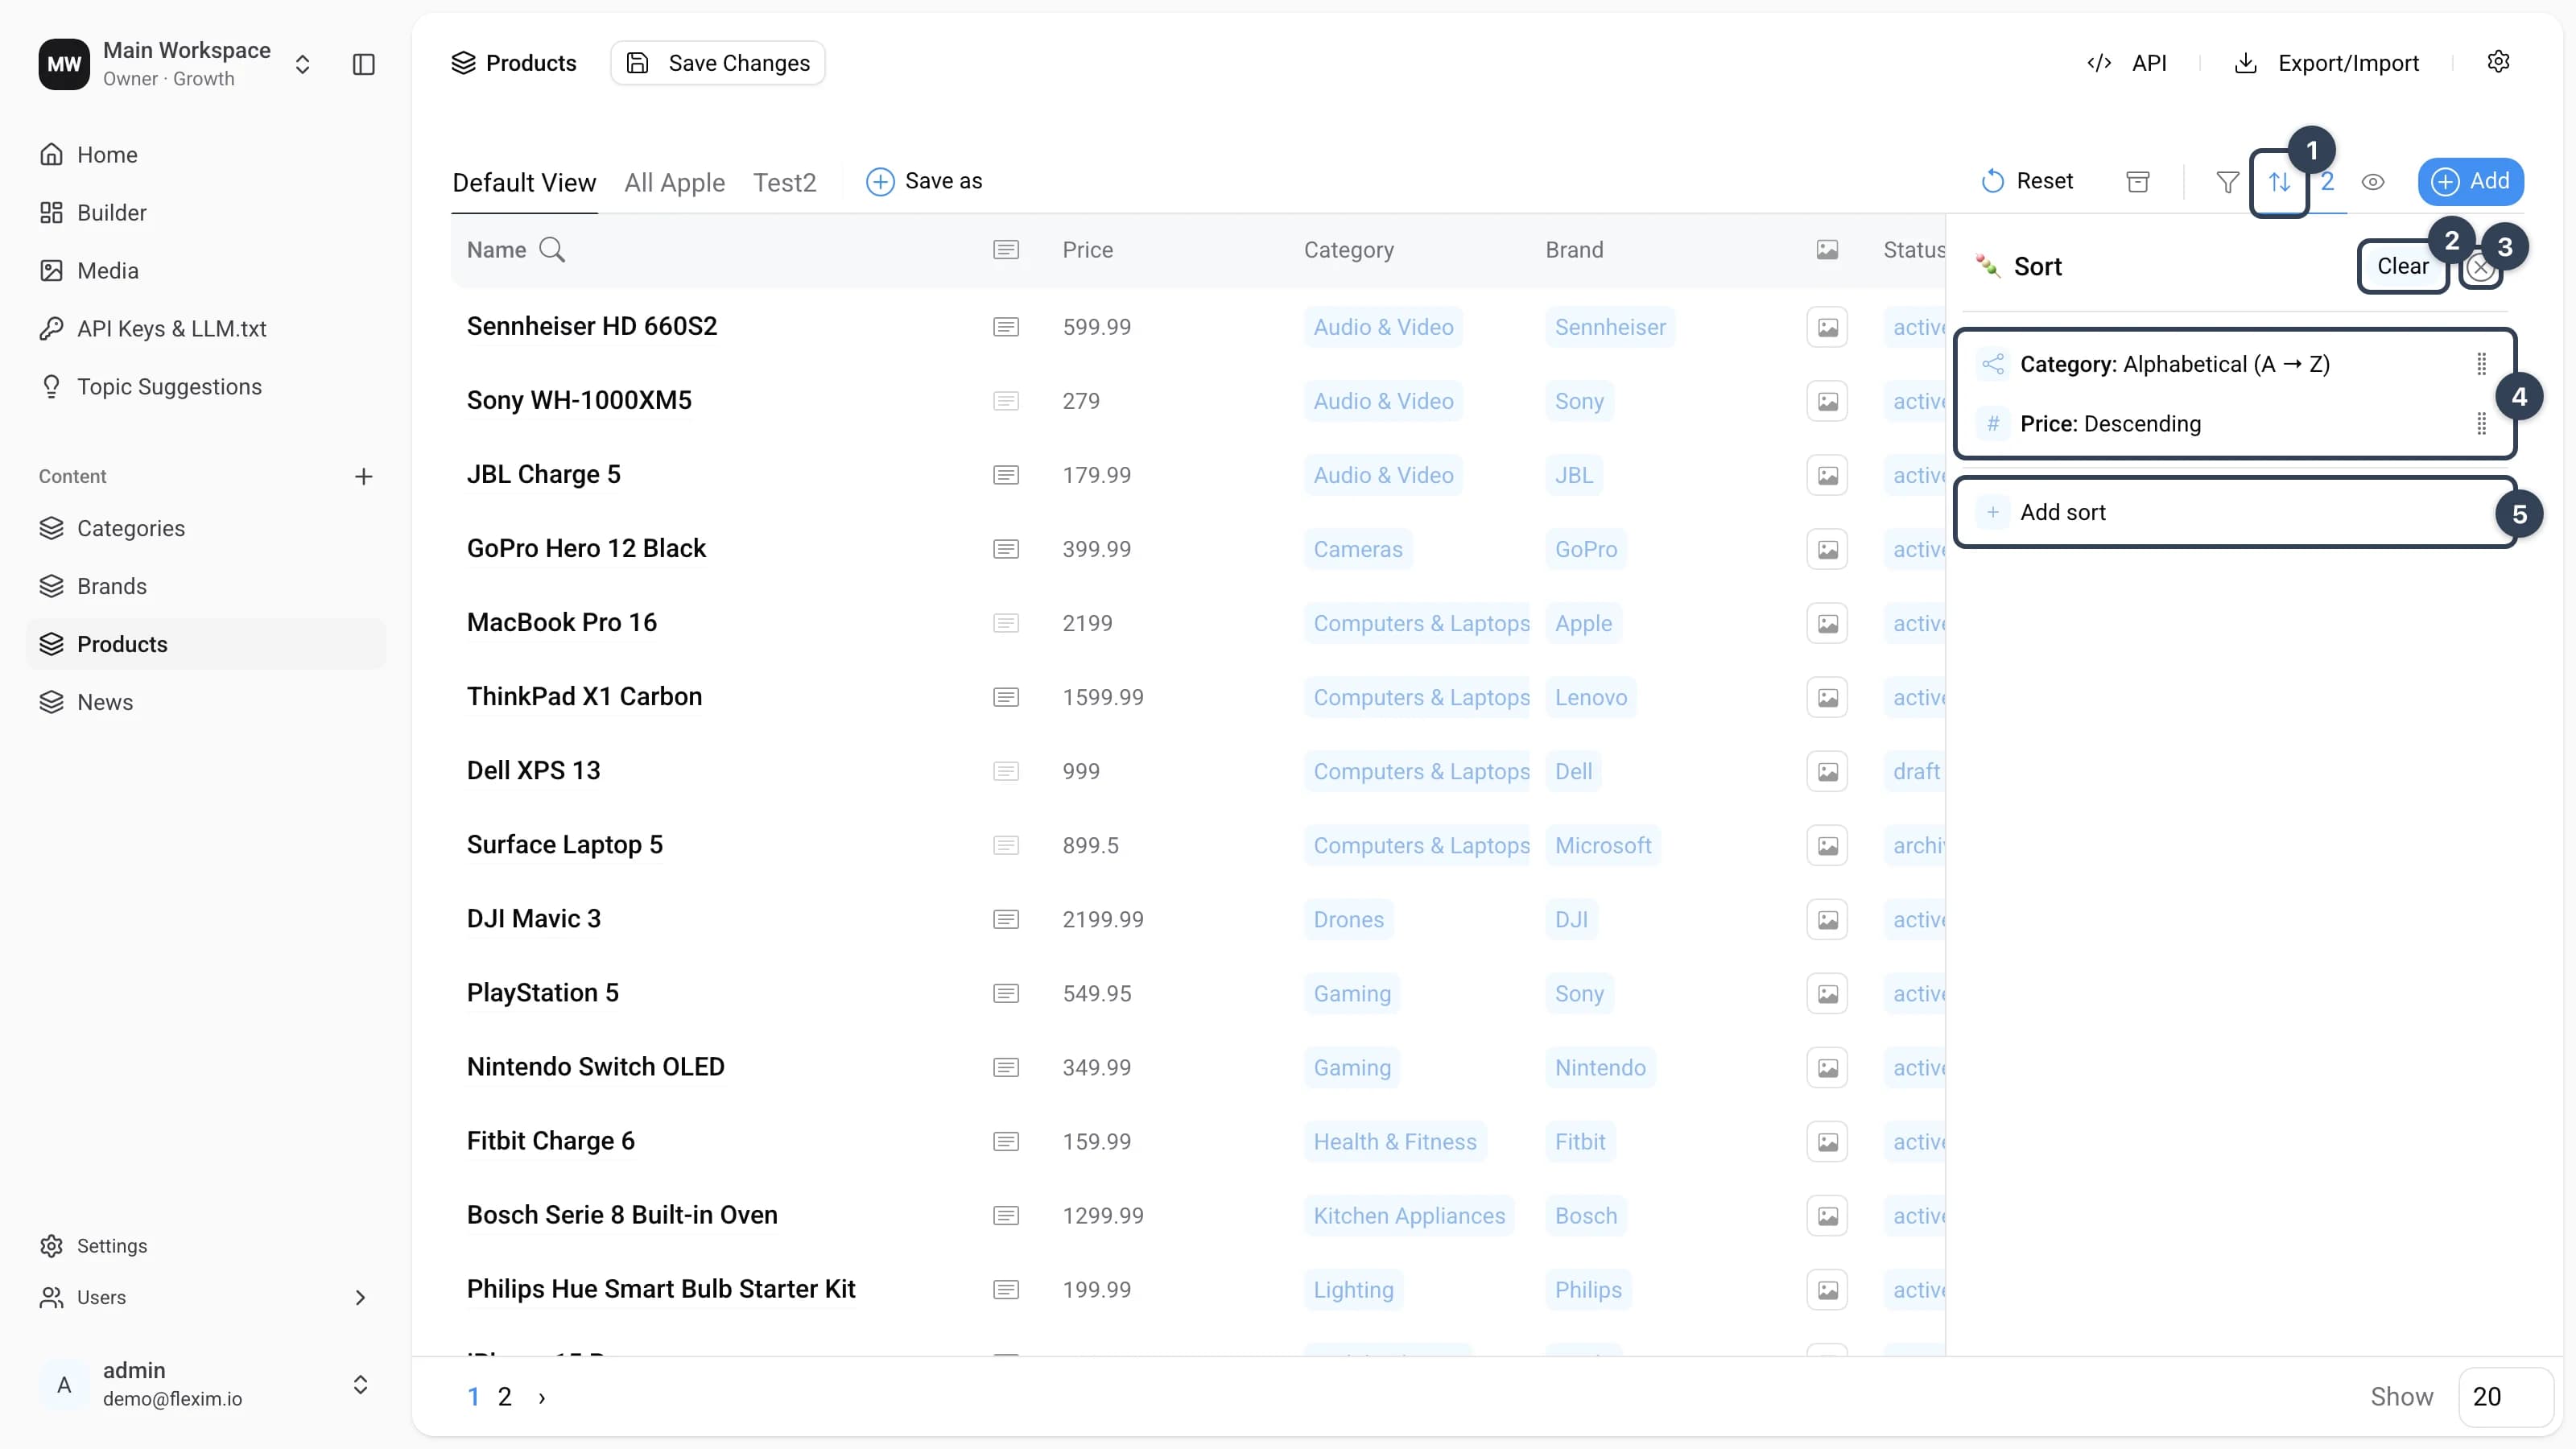
- Open Sort button Opens the Sort panel. The badge next to the icon shows how many sorts are currently active.
Clearbutton Removes all sorts at once. The counter is reset accordingly.- Close button Hides the Sort panel without changing the sorts.
- Sorting list Each line is a rule that records in the collection are ordered by. Drag the handle on the right to change a rule's priority, or click a line to edit or delete it.
- Add sort Adds another sort on top of the existing ones.
Sorting states
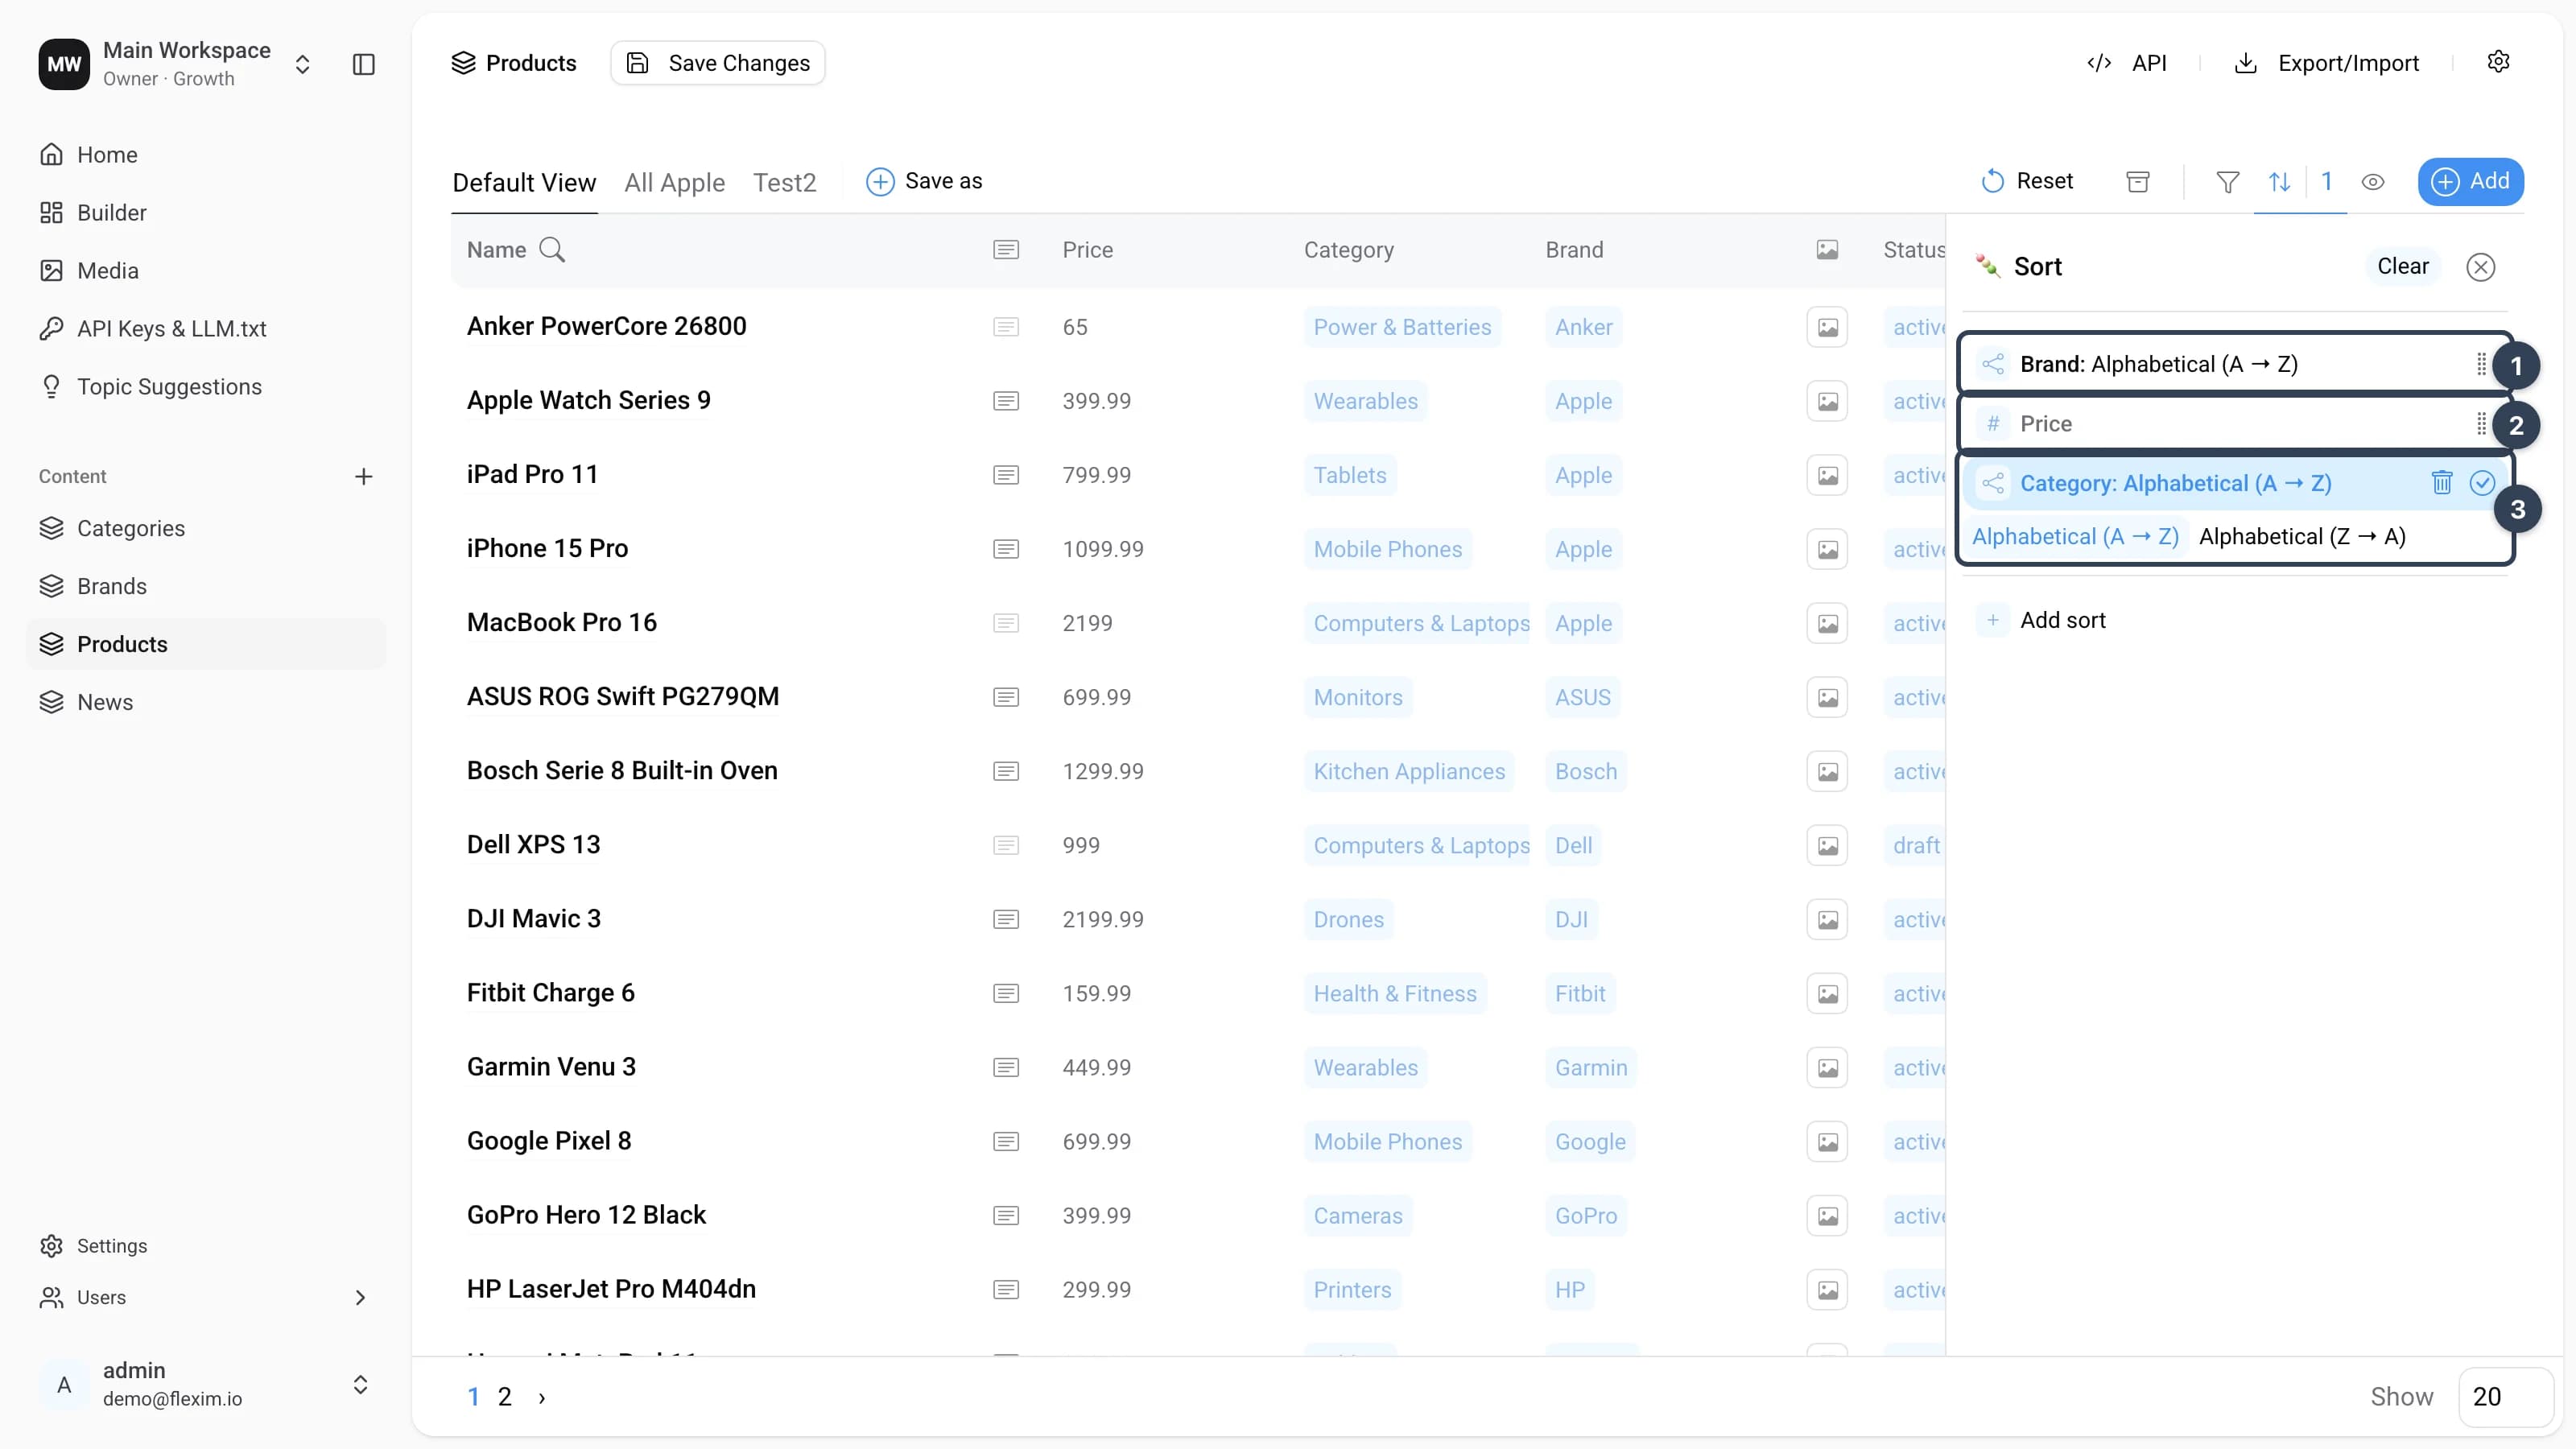
A sort rule can be in one of the following states:
- Active
A rule that was added, configured, and confirmed with
✓. Its name is shown in black and it takes part in ordering the records. - Inactive
A rule that was added but not confirmed with
✓. Its name is greyed out and no method is shown. It stays in the list but does not affect the order until you open it and confirm. You can activate or delete it at any time. - Editing A rule enters the editing state when you add a new sort or click an existing one. The editing view has two parts: the control buttons (delete or save) and the sorting methods (see Sorting methods). When you add a new sort, the first available method is selected by default.
Editing and removing a sort
Click a rule in the list to open it in editing mode. From there you can:
- switch the sorting method with the chips below the rule;
- delete the rule with the trash icon;
- confirm your changes with
✓.
To change the priority of a rule, drag it by the handle on the right.
Sorting levels
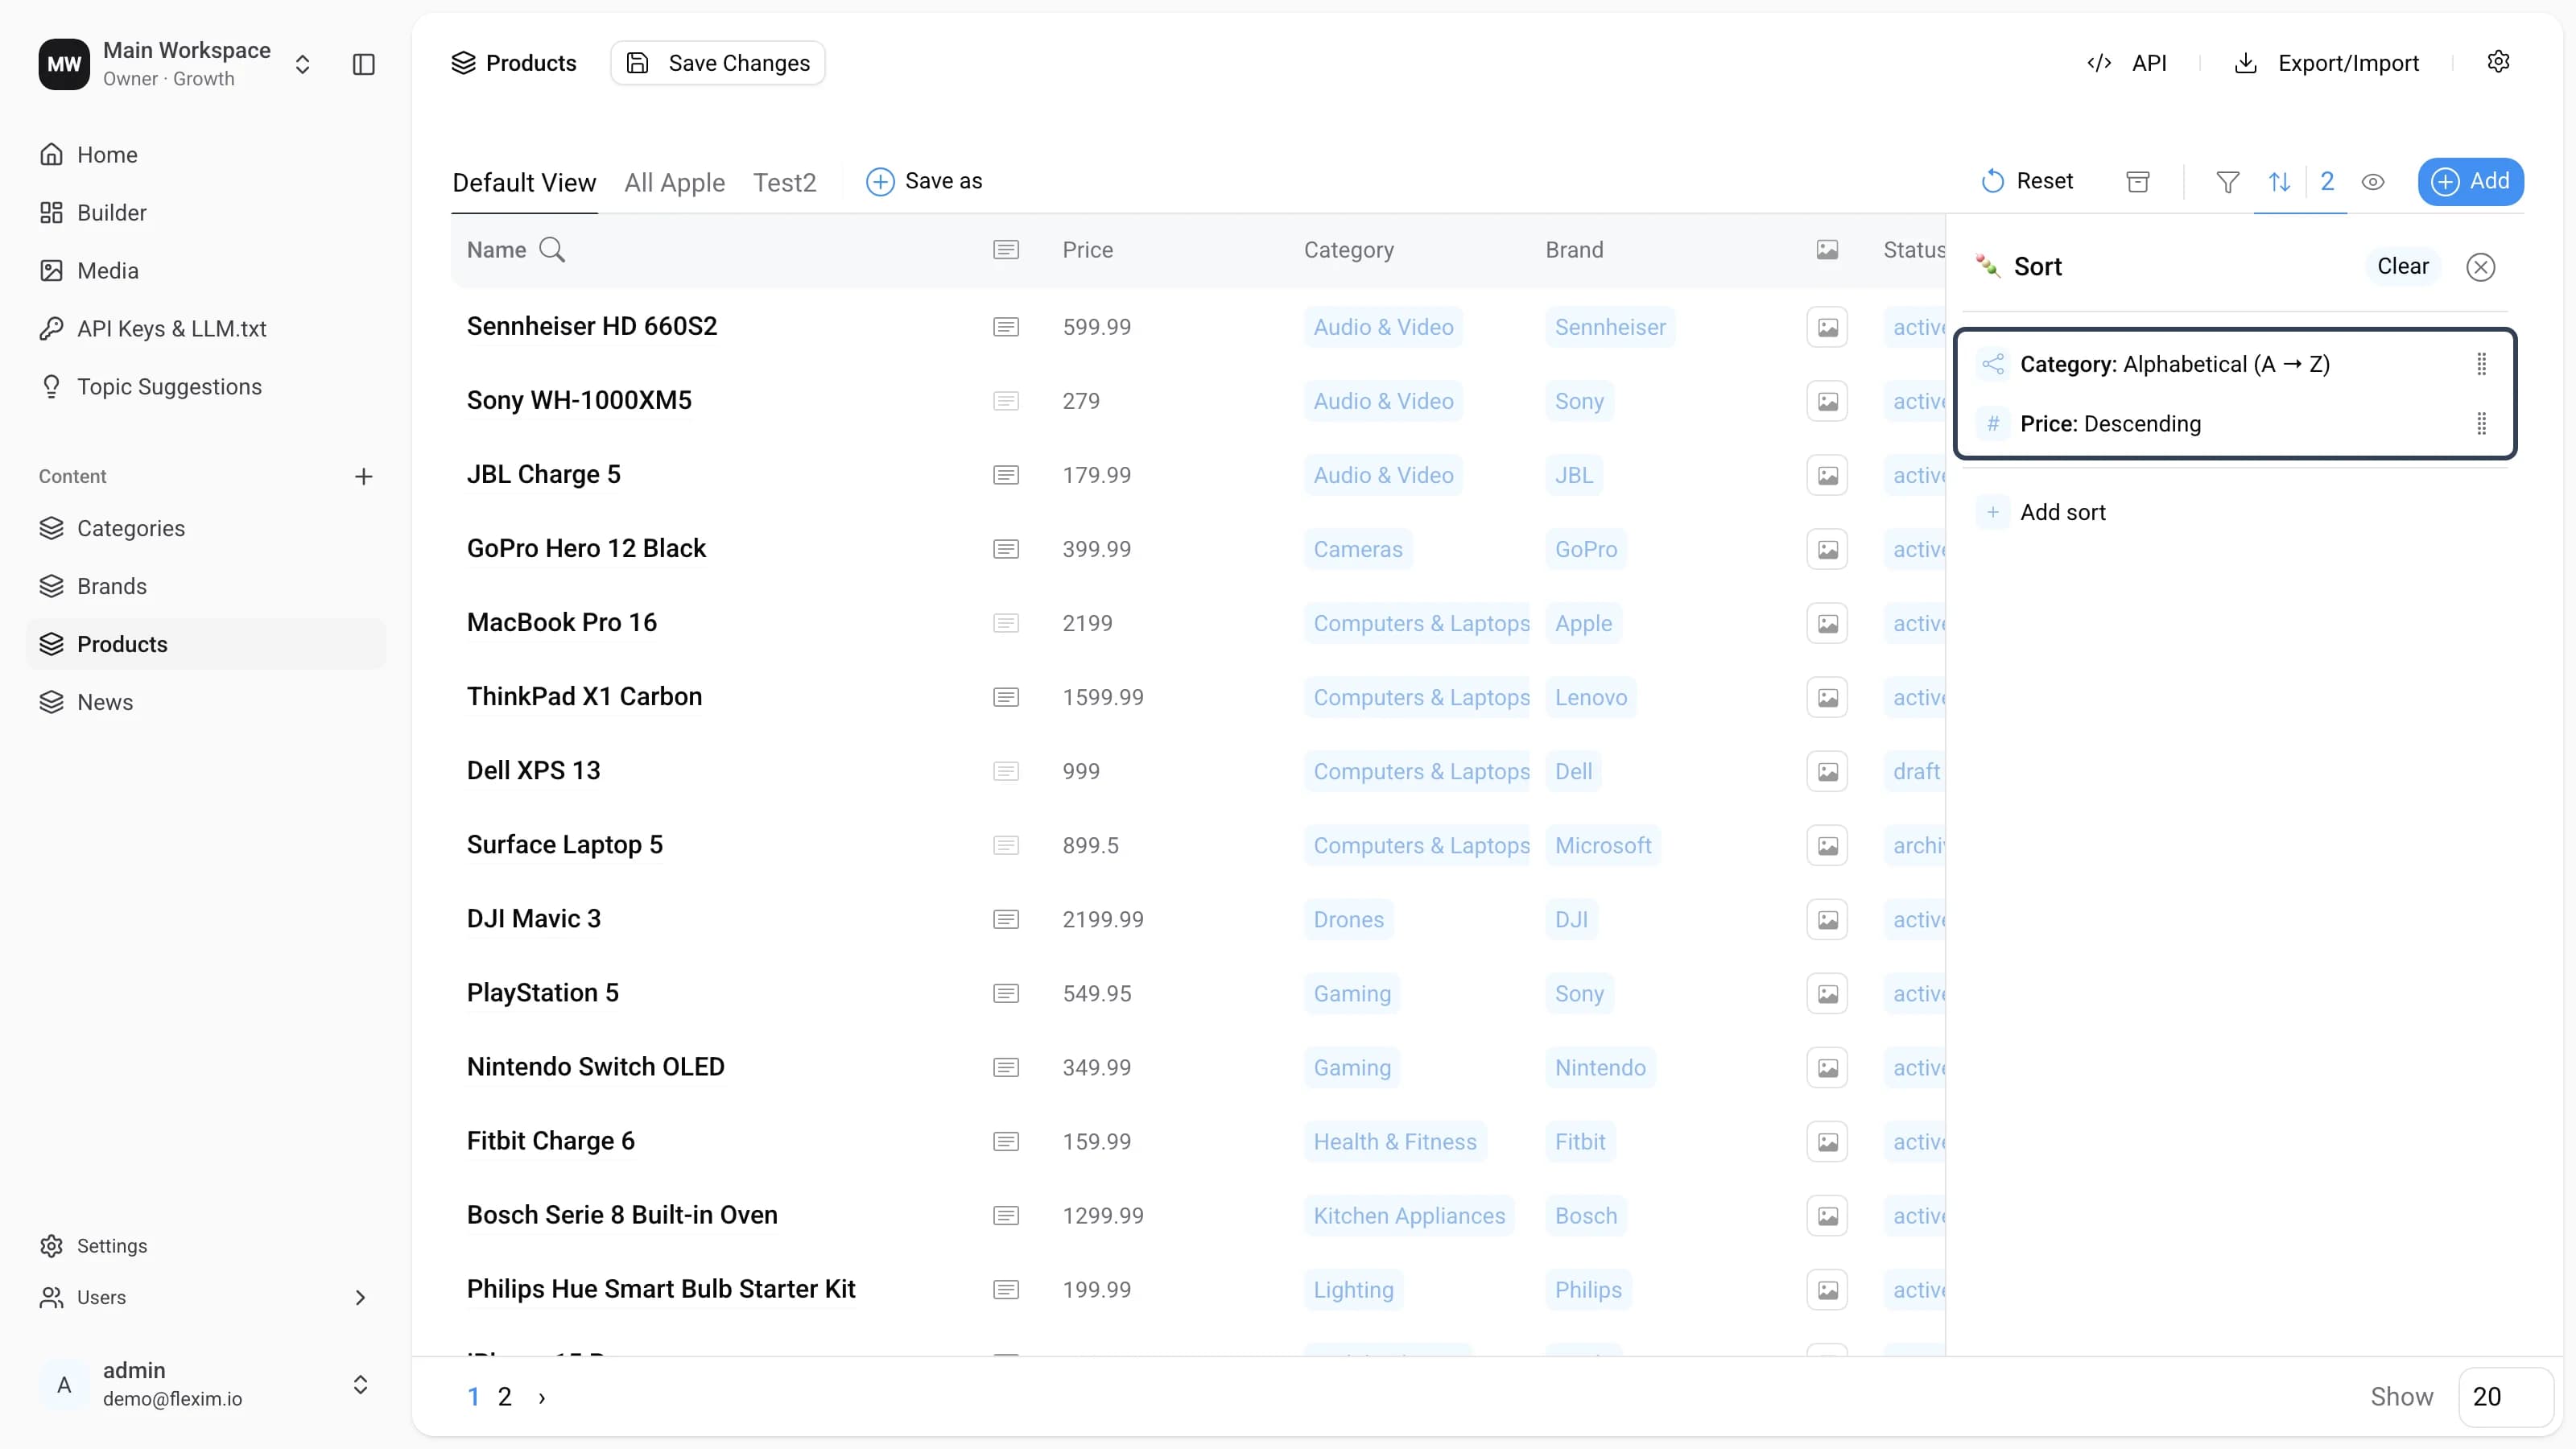
You can use more than one sort. For example, first add a sort by category in alphabetical order, and then a sort by price in descending order. You get products grouped by category, and within each category ordered by decreasing price.
You can add as many sorts as you need.
Adding a sort
Task: sort the products by category so that within each category they are ordered by decreasing price.
-
Click the
Add sortbutton.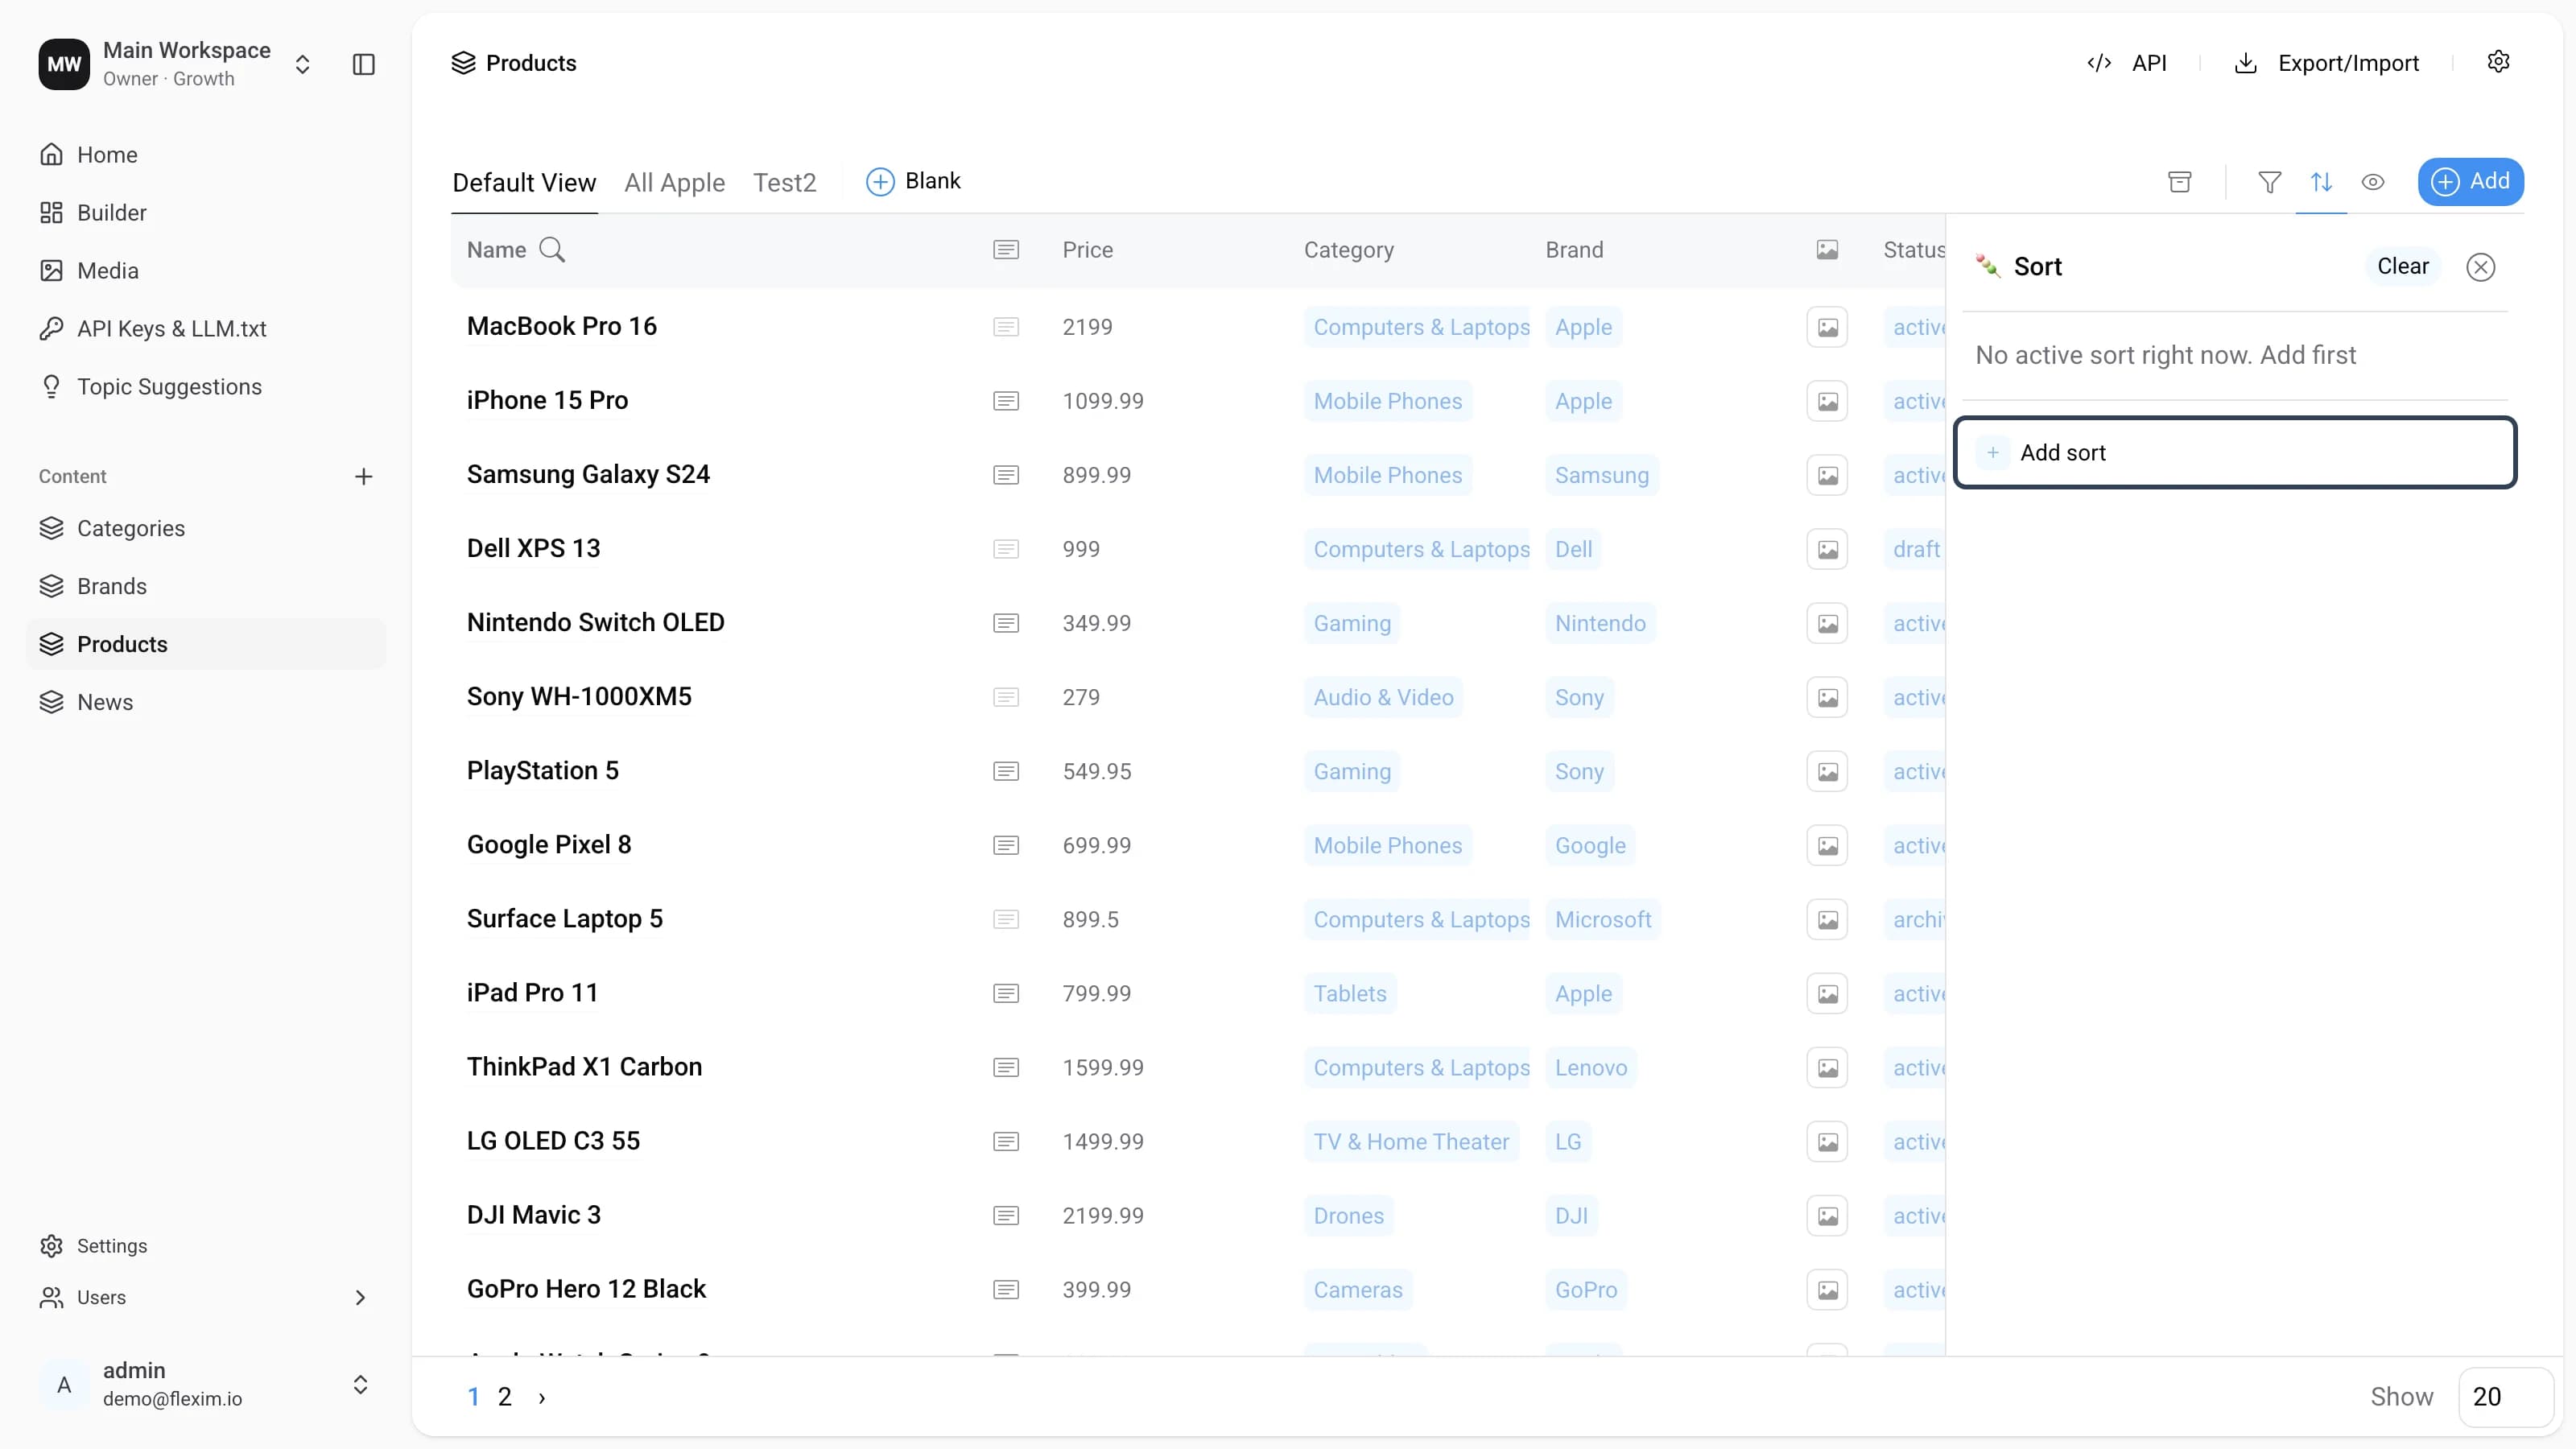
-
Choose the
Categoryfield from the list of available fields.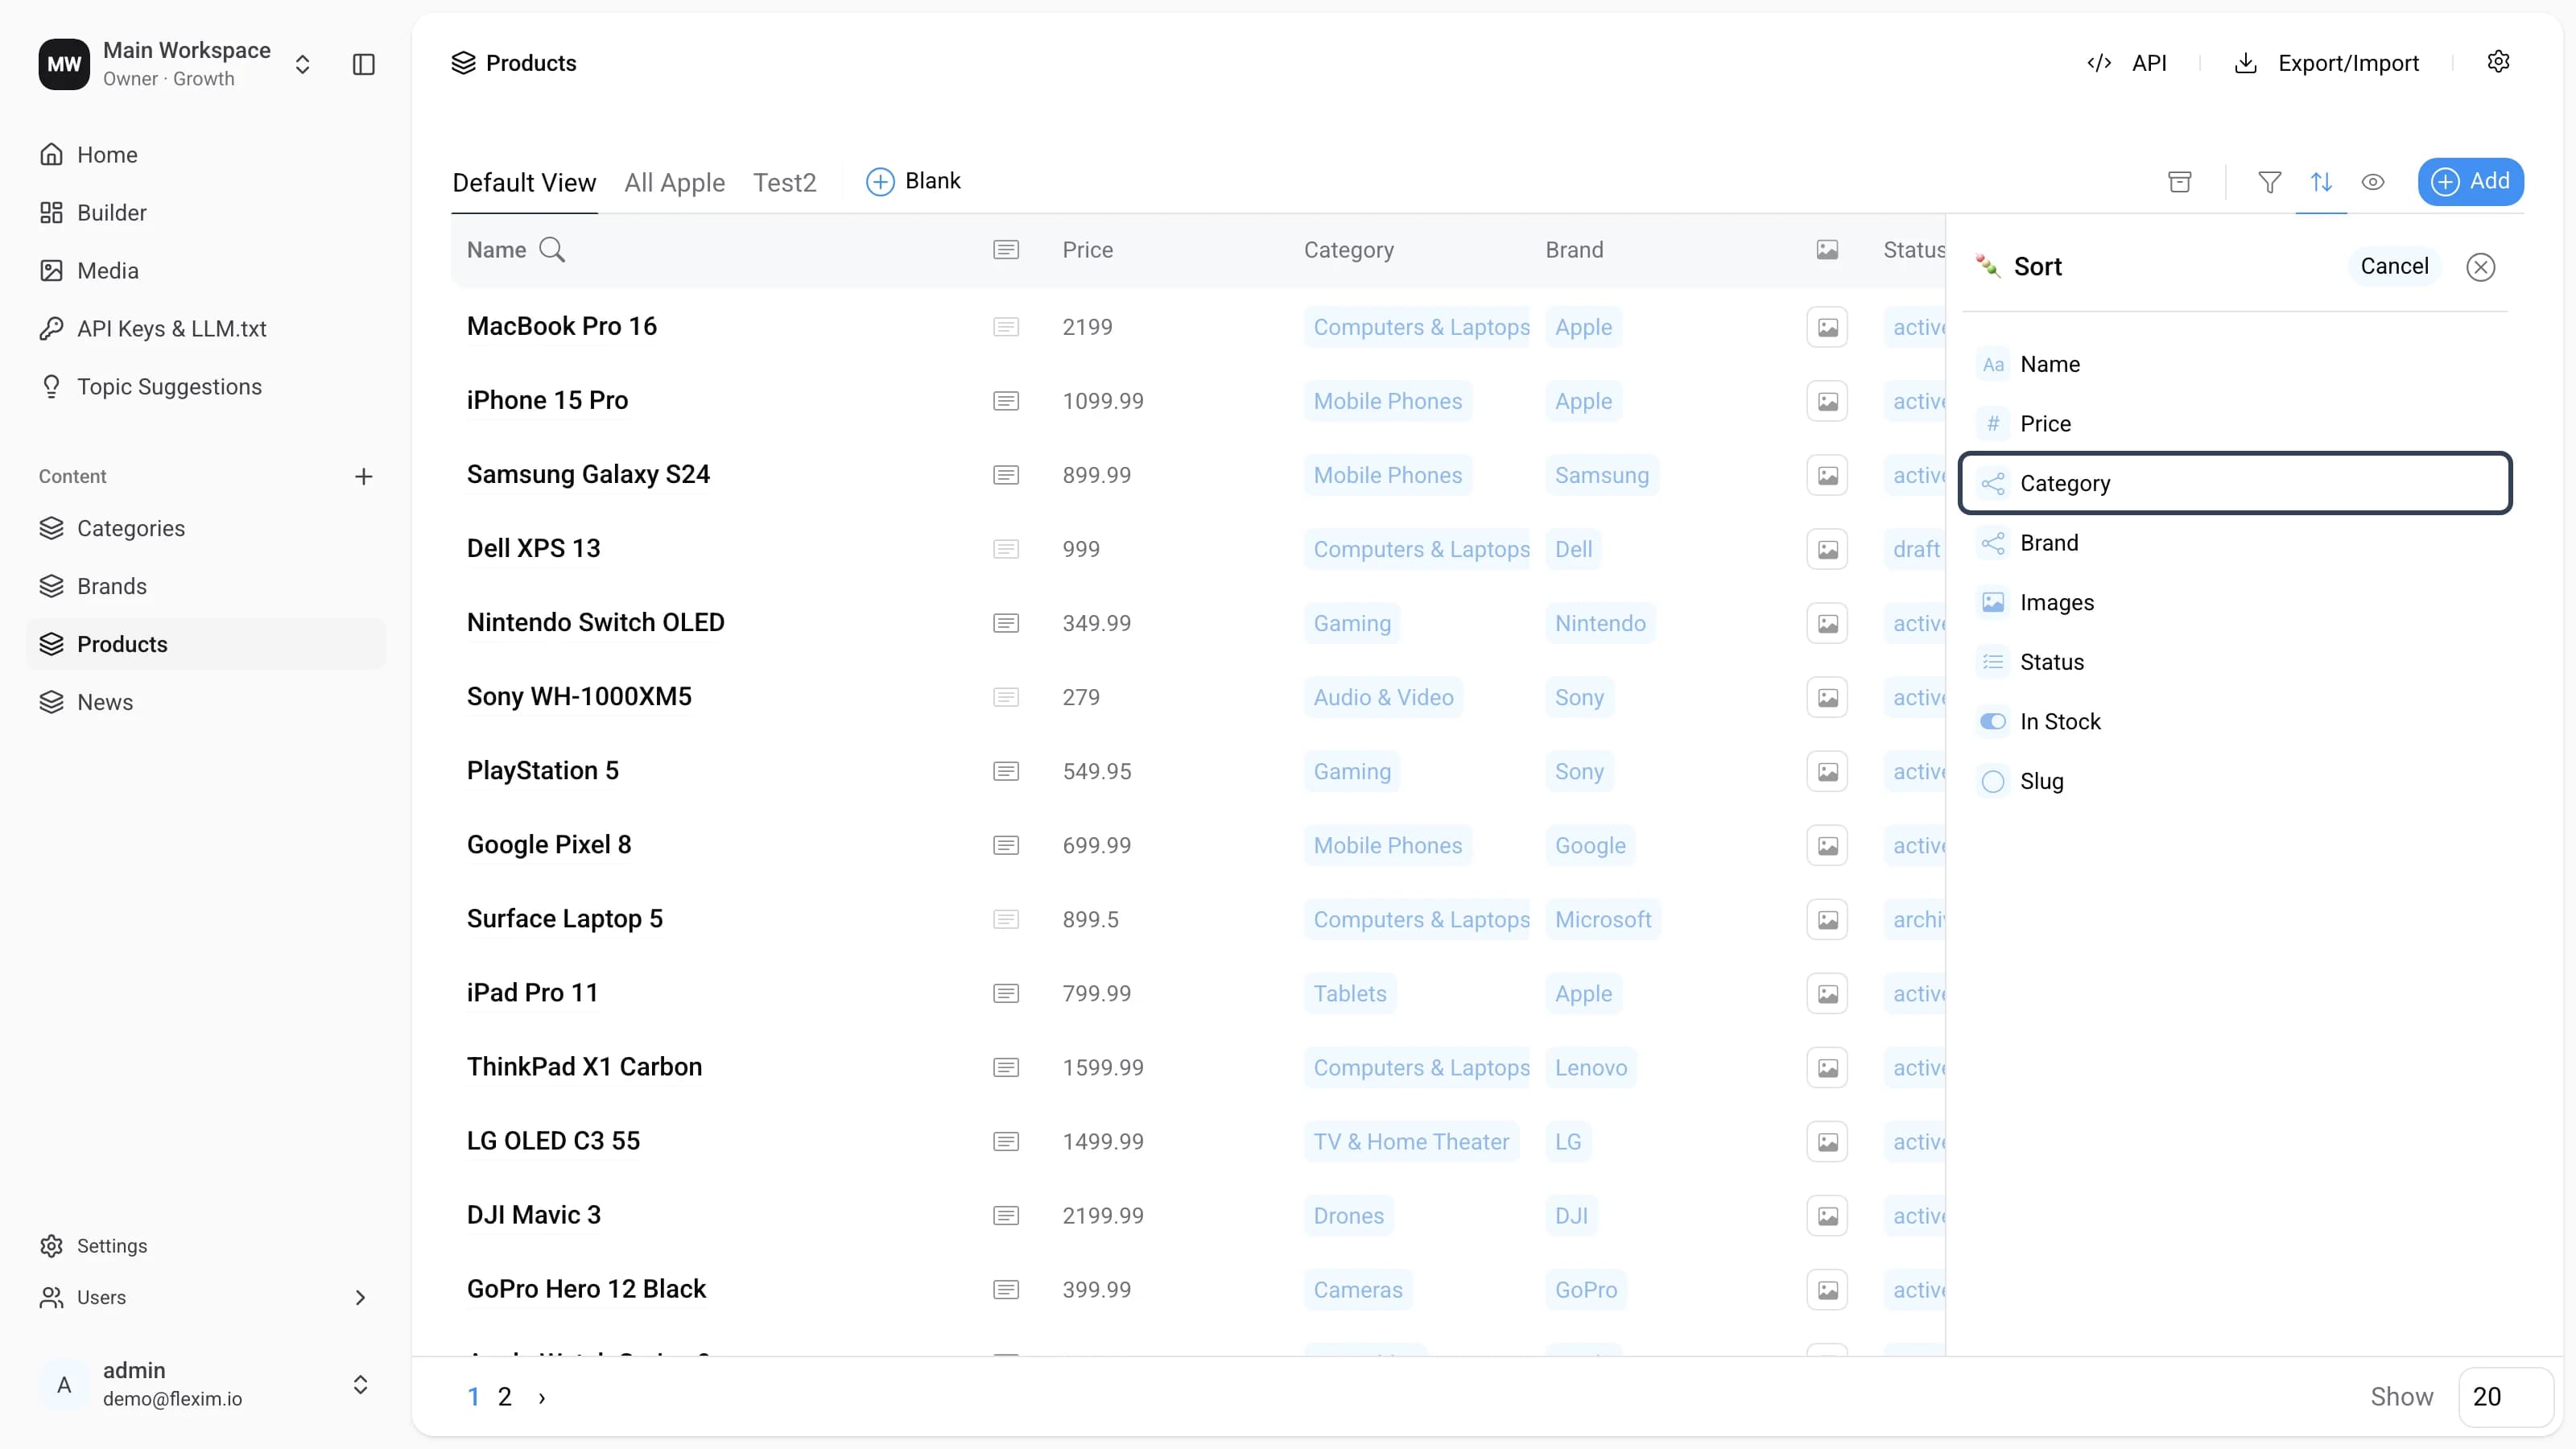
-
The new sort opens in editing mode. The first available method,
Alphabetical (A → Z), is already selected by default (see Sorting methods). Leave it as is and click✓to save.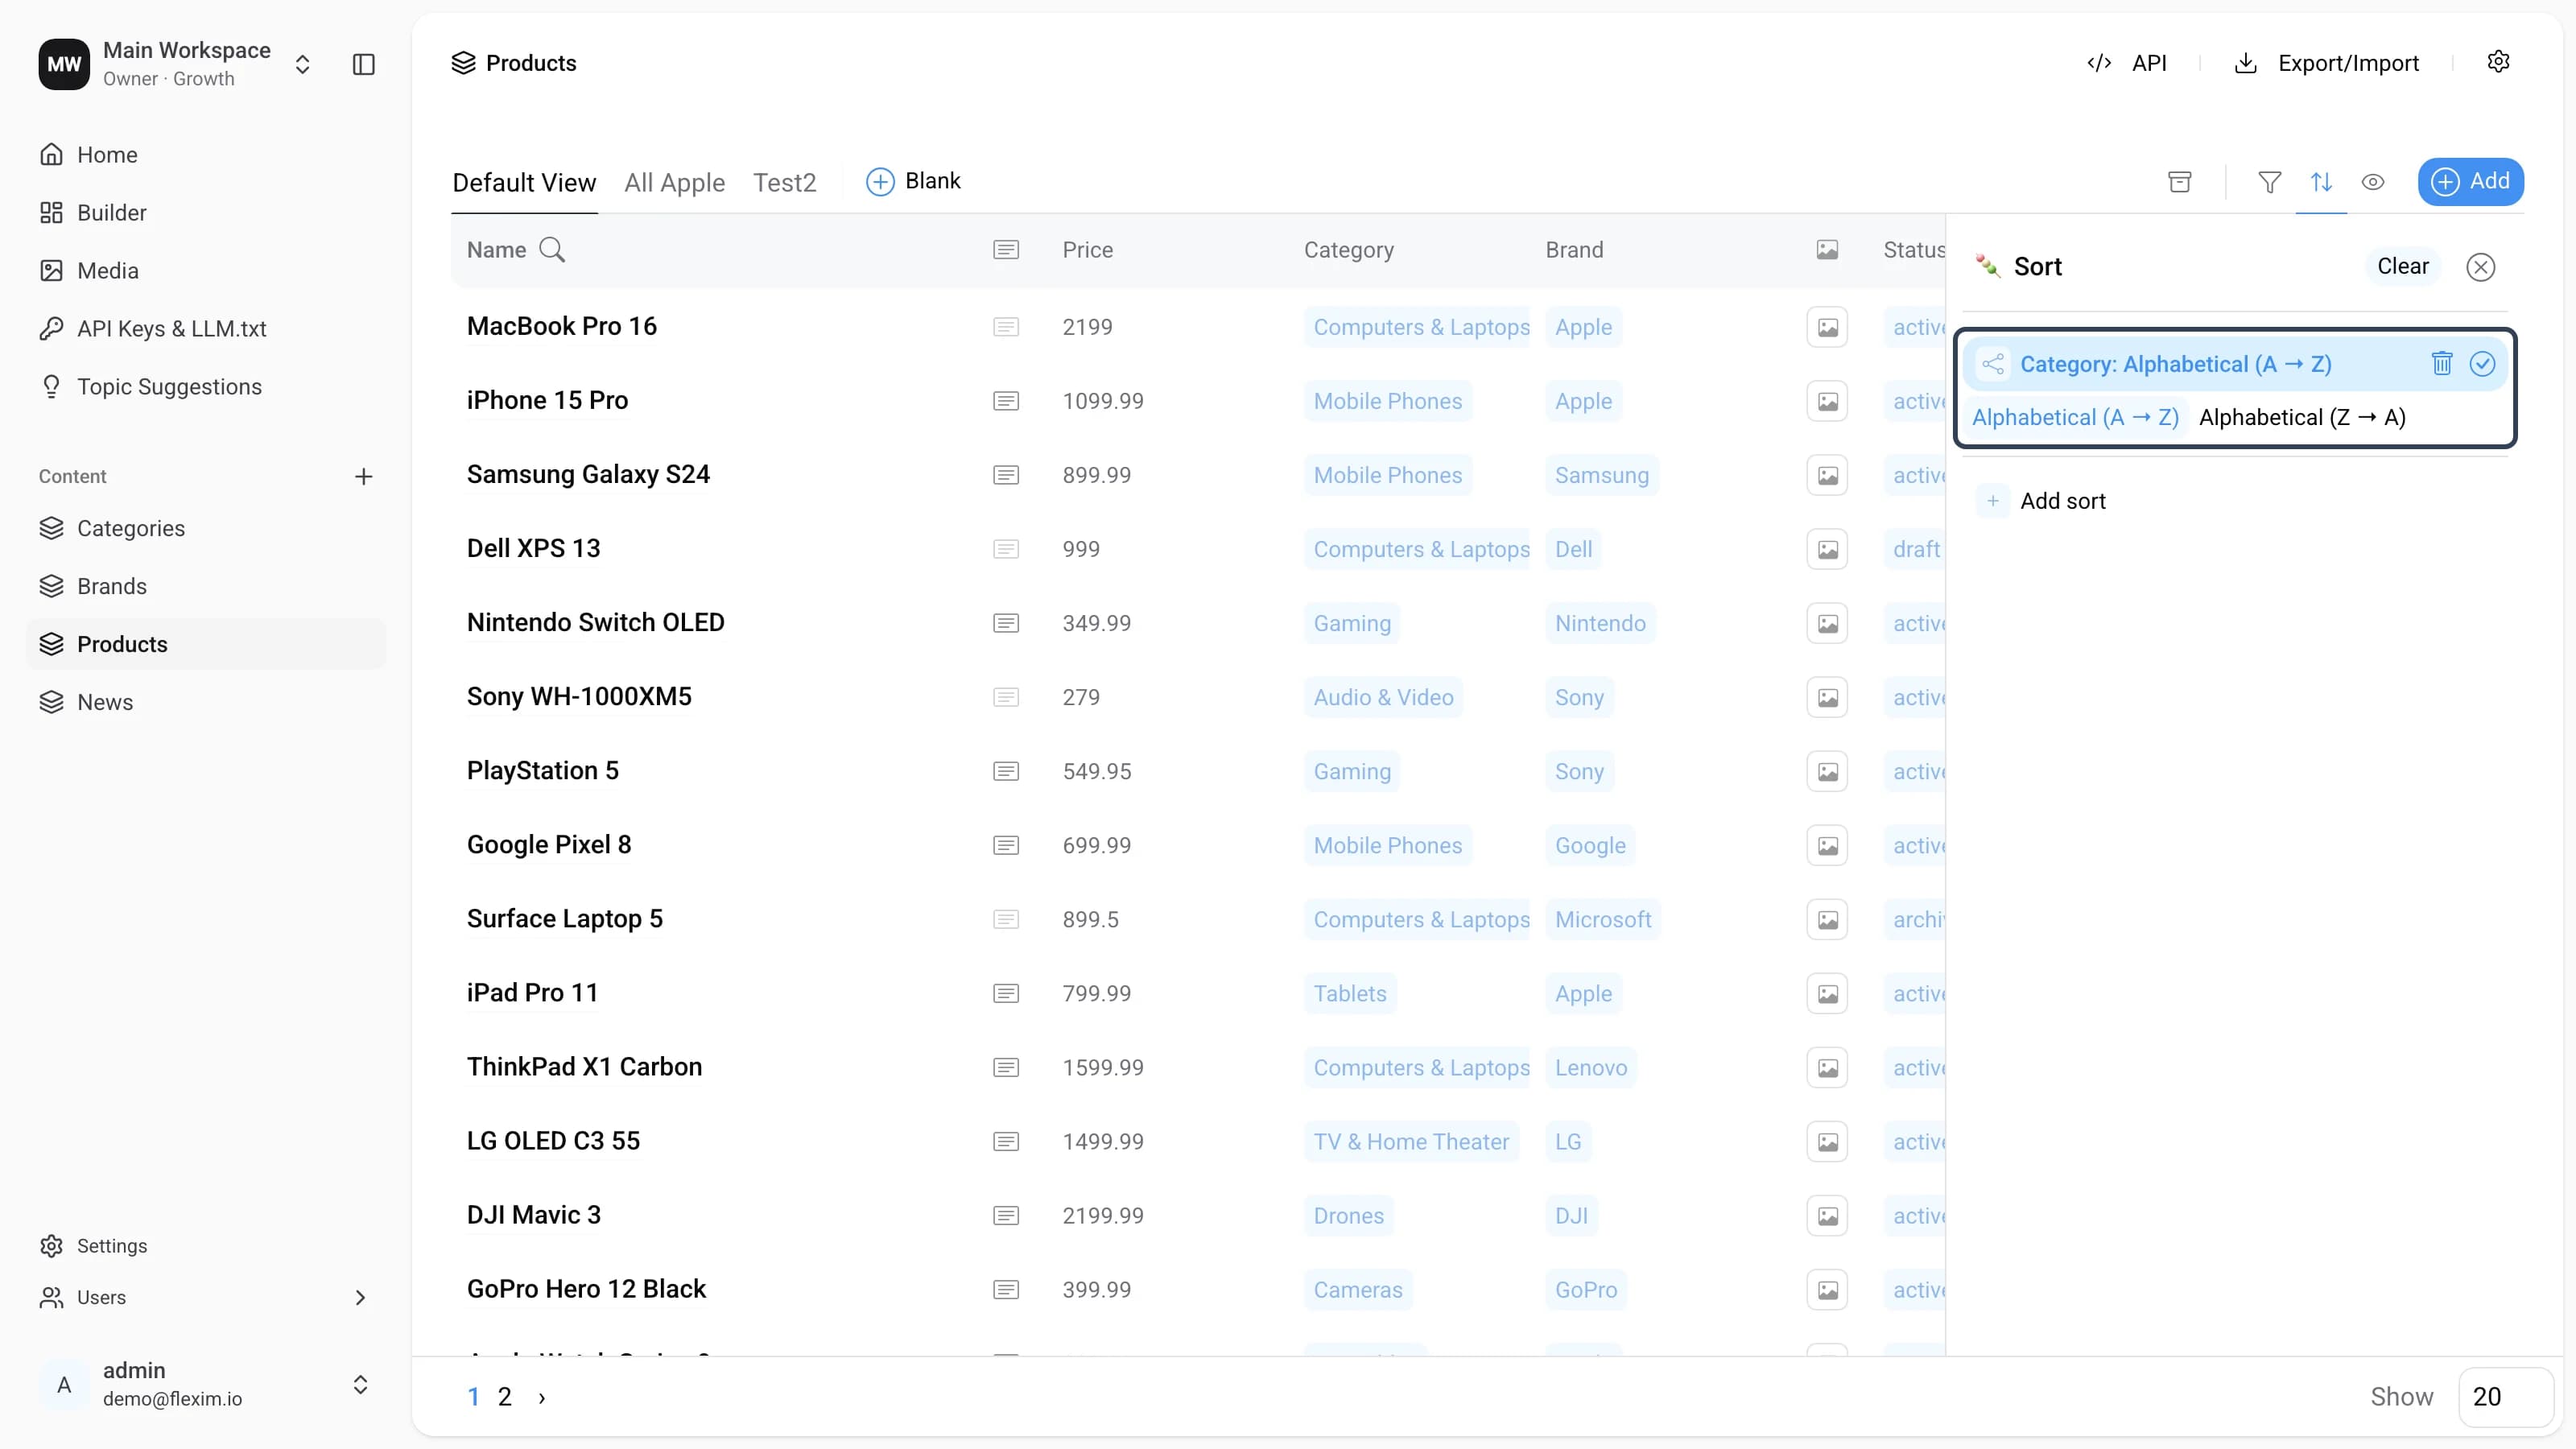
-
The sort is saved. Now add a second sort by price — click
Add sortagain.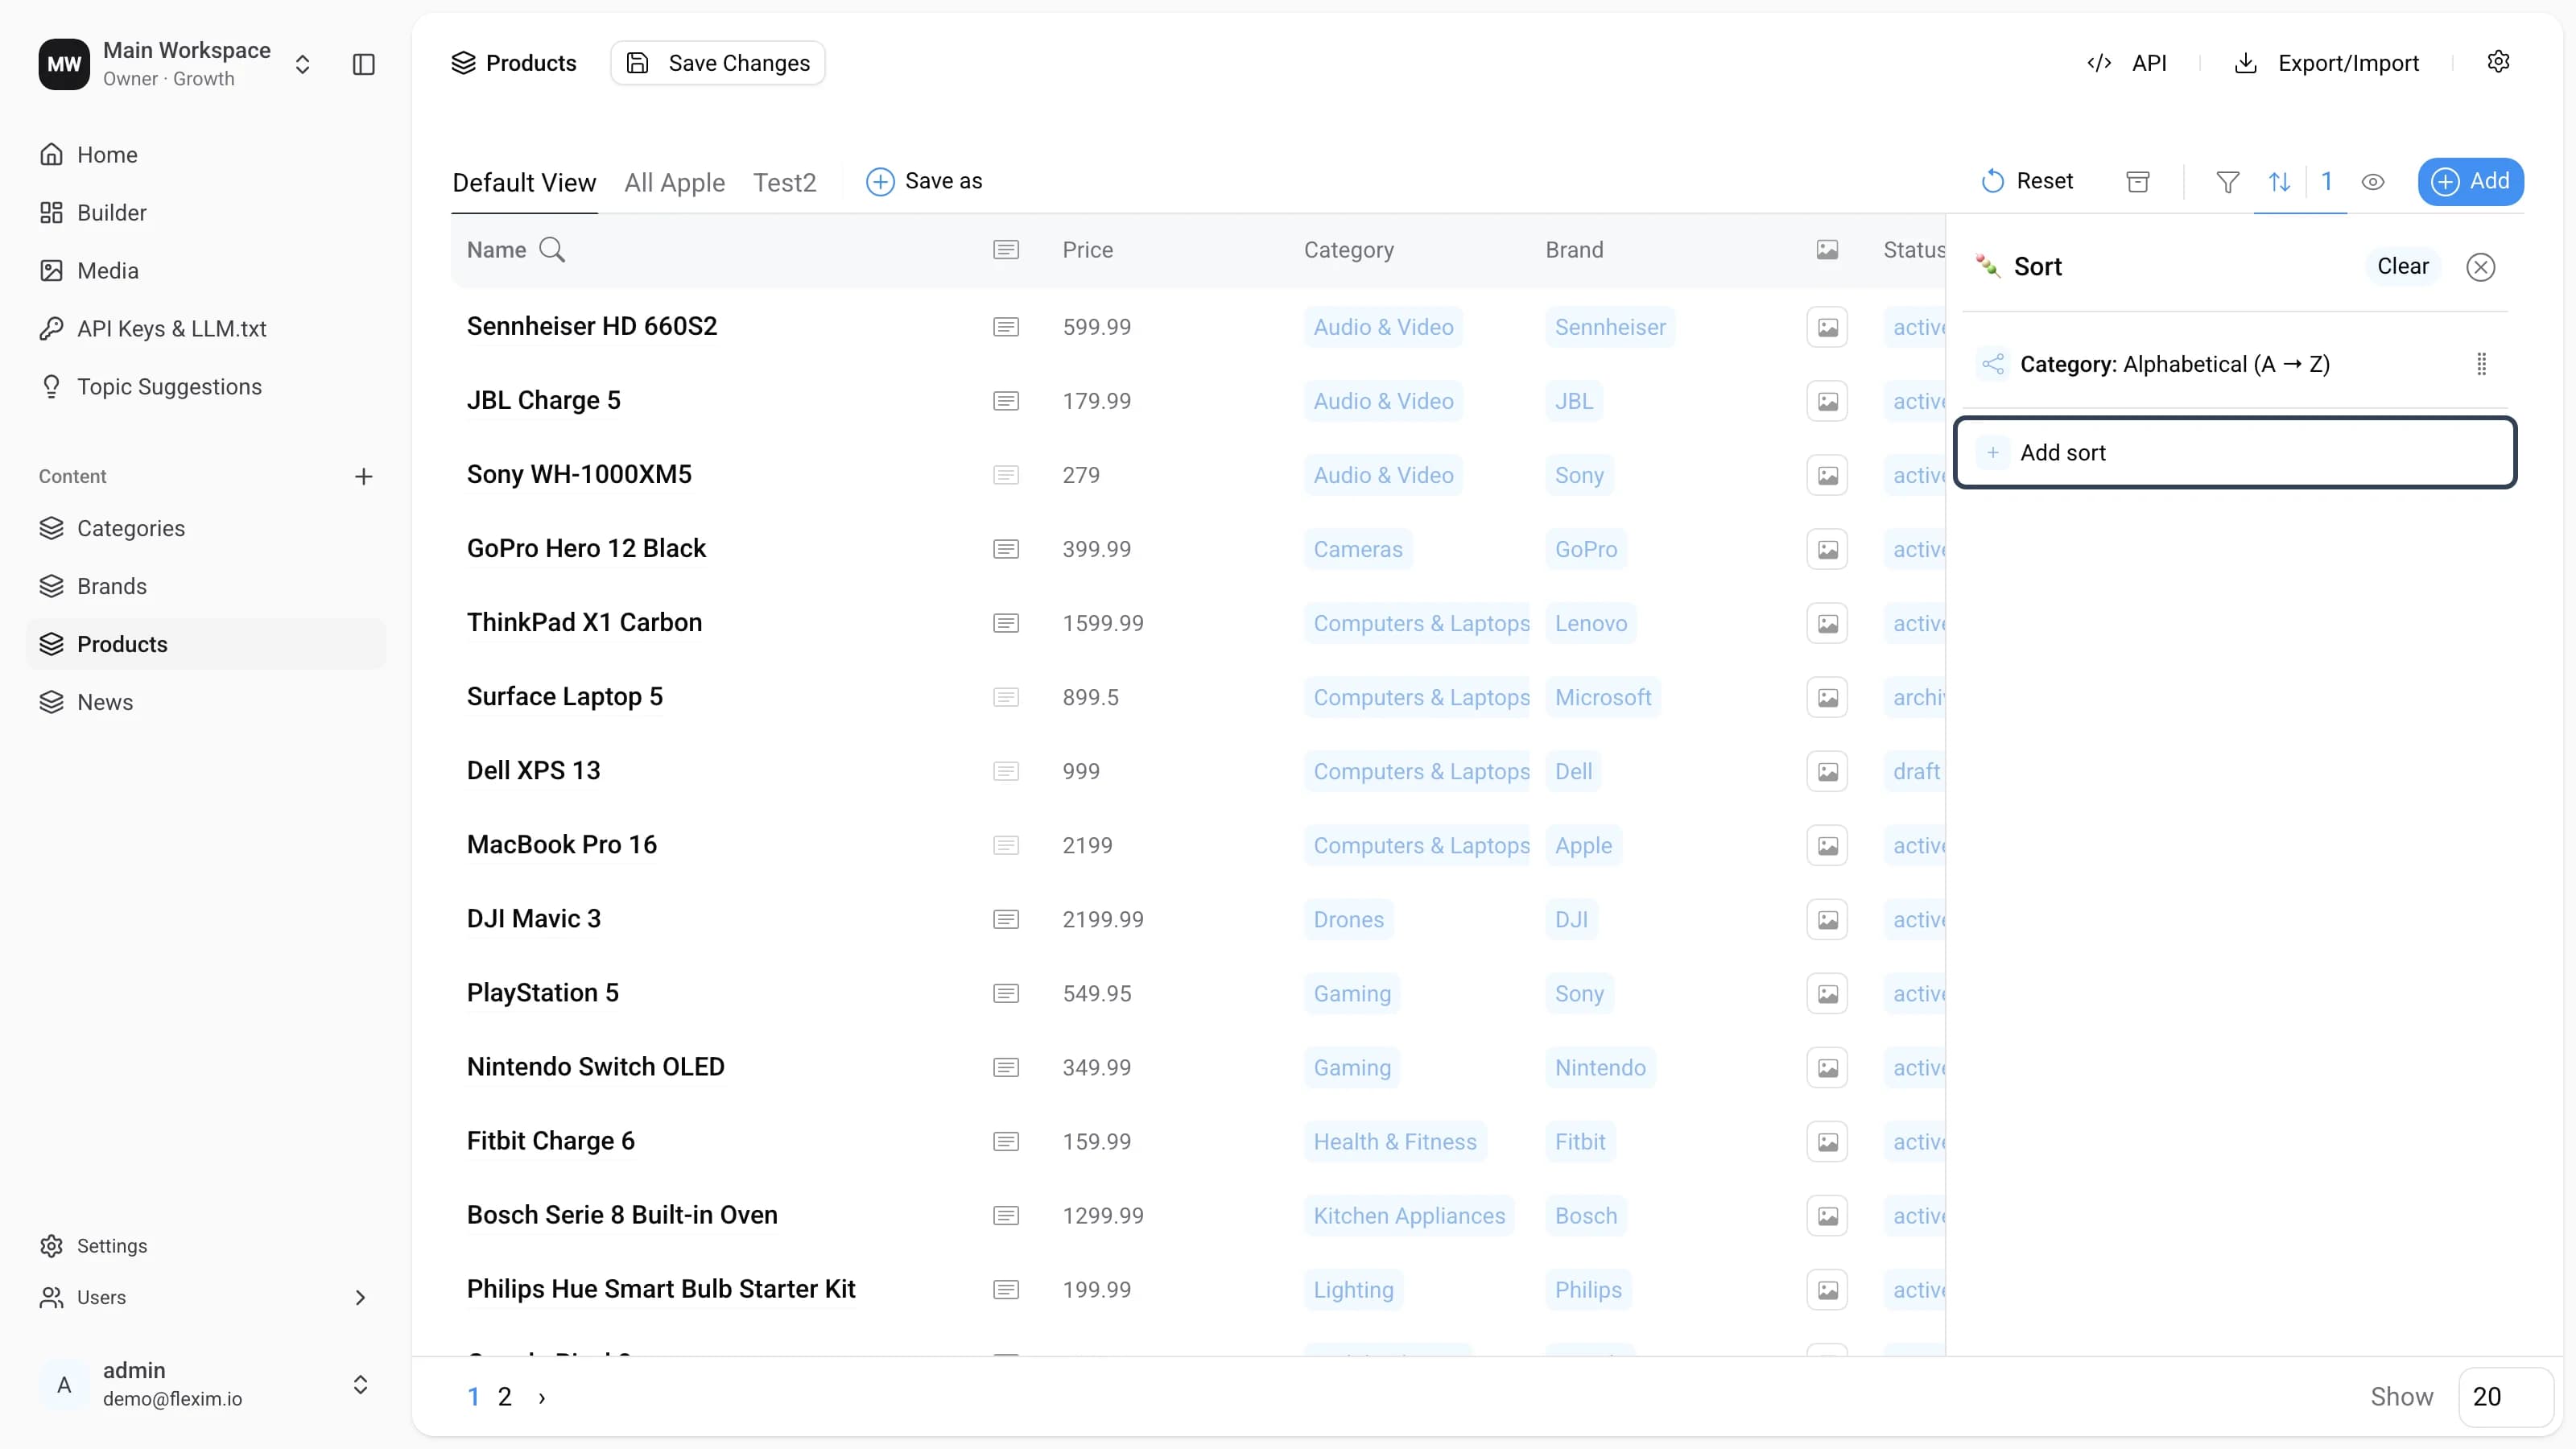
-
Choose the
Pricefield from the list.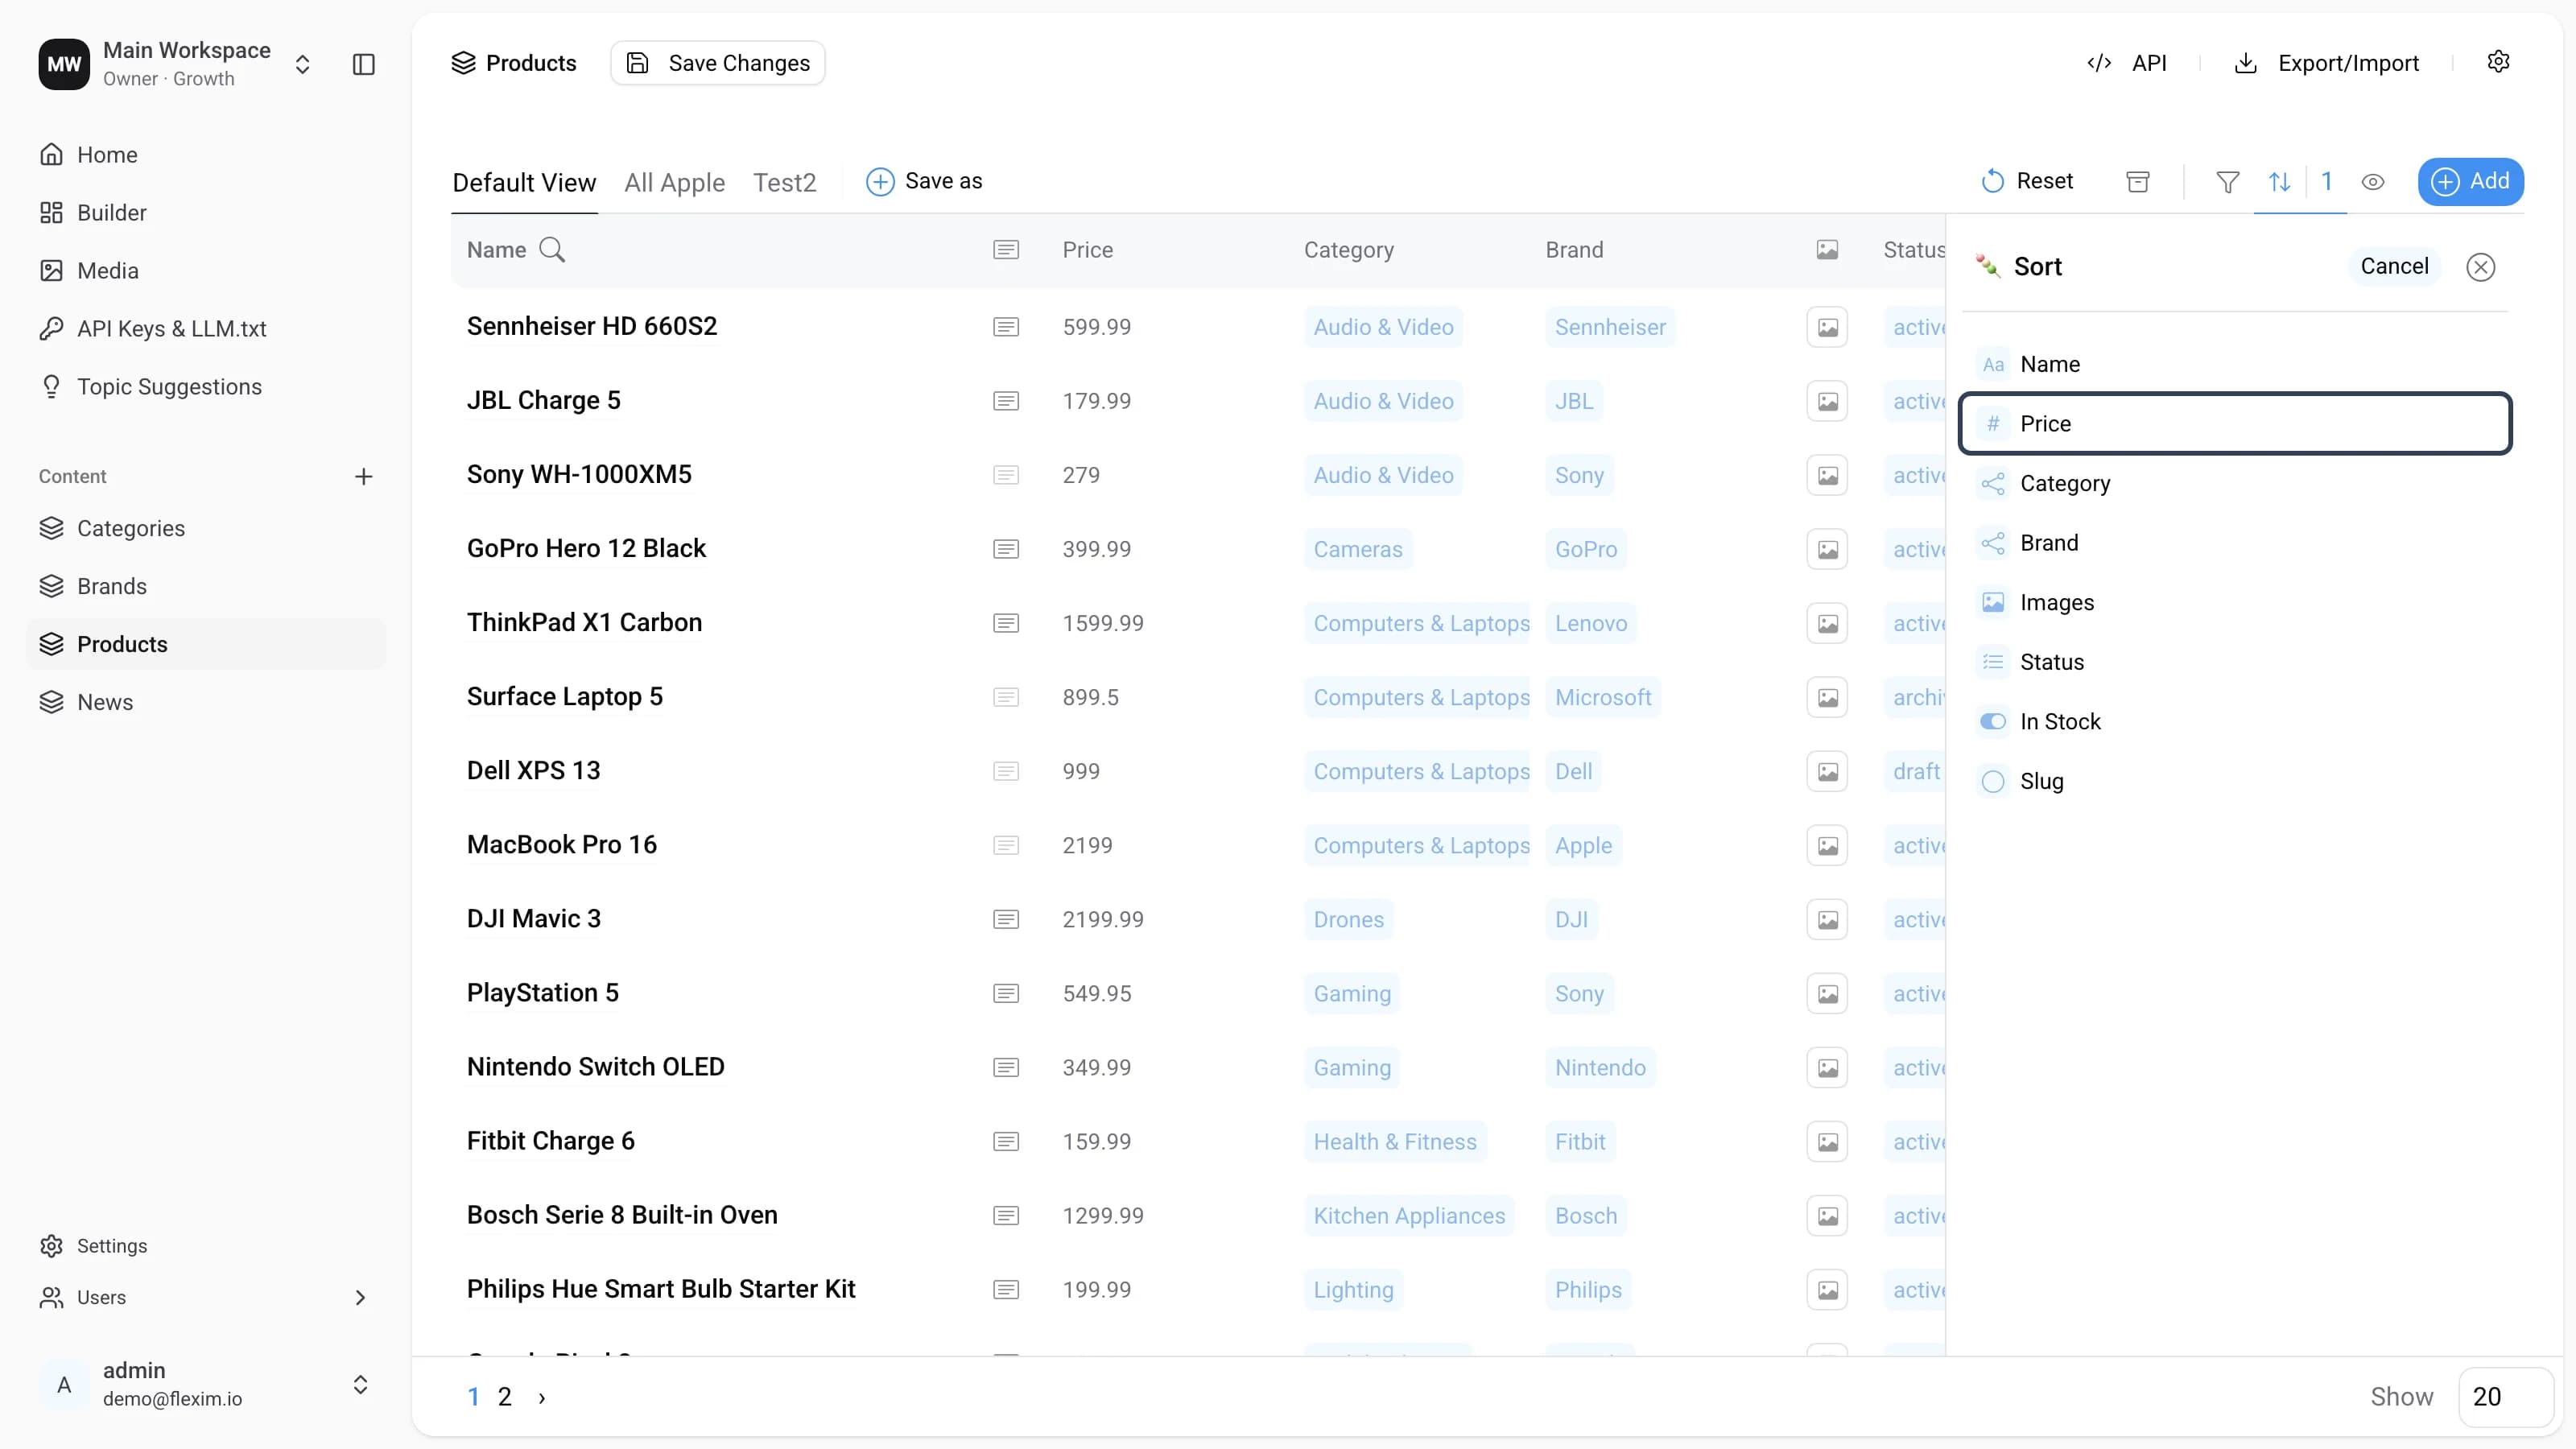
-
The price sort opens in editing mode. Change the method from
AscendingtoDescendingand click✓.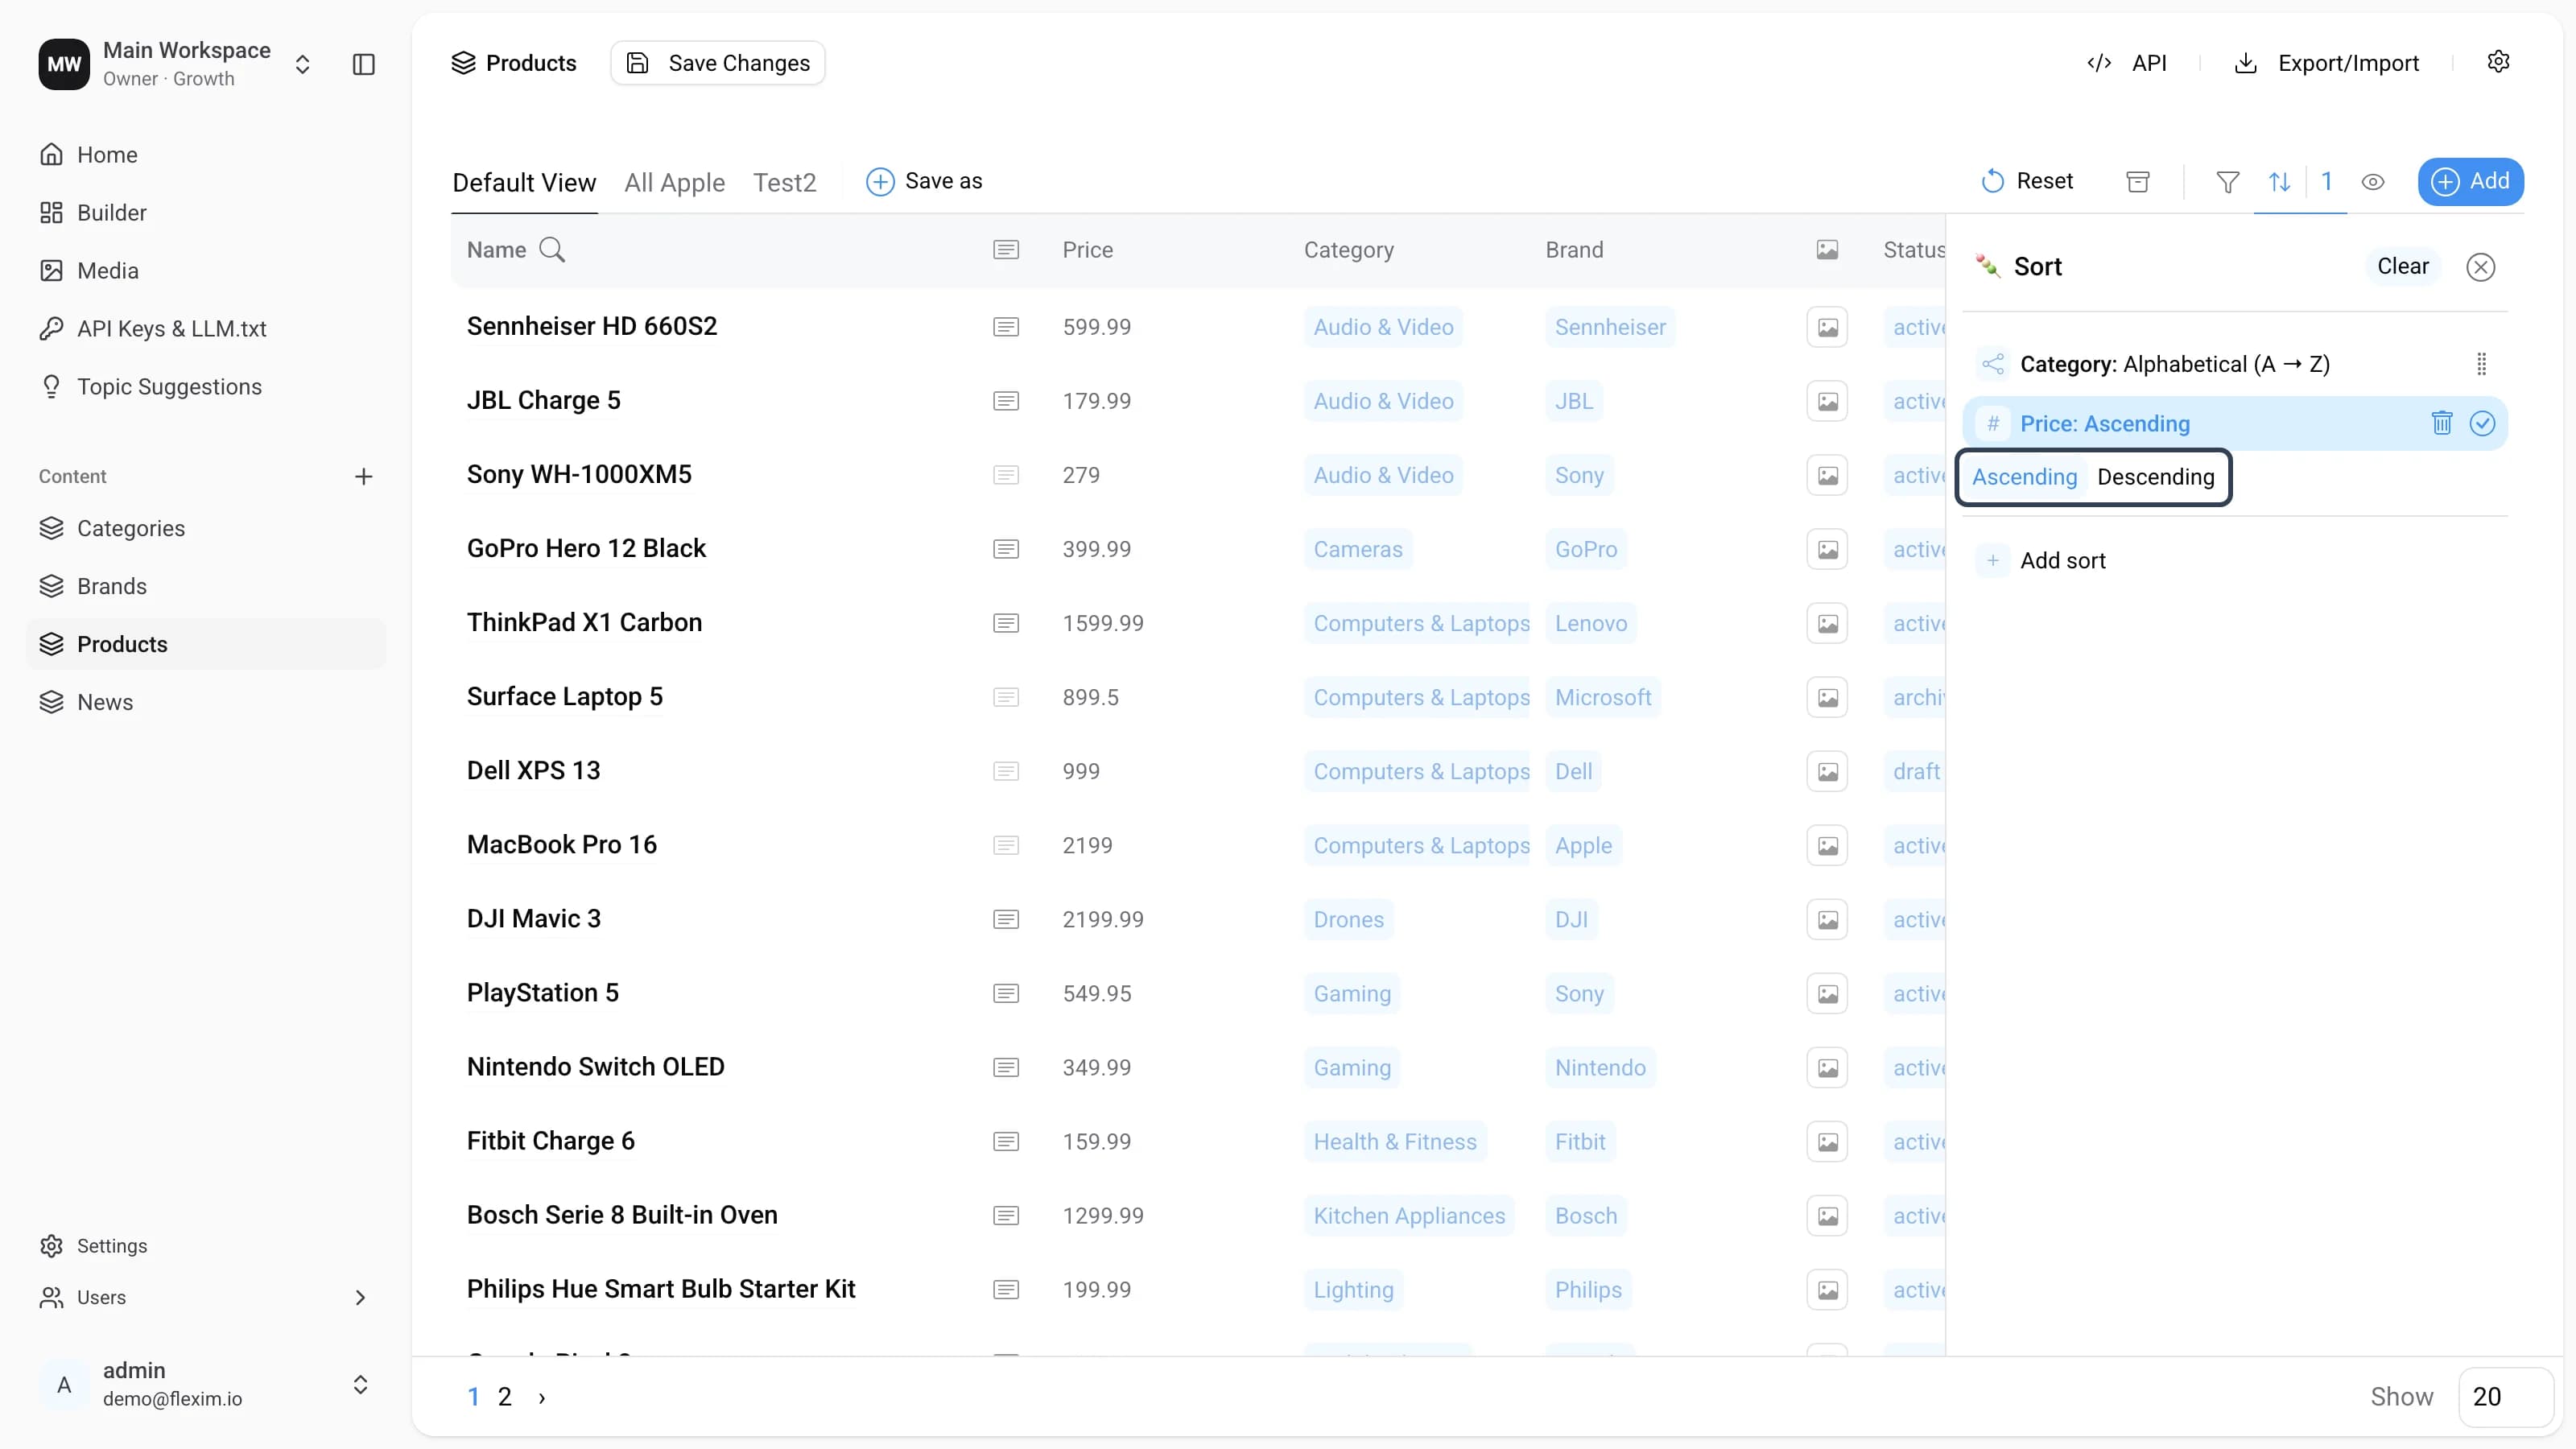
-
Done. The products are now sorted by category, and within each category by decreasing price.
Read more on this topic