Export/Import
Export a Flexim collection to Excel, map workbook columns to fields, validate imported values, and bring updated records back.
The CMS lets you export a collection to an Excel (.xlsx) file and import data back from Excel. Exchange happens per collection and uses a field mapping that you control.
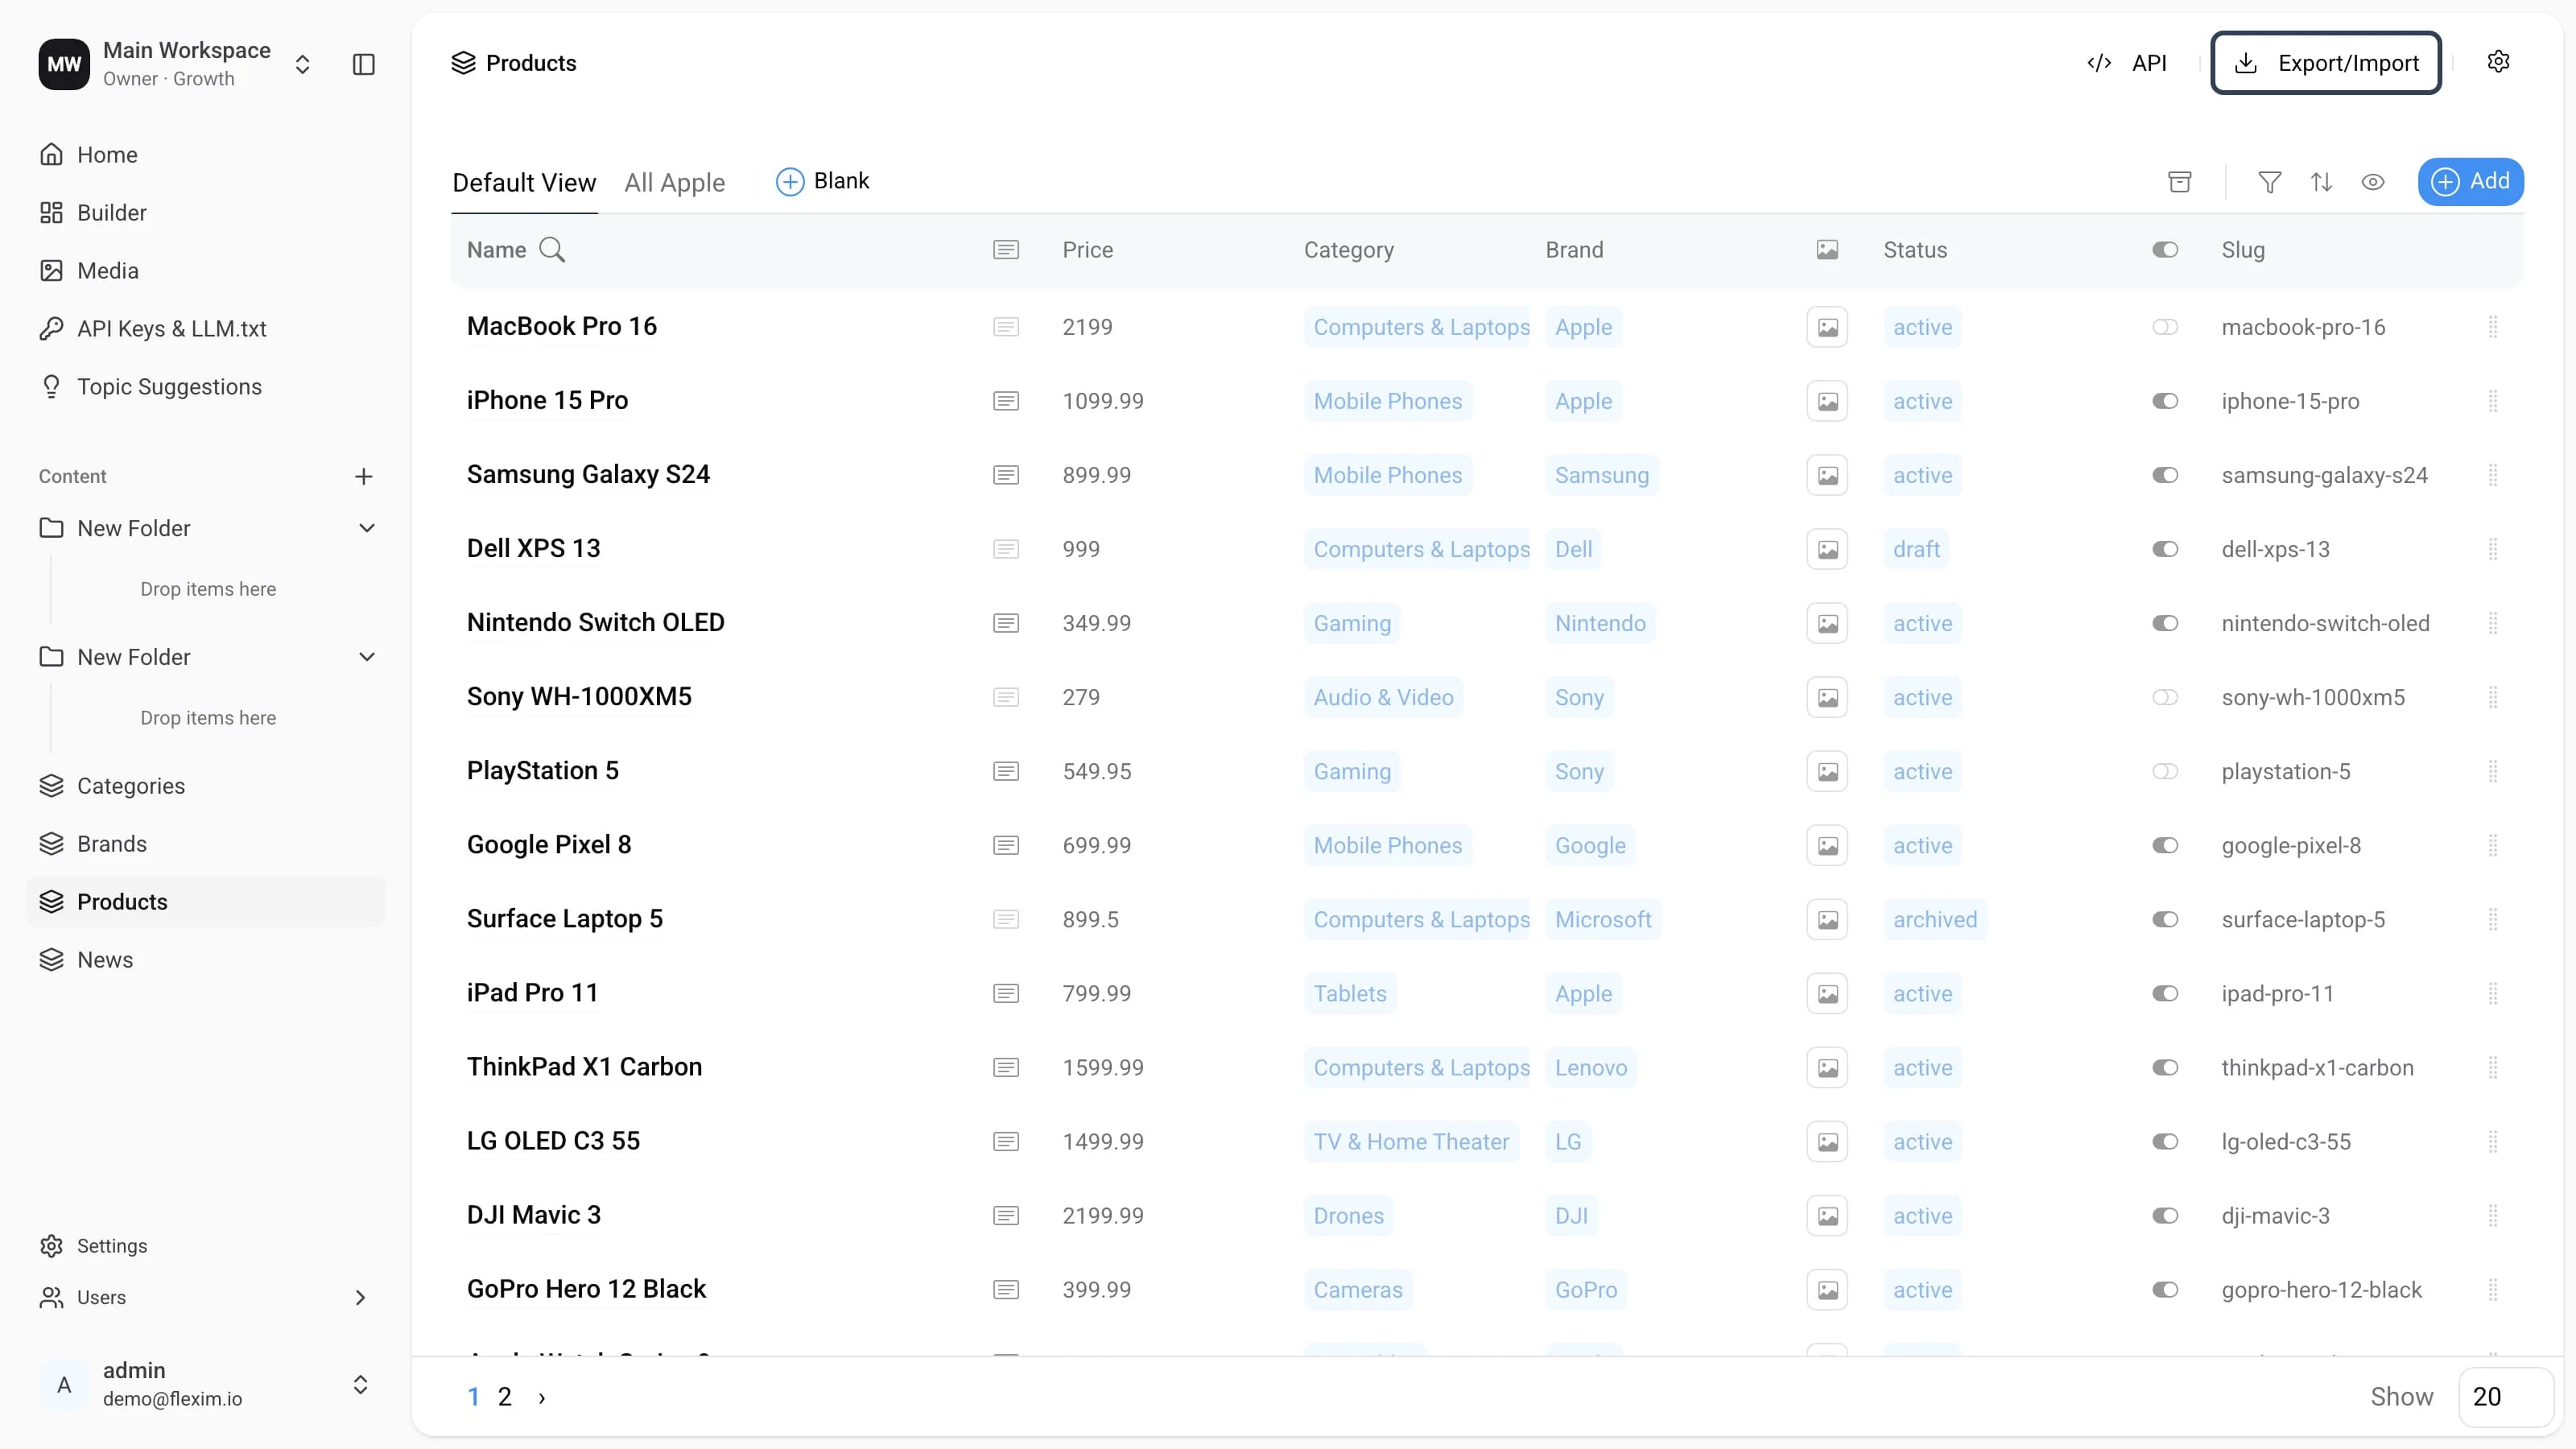
In the top‑right corner of a collection there is an Export/Import button. Clicking it opens a menu with three actions — Export, Import and Settings.
Export/Import menu
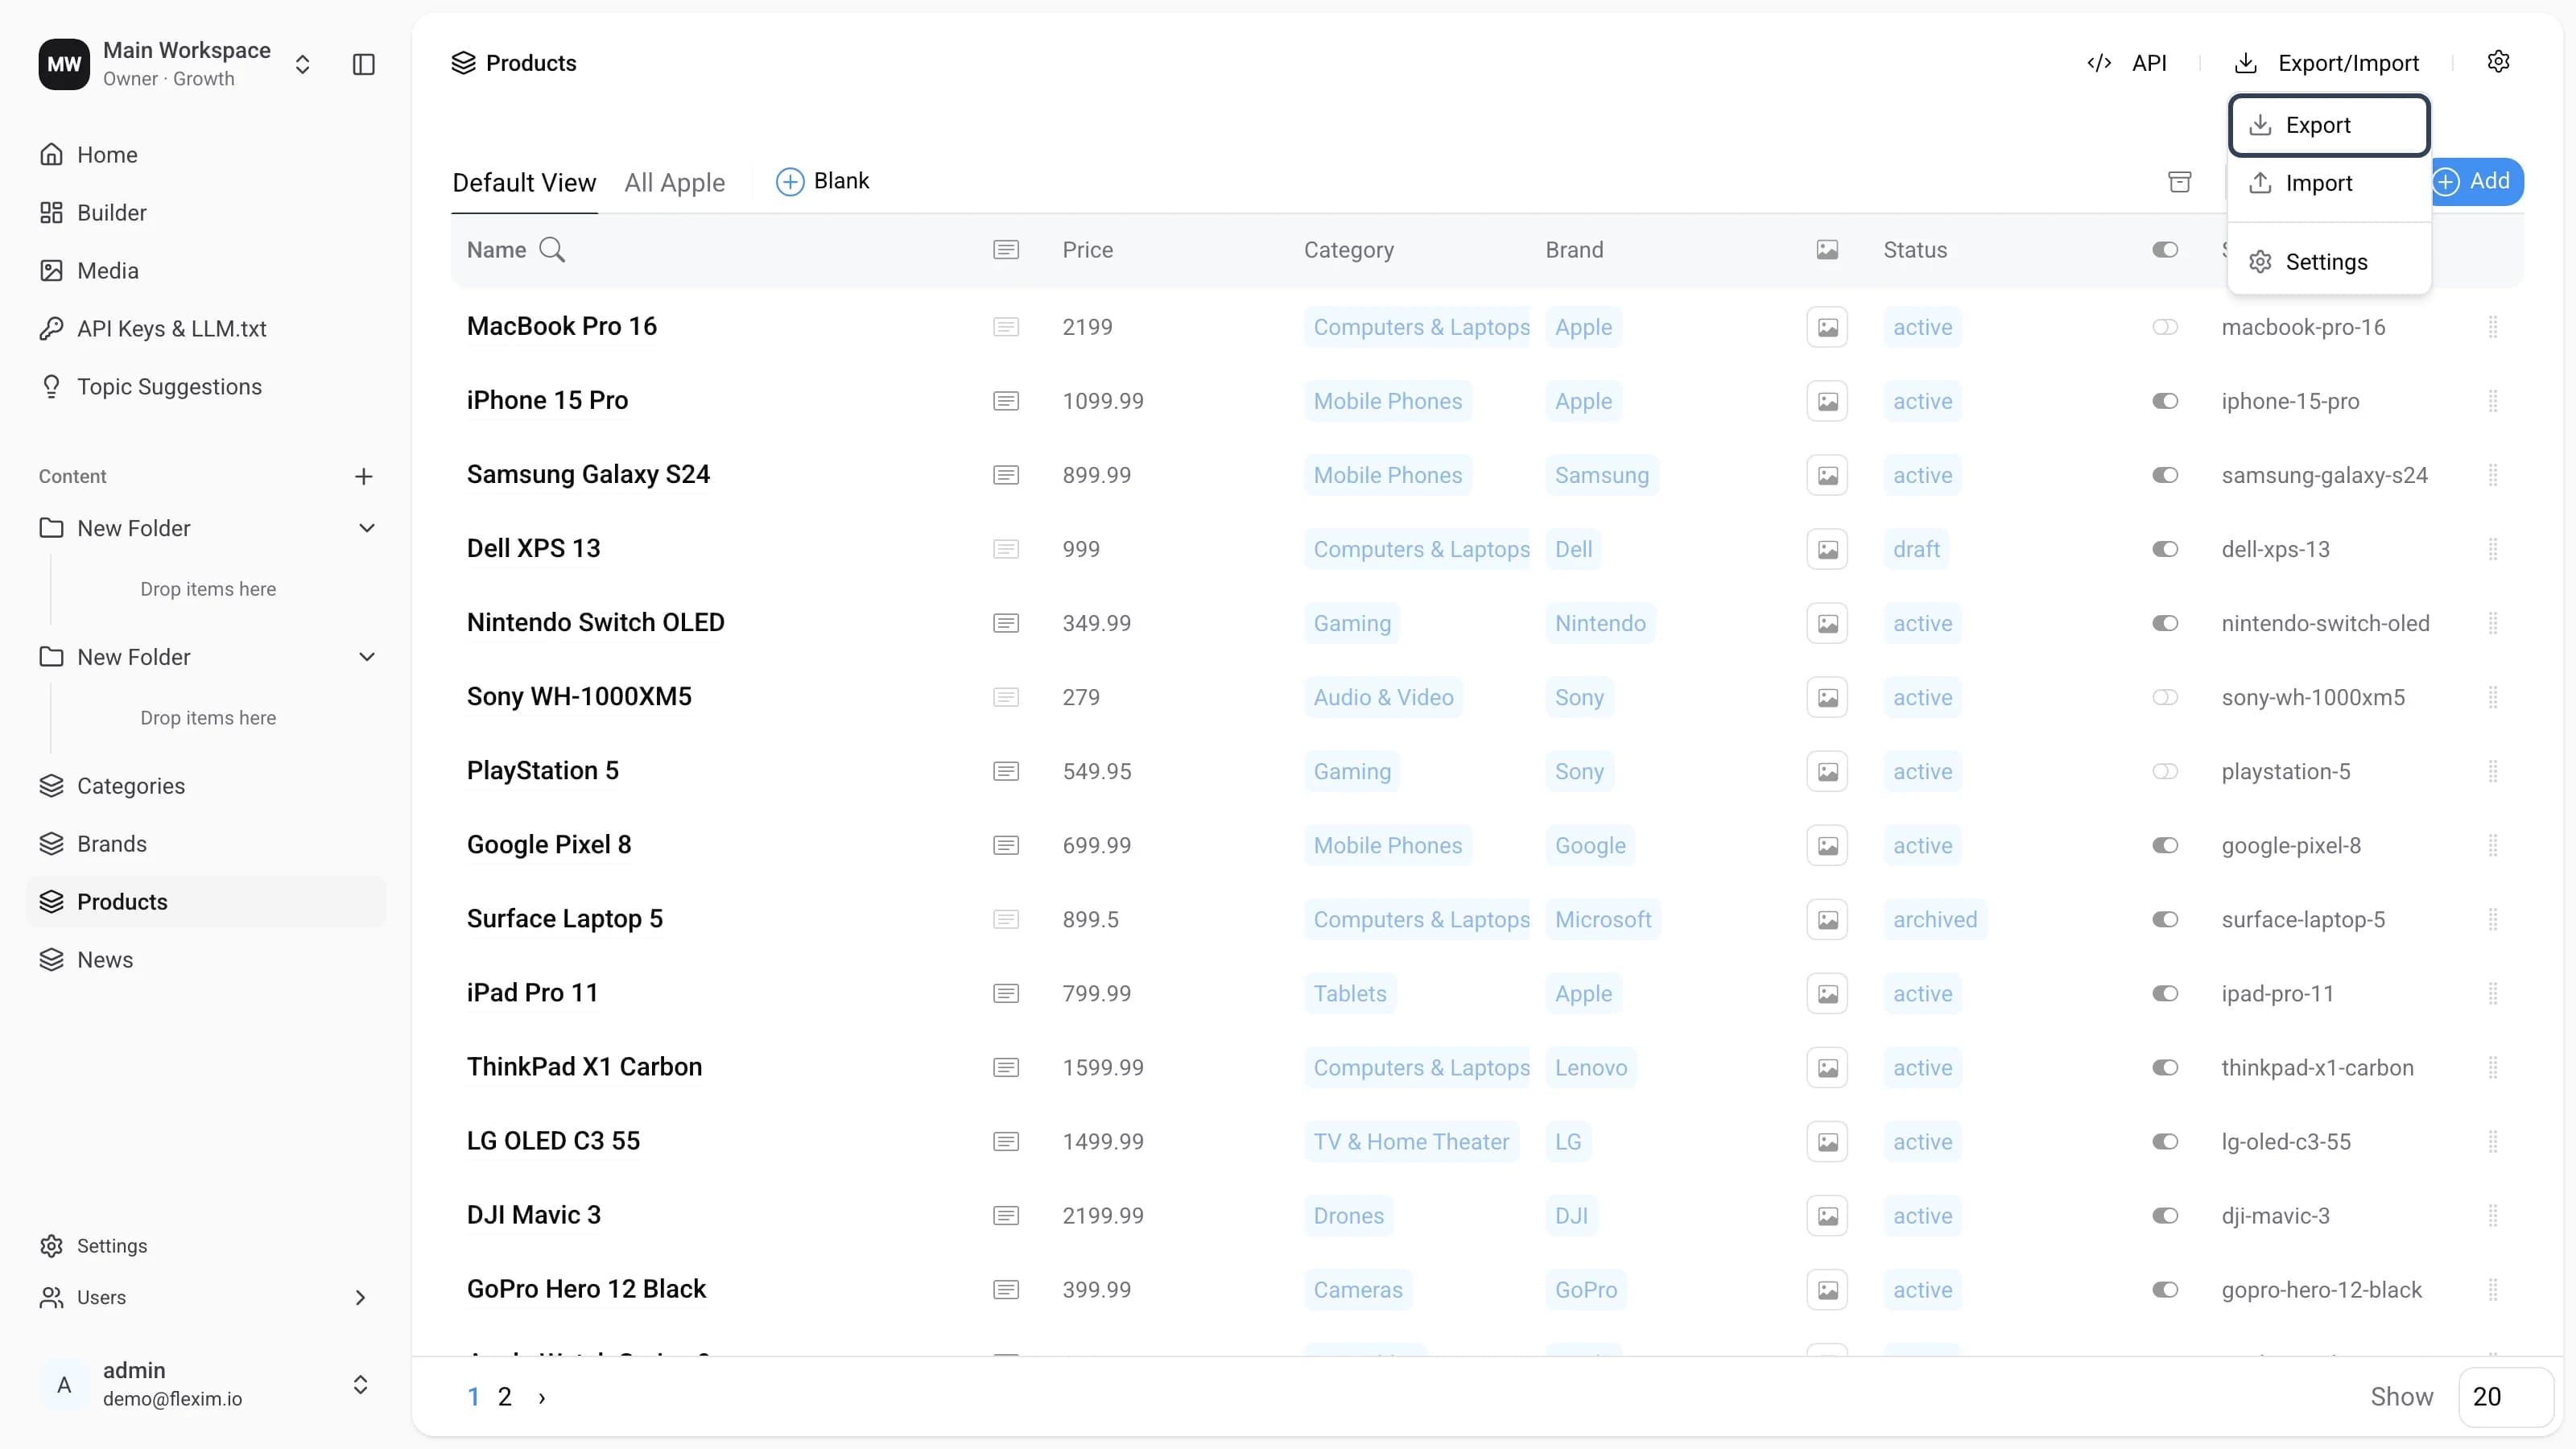
- Export — exports the current collection to an
.xlsxfile using the saved field settings. The file downloads automatically when it is ready. - Import — opens a file picker so you can upload an Excel file and update the collection from it.
- Settings — opens the
Excel Settingspanel where you configure how CMS fields map to columns in the Excel file.
Excel Settings
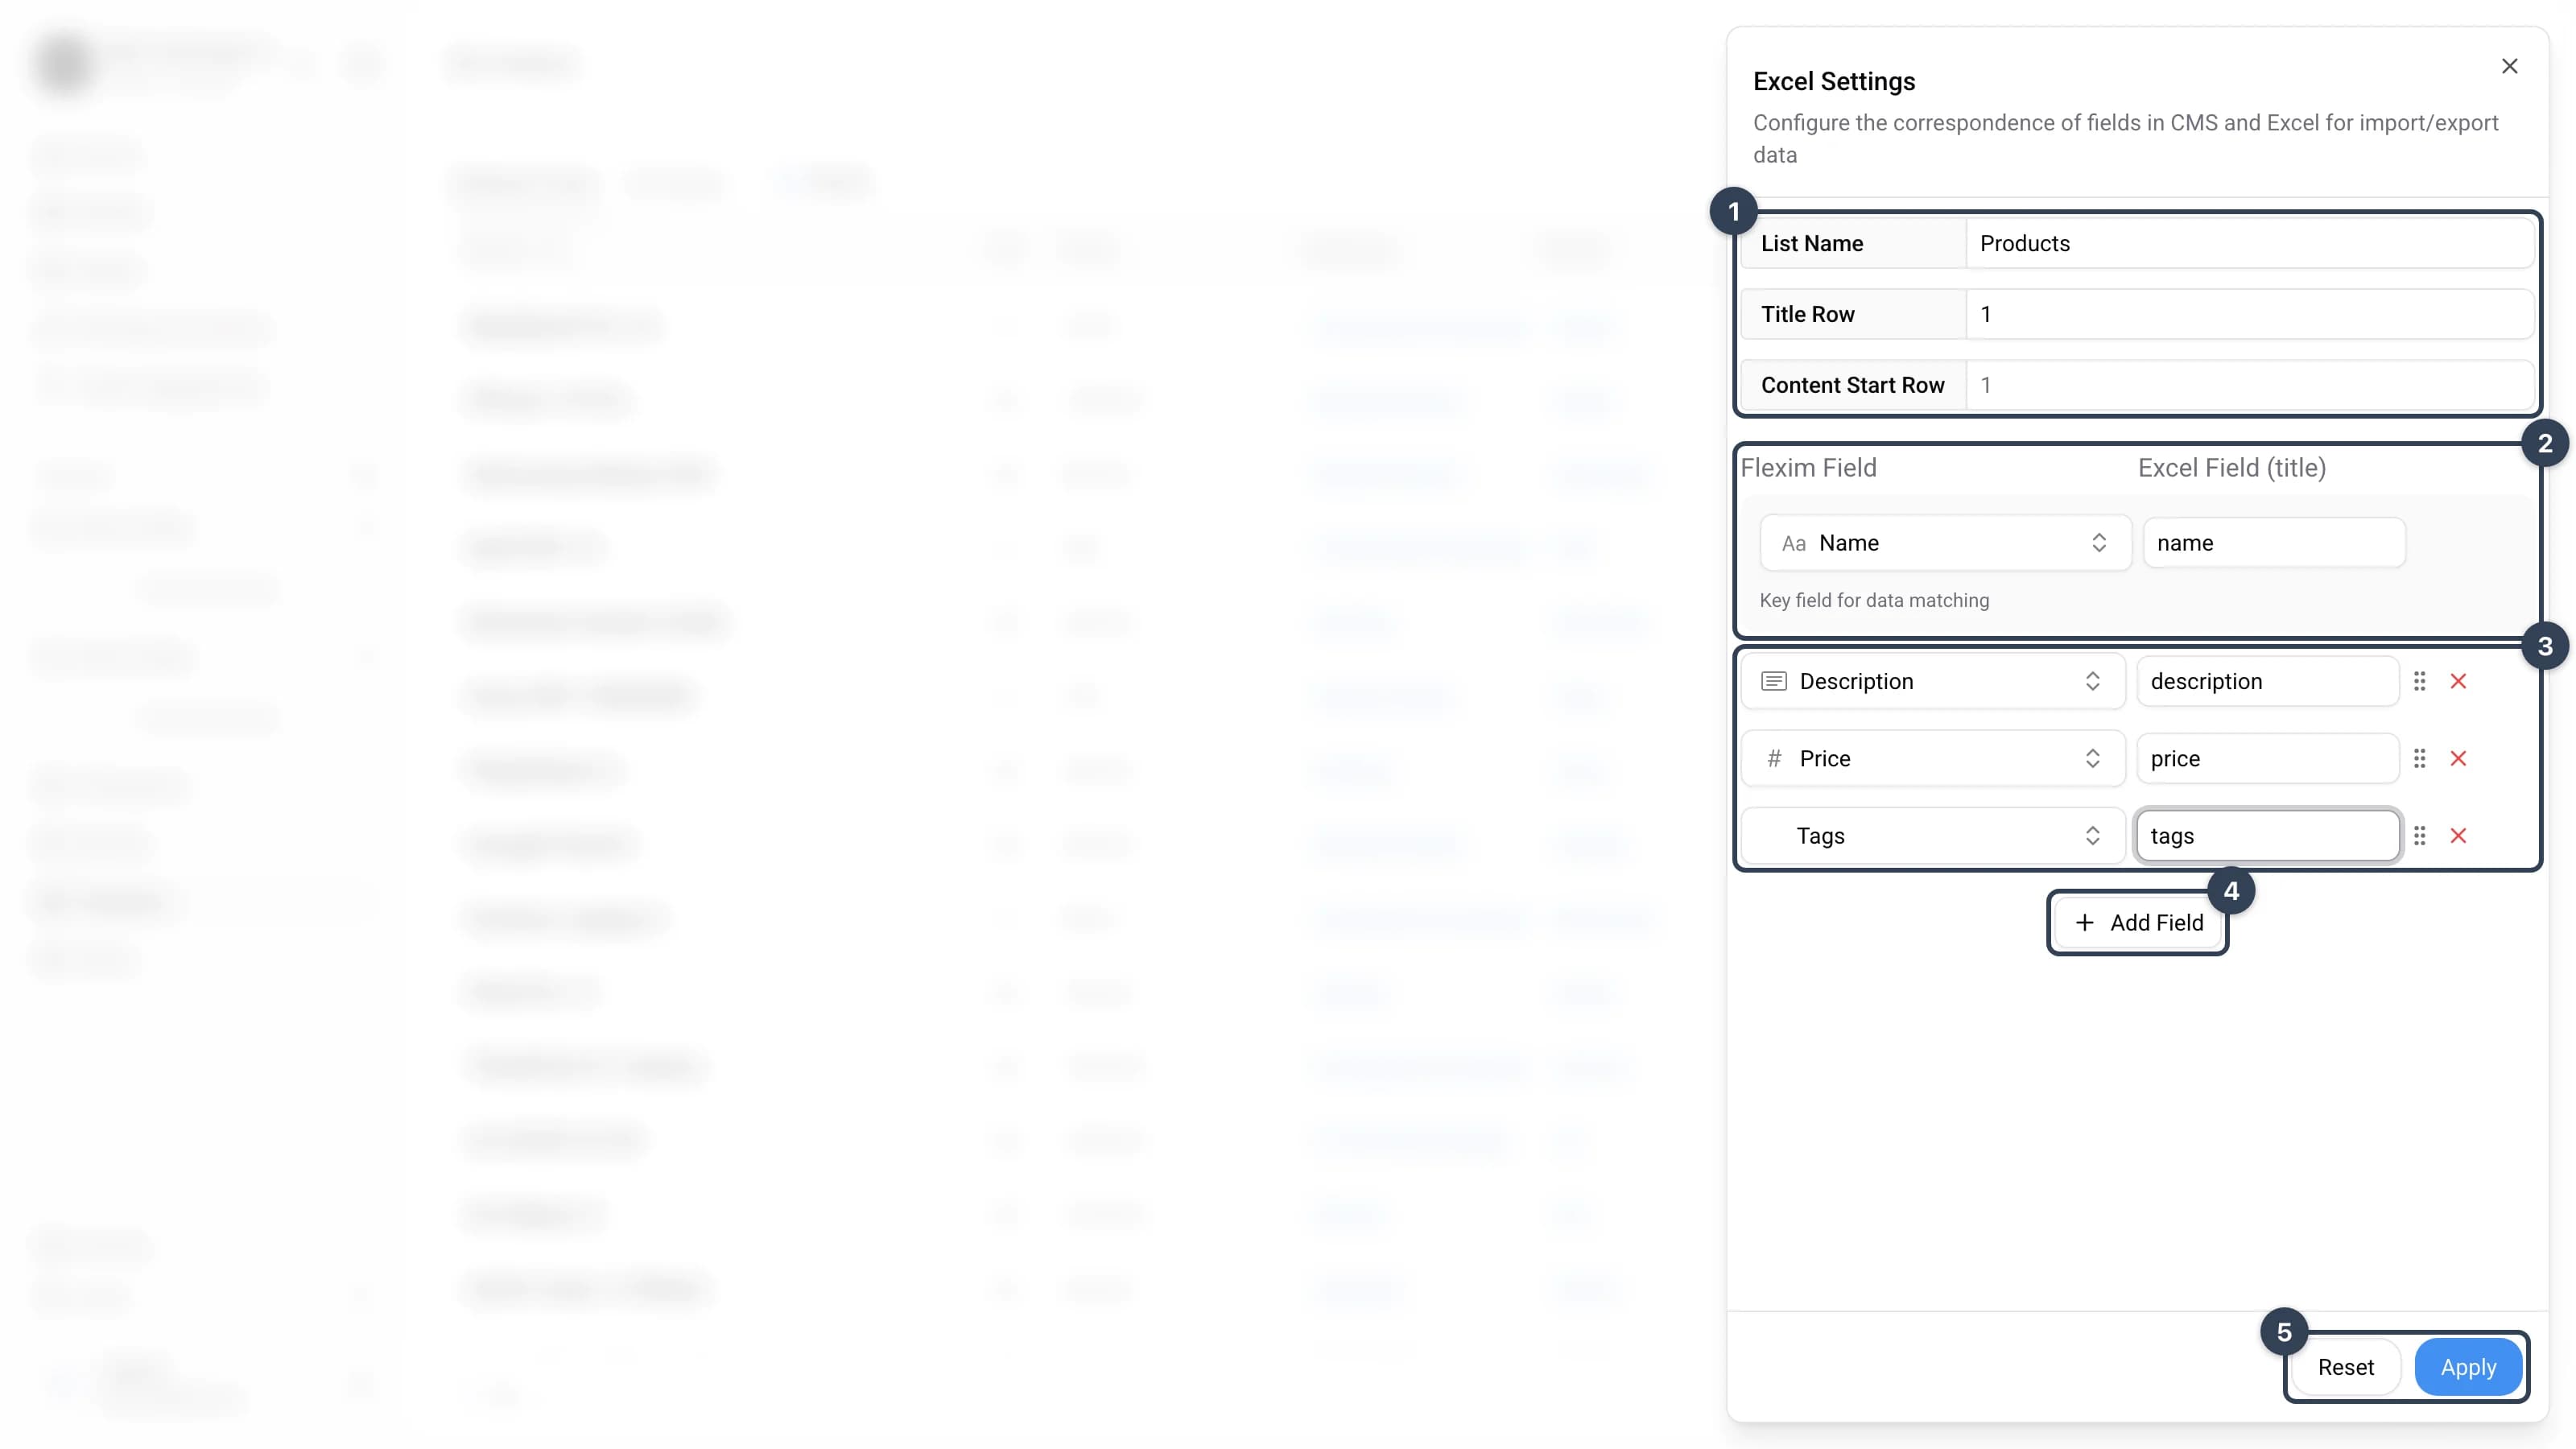
- Sheet configuration
List Name— the name of the sheet (list) inside the Excel file.Title Row— the row number that holds the column titles.Content Start Row— the first row that contains data. - Key field
The field used to match records during import and export. On the left you pick the
Flexim Field(its type icon is shown next to the name); on the right you type its column title in Excel (Excel Field (title)). Records are compared by this field, so it should be unique. - Field list
The other fields included in export/import. Drag a row by the grip handle to reorder it, or remove it with the
✕button. Each row maps one Flexim field to one Excel column title. - Add Field Adds a new mapping row.
- Reset / Apply
Resetclears the field list.Applysaves the configuration. Save the settings before running an export or import so they take effect.
Fields that can be exported/imported
- Text
- Rich text
- Numbers
- Date
- Boolean
- Array
- Select
Import
-
Choose
Importfrom theExport/Importmenu and select an Excel file from your device. Excel files (.xlsx,.xlsb) and.csvare supported.The maximum import file size is 50 MB.
The sheet name inside the imported file must match the
List Namevalue inExcel Settings. Otherwise the data will not be updated. -
Progress is shown as notifications in the top‑right corner: first the file upload (
Uploading file …%), thenUpdating data… Please waitwith a reminder not to close or reload the page. -
After the records are written, related collections are updated (
Updating related collections… Please wait). -
When everything is finished you see
Import completed successfully. Refresh the page to see the updated records.
Export
- Choose
Exportfrom theExport/Importmenu. Progress is shown as notifications in the top‑right corner:Sending data…, thenProcessing documents… N processed, and finallyPreparing file…while the document is assembled. - When the file is ready it downloads automatically and
Export completed successfullyappears. Open the downloaded.xlsxto see all the mapped fields as columns.
Read more on this topic